

Storied Blanket - Process
PROPOSAL DOCUMENTMy final project will pay homage to the historical practice of storytelling through textiles.


Left:
The Bayeux Tapestry | Right: “Twirling Leaves” by Almira Buffalo Bone Jackson
![]()
![]()
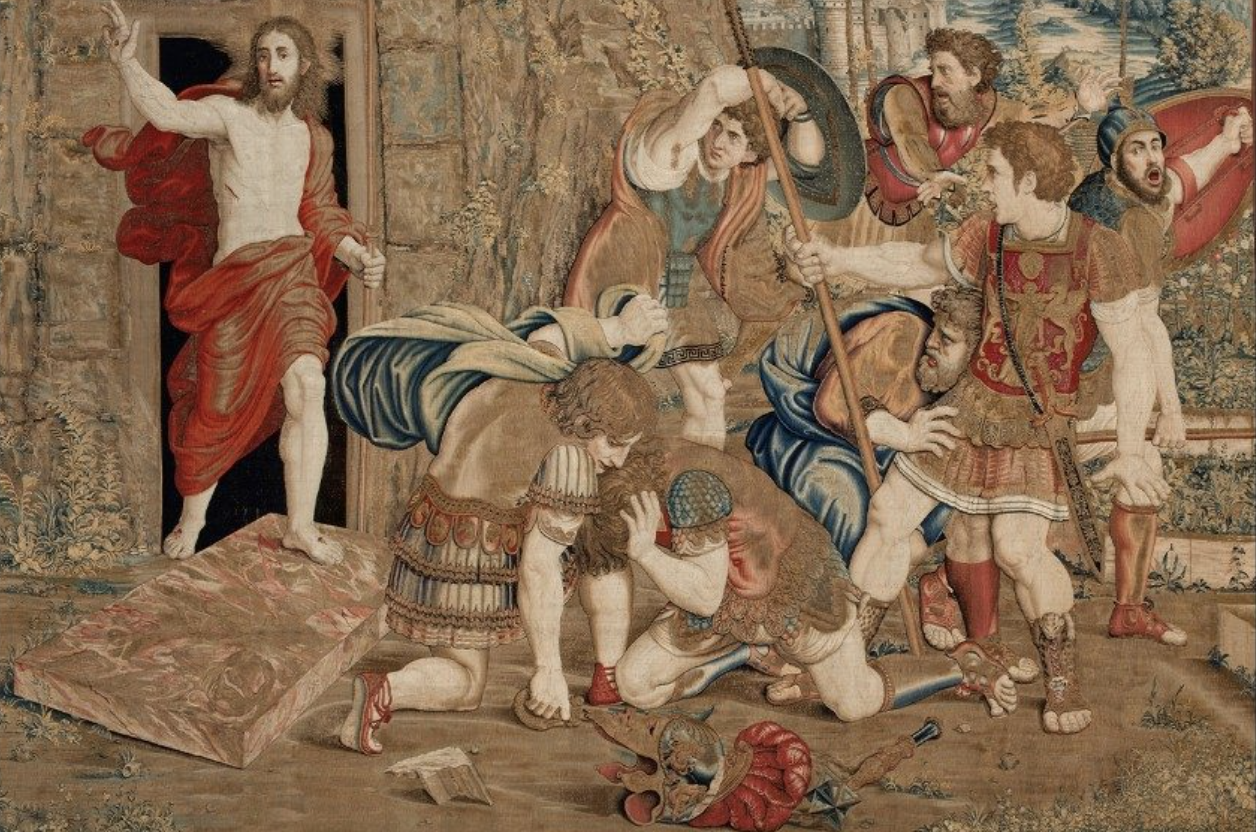
Left: Village Story Blanket, 1980, by Ka Zoua Lee (Hmong, born Laos)
Right: Flemish production, Brussels, workshop of Pieter van Aelst (d. Brussels 1532)
Diagram:
![]()

Left: Village Story Blanket, 1980, by Ka Zoua Lee (Hmong, born Laos)
Right: Flemish production, Brussels, workshop of Pieter van Aelst (d. Brussels 1532)
Diagram:
APRIL 5
My goal for today was to use the sound of my voice (or any sound in general into my laptop’s mic) to affect the visual output of the sketch. I was able to come up with this sketch where the screen becomes more red with higher volume:
APRIL ???
Whoops, realized I haven’t posted an update in a while. Since the last update, a few things happened:1. I decided not to use projections. Instead, I’m going to embed the light source within the blanket itself. I tested that out using some EL wire. I really like how it looks, but i don’t like that I can’t find other colors of EL wire that are clear when they are turned off. I don’t want people to see the tubing / cables when the lights are off. I used some yarn I found on the junk shelf and knitted up a swatch. I like thet the cable looks like it’s a part of the yarn itself:


I thought about using Adafruit nOOds, but they have to be connected on both ends, which I think would make this a lot more complicated. Also, they’re quite expensive.
2. I spent some time researching options to create multicolor lights and landed on some kind of fiber optic situation. I didn’t know that side-glow fiebr optic cables existed, and I am now working on versions of this project that use those. That way, I can use whatever color I want and can get a lot for less money. One thing I still have to figure out is how to even out the intensity of the light - it gets less bright the farther away from the light source it is.
3. I tried desparately to find the same yarn as the original swatch to make the whole thing. I couldn’t find it anywhere online and didn’t have the original label to look up the brand. I ended up posting in a million different subreddits dedicated to knitting, crochet, yarn lovers, and yarn identifiers. No one could identify it. The closest I got was a kind of yarn that was been discontinued. Devastated, I went to Michael’s and got one that’s a similar color and weight, and I think I’ll manually distress it to create the texture of the original yarn.
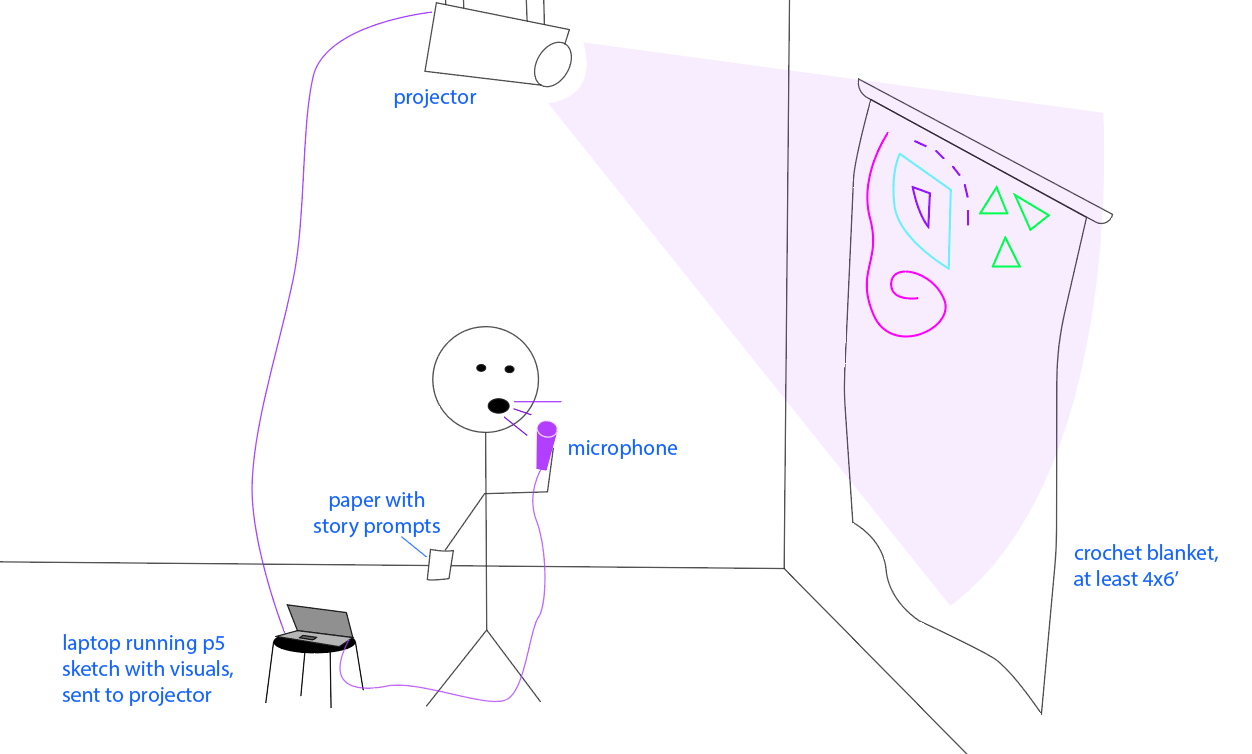
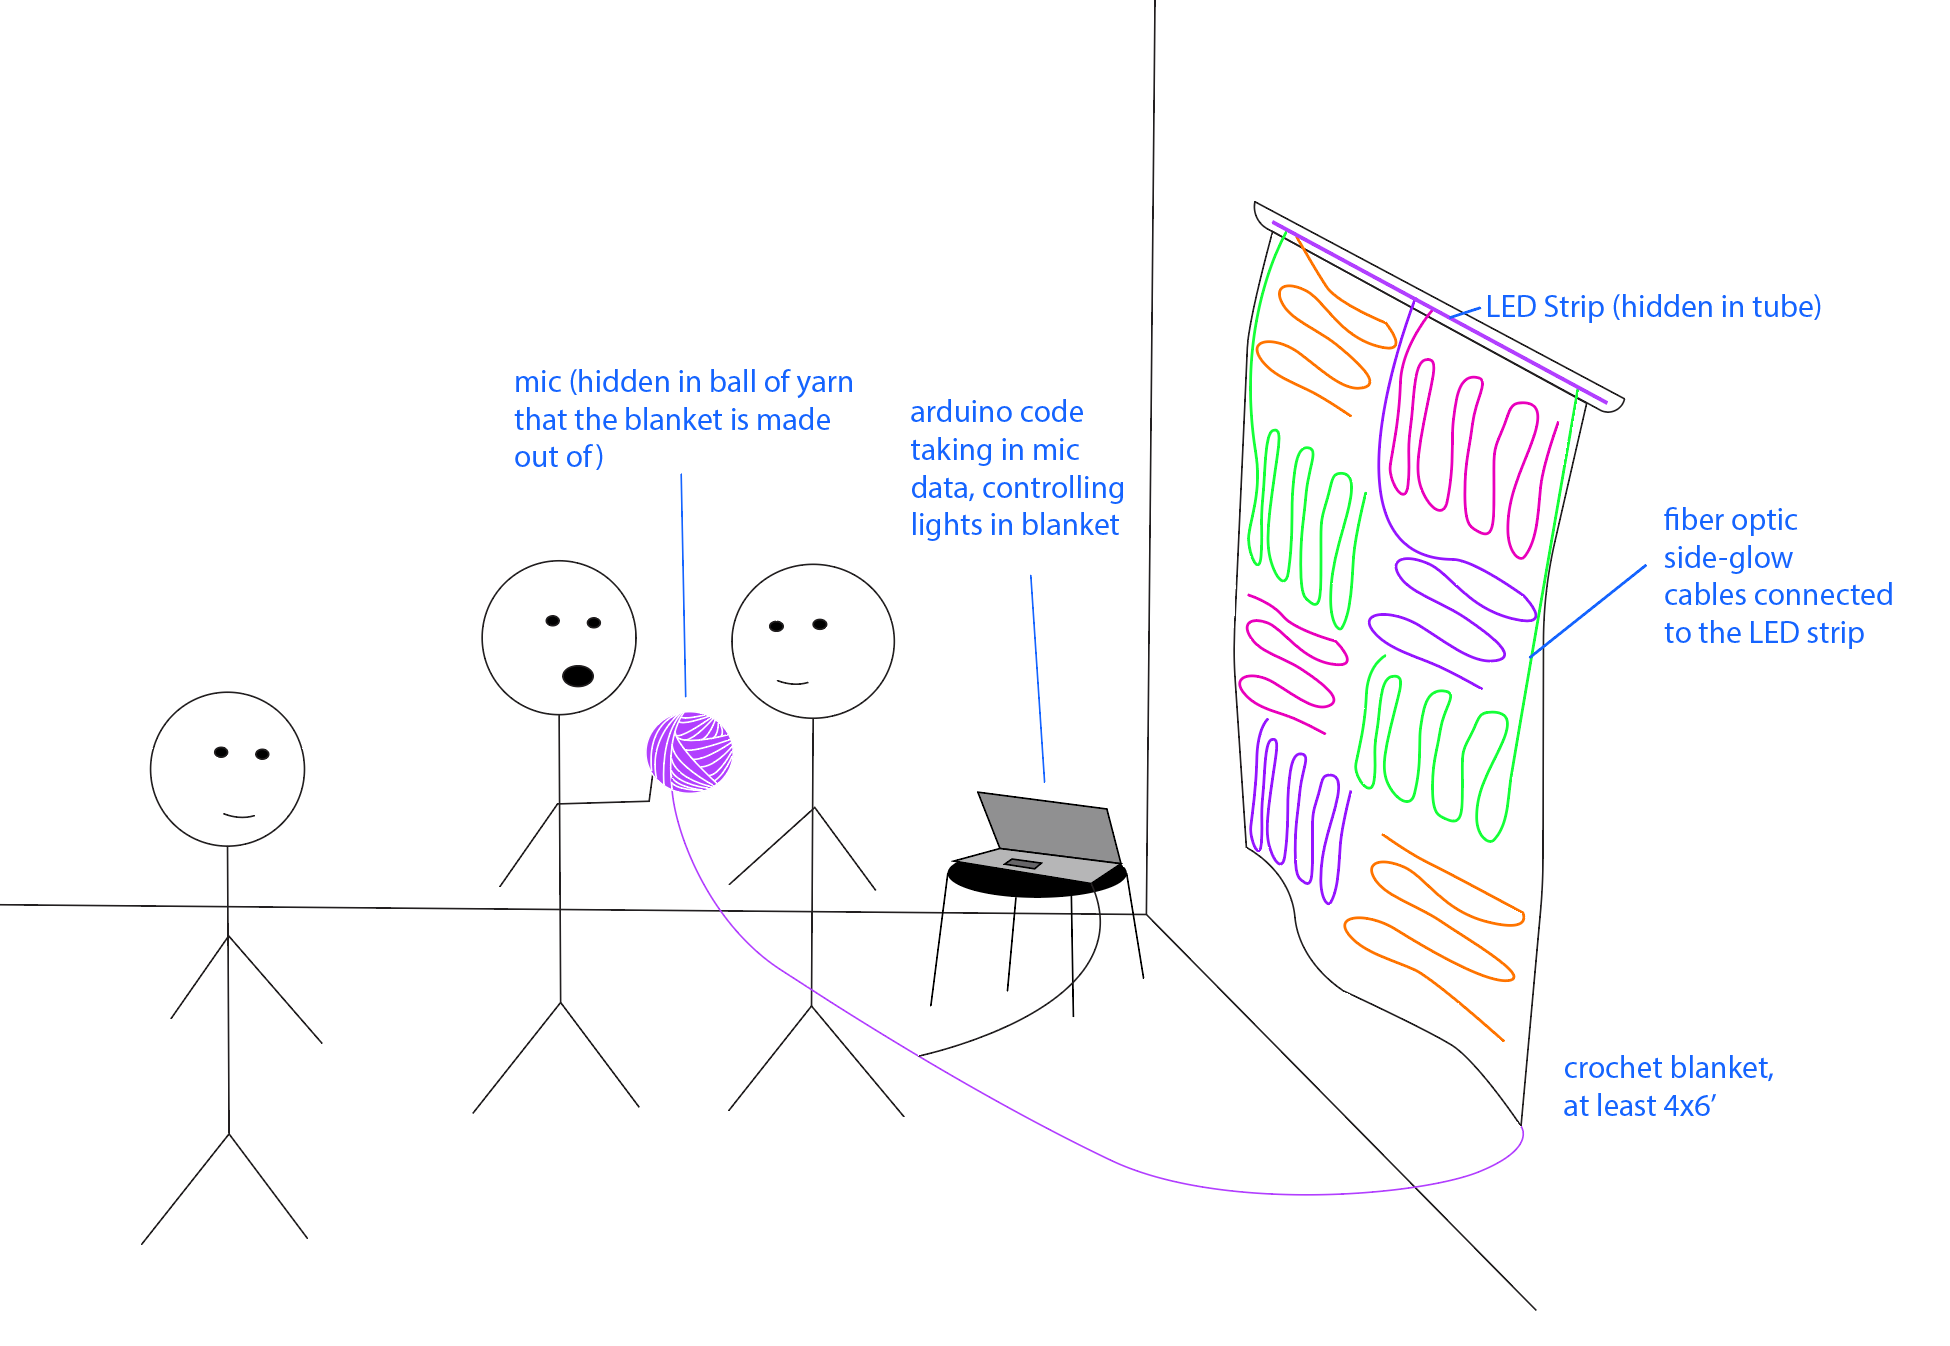
Here’s a walkthrough of my final design ideas. #3 is the one I’m going with.
VERSION 1:
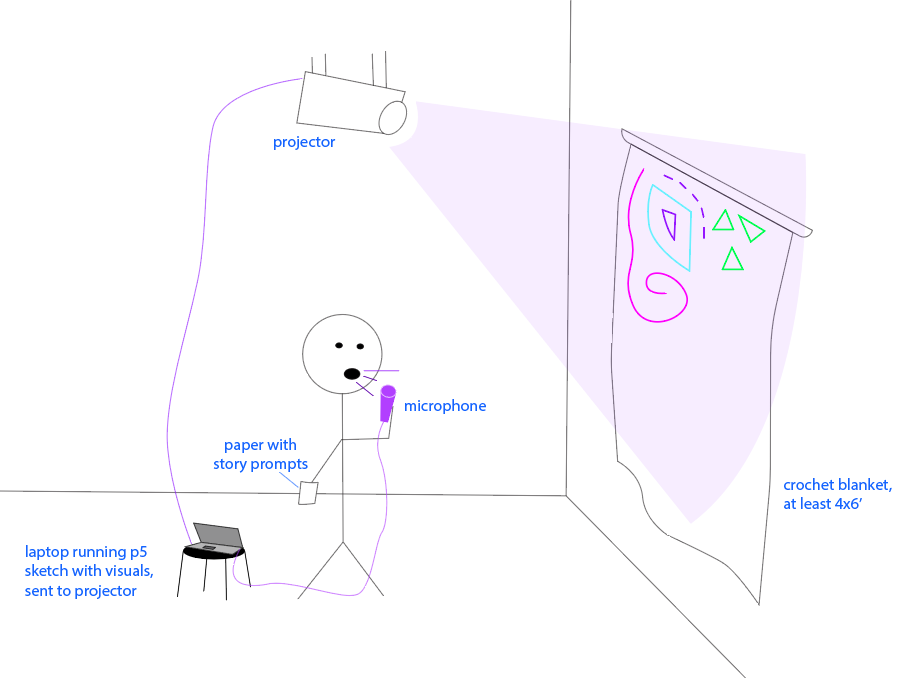
VERSION 2:
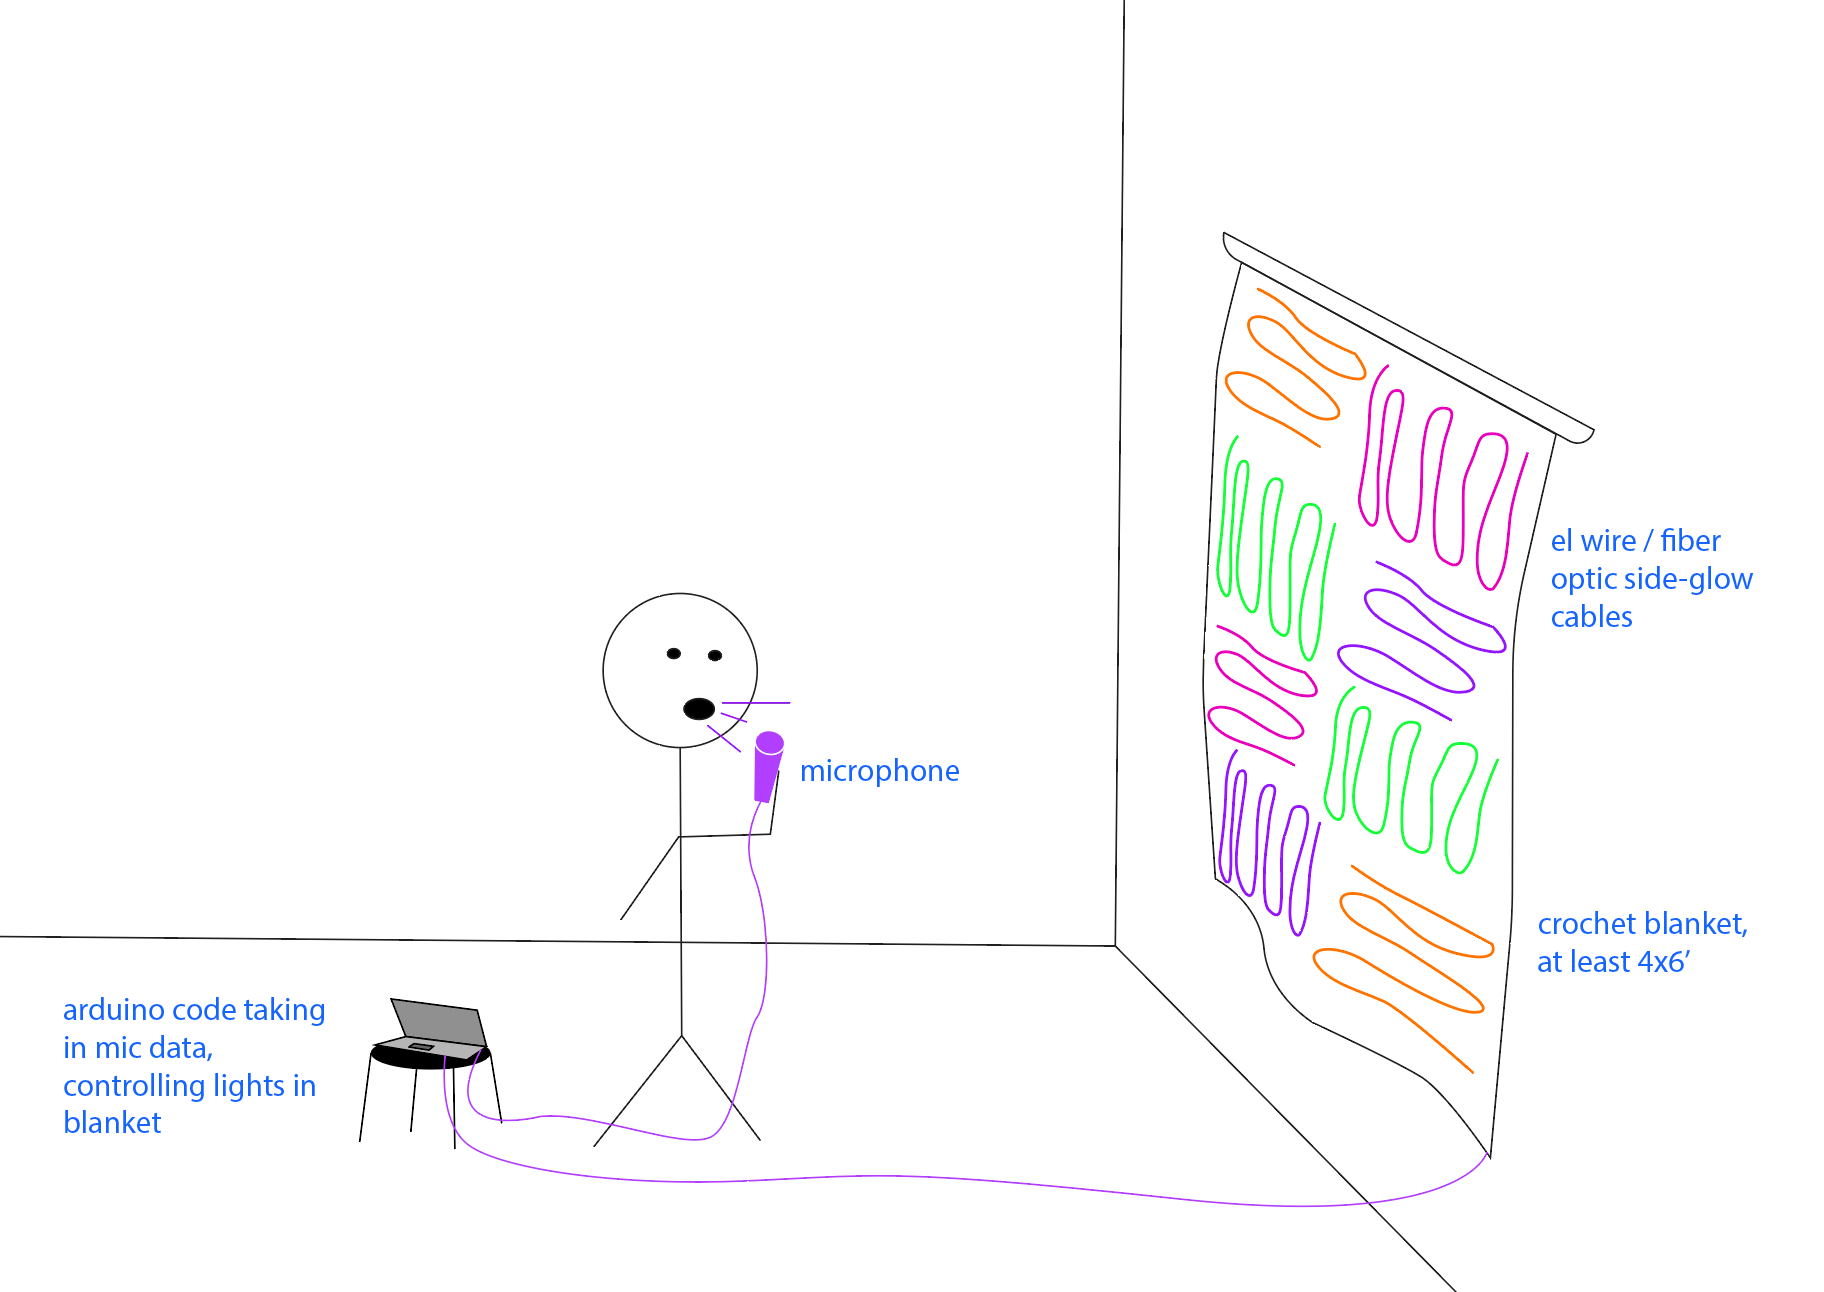
VERSION 3 (winner!)

I’m going use an neopixel LED strip in the top of the blanket hidden in a wooden rod, so I can control the color and brightness more easily.
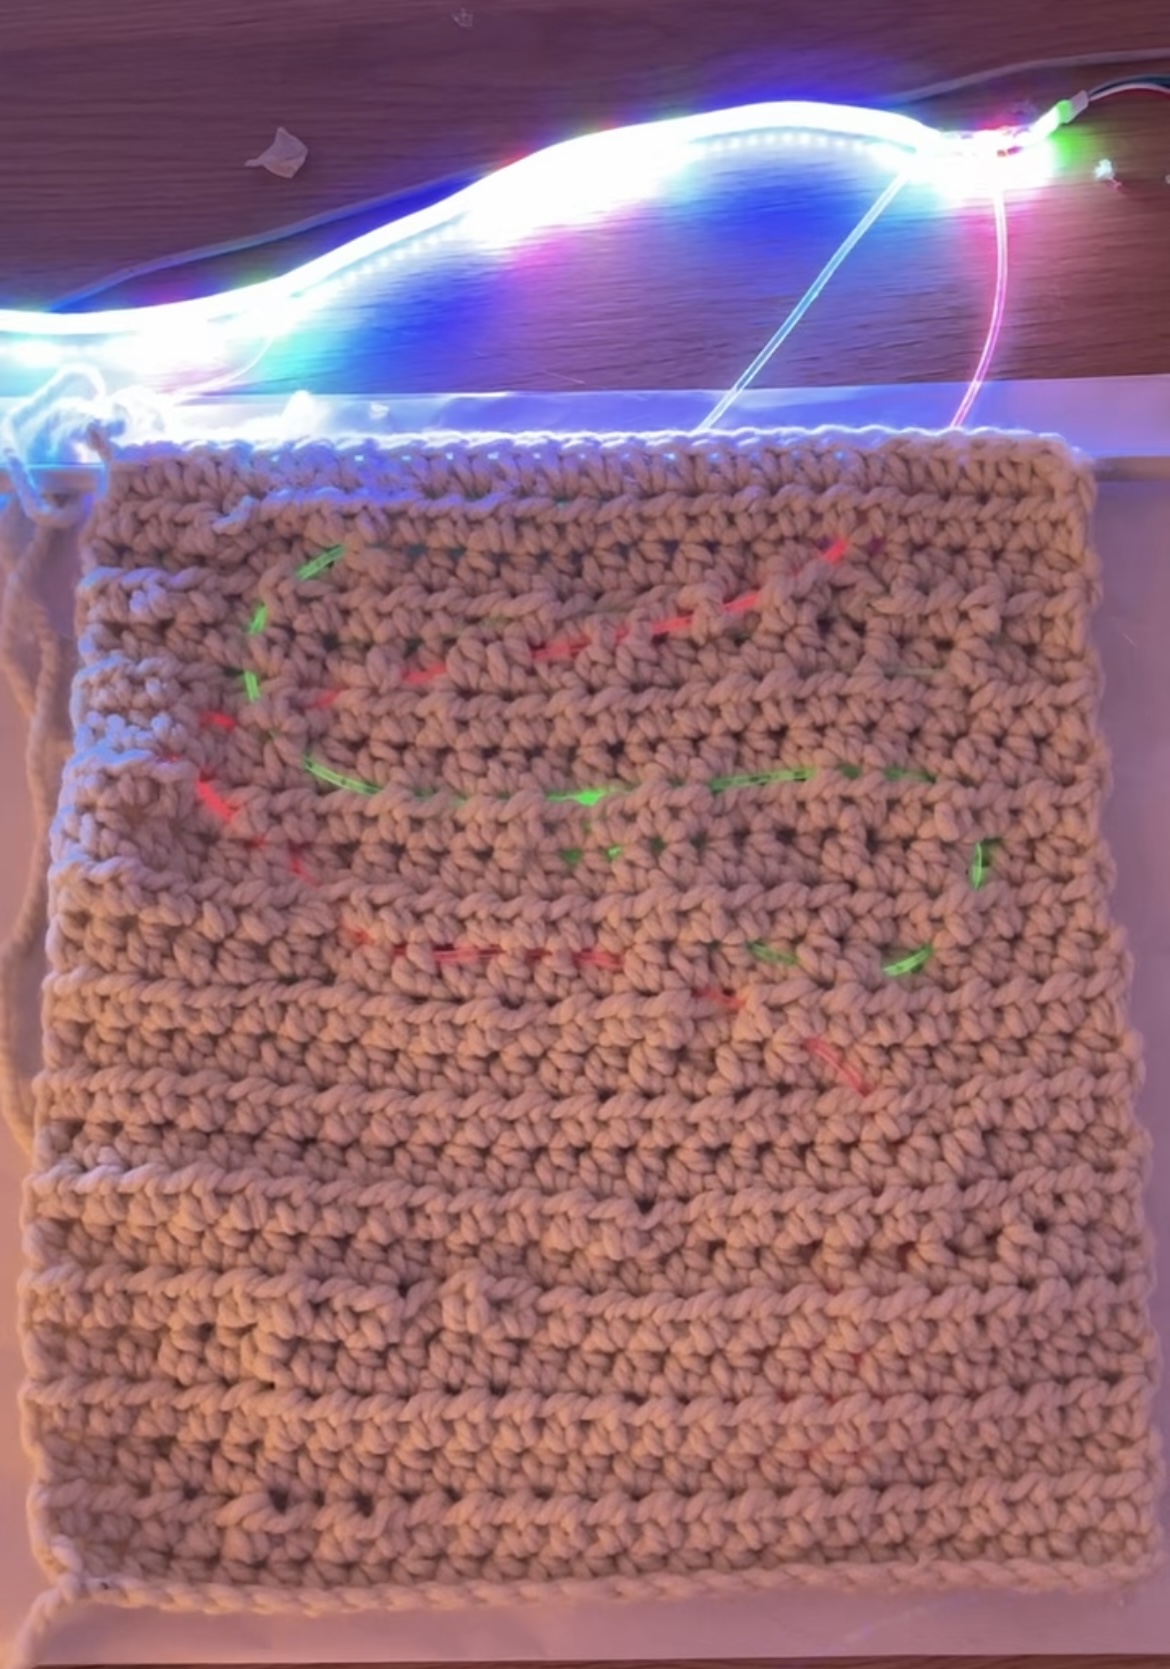
I made a prototype using the new yarn and fiber optic side-glow cable. I crocheted this swatch, but I might knit the final version instead, I think it gives it a better texture.


Next, I got started with the mic input side of things. The shop was out of the mic sensors I was looking for, but luckily Phil told me that the BLE Sense board has a built in mic! After going through 2 from the shop that ended up being broken, I found one that worked. I had fun testing it.
Today my goal was to get the same thing to work with an LED strip instead of single LEDs. I ran into the problem of the FastLED library I had used for a previous project wasn’t compatible with the BLE sense I’m using so I ended up using the Adafruit neopixel library. I got the lights to be sound-reactive, but I’m not totally sure exactly what is happening -- I need to figure out the thresholds.
At one point in testing it out with Phil, everything shut down all at once. My computer, the board, everything. Still not really sure why that happened - but the report said something about a panic error or something? Oh well. Hope that doesn’t happen again!
NEW DIAGRAM:
The next thing I needed to do was figure out a way to attach the fiber optic cables to the LED strip without having to 3D print something. I first tried just hot-gluing the cable to the LED which worked for a second or two, then fell off.


Documentation while the hot glue stayed on (fell off shortly after these were taken)

Above left: Not really sure what happened here - some kind of weak wiring that resulted in me feeling like i had conductive fingertips. This might have been a little dangerous but oh well. I just replaced all the wires and it was fine.
Above right: testing out the range of the mic.
At this poing, it was time to cut the LED strip to the length I needed for this prototype. I cut off the end of it, left about 16 LEDs, and then soldered wires onto it to connect it to the board. I hadn’t done anything like that before so I’m glad it worked!

To connect the cable to the LED, I measured the widths of the cable the LEDs, and the strip itself, and created a prototype of this mold to hold them in place. The issue was that the hot glue + LED + cable wouldn’t stay stuck together, so I expected that having cardboard in there to keep things secure would help.

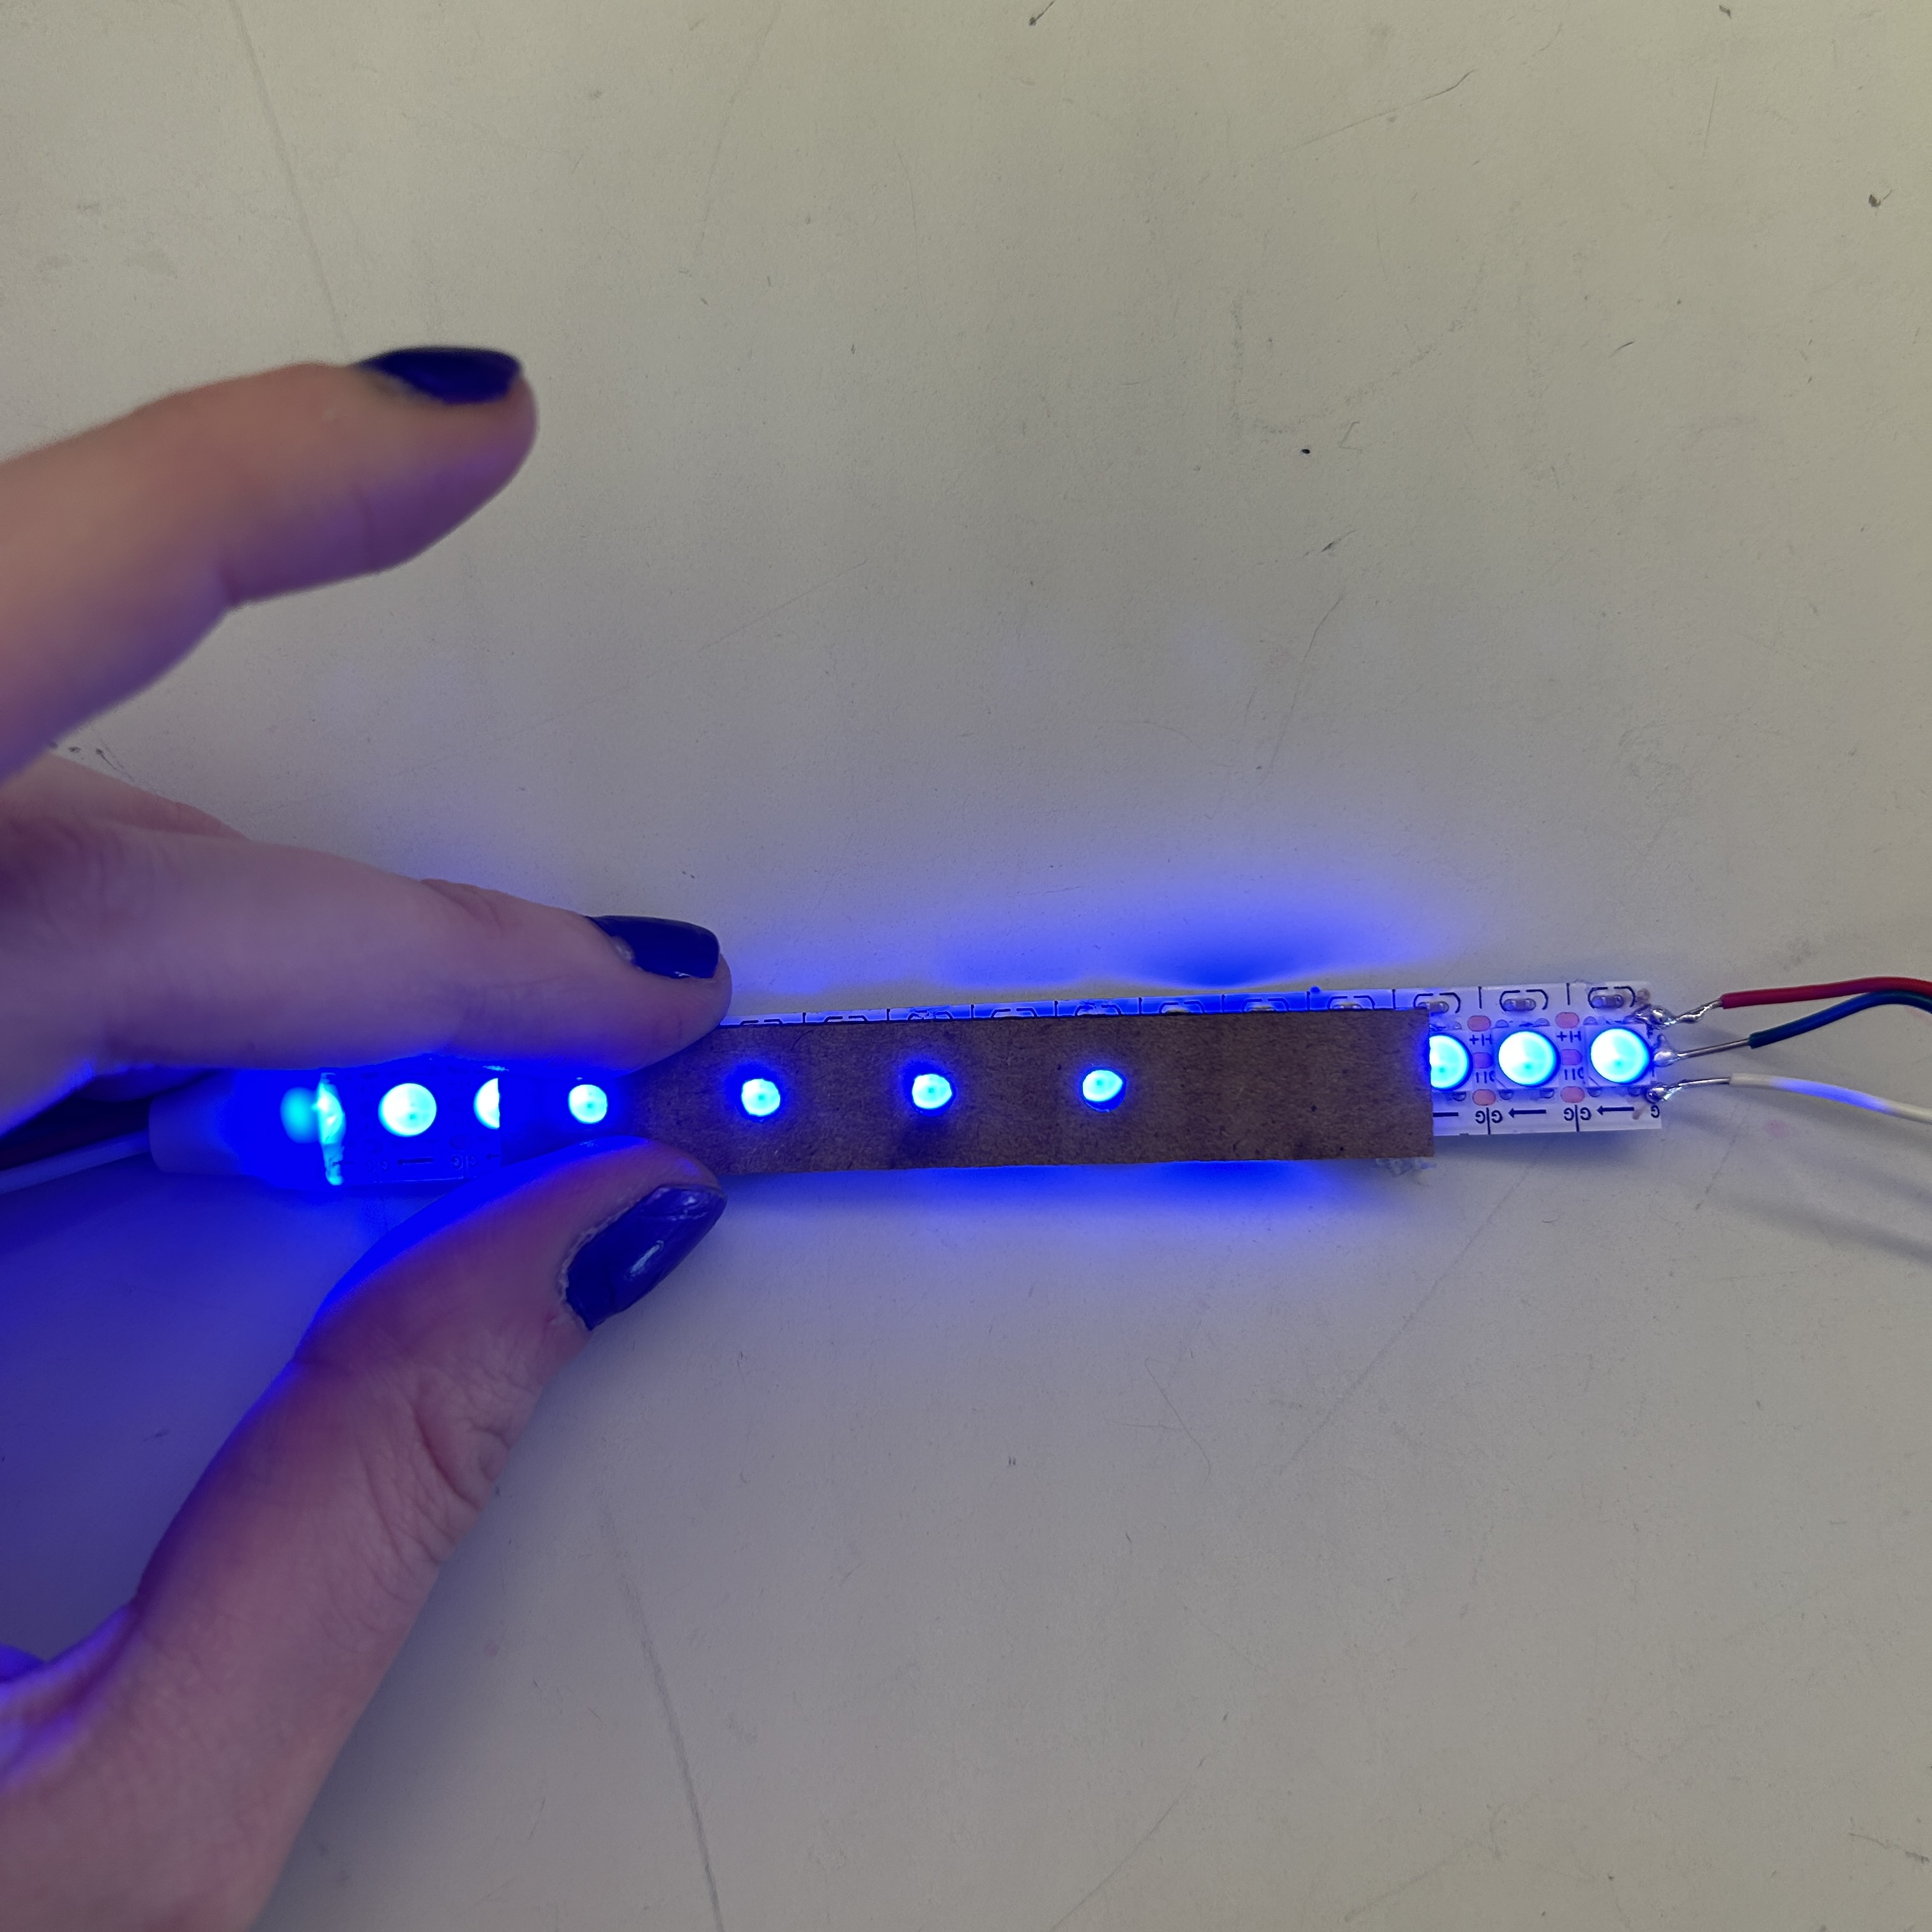
24 hour update - the cables stayed in place. I’m happy with where my prototype is right now. For the final version in the Spring Show, I’ll make 3 more squares, sew them together, and hide the circuit in the ball of yarn more seamlessly.
SCALING UP (AND THEN DOWN):
SPRING SHOW VERSION


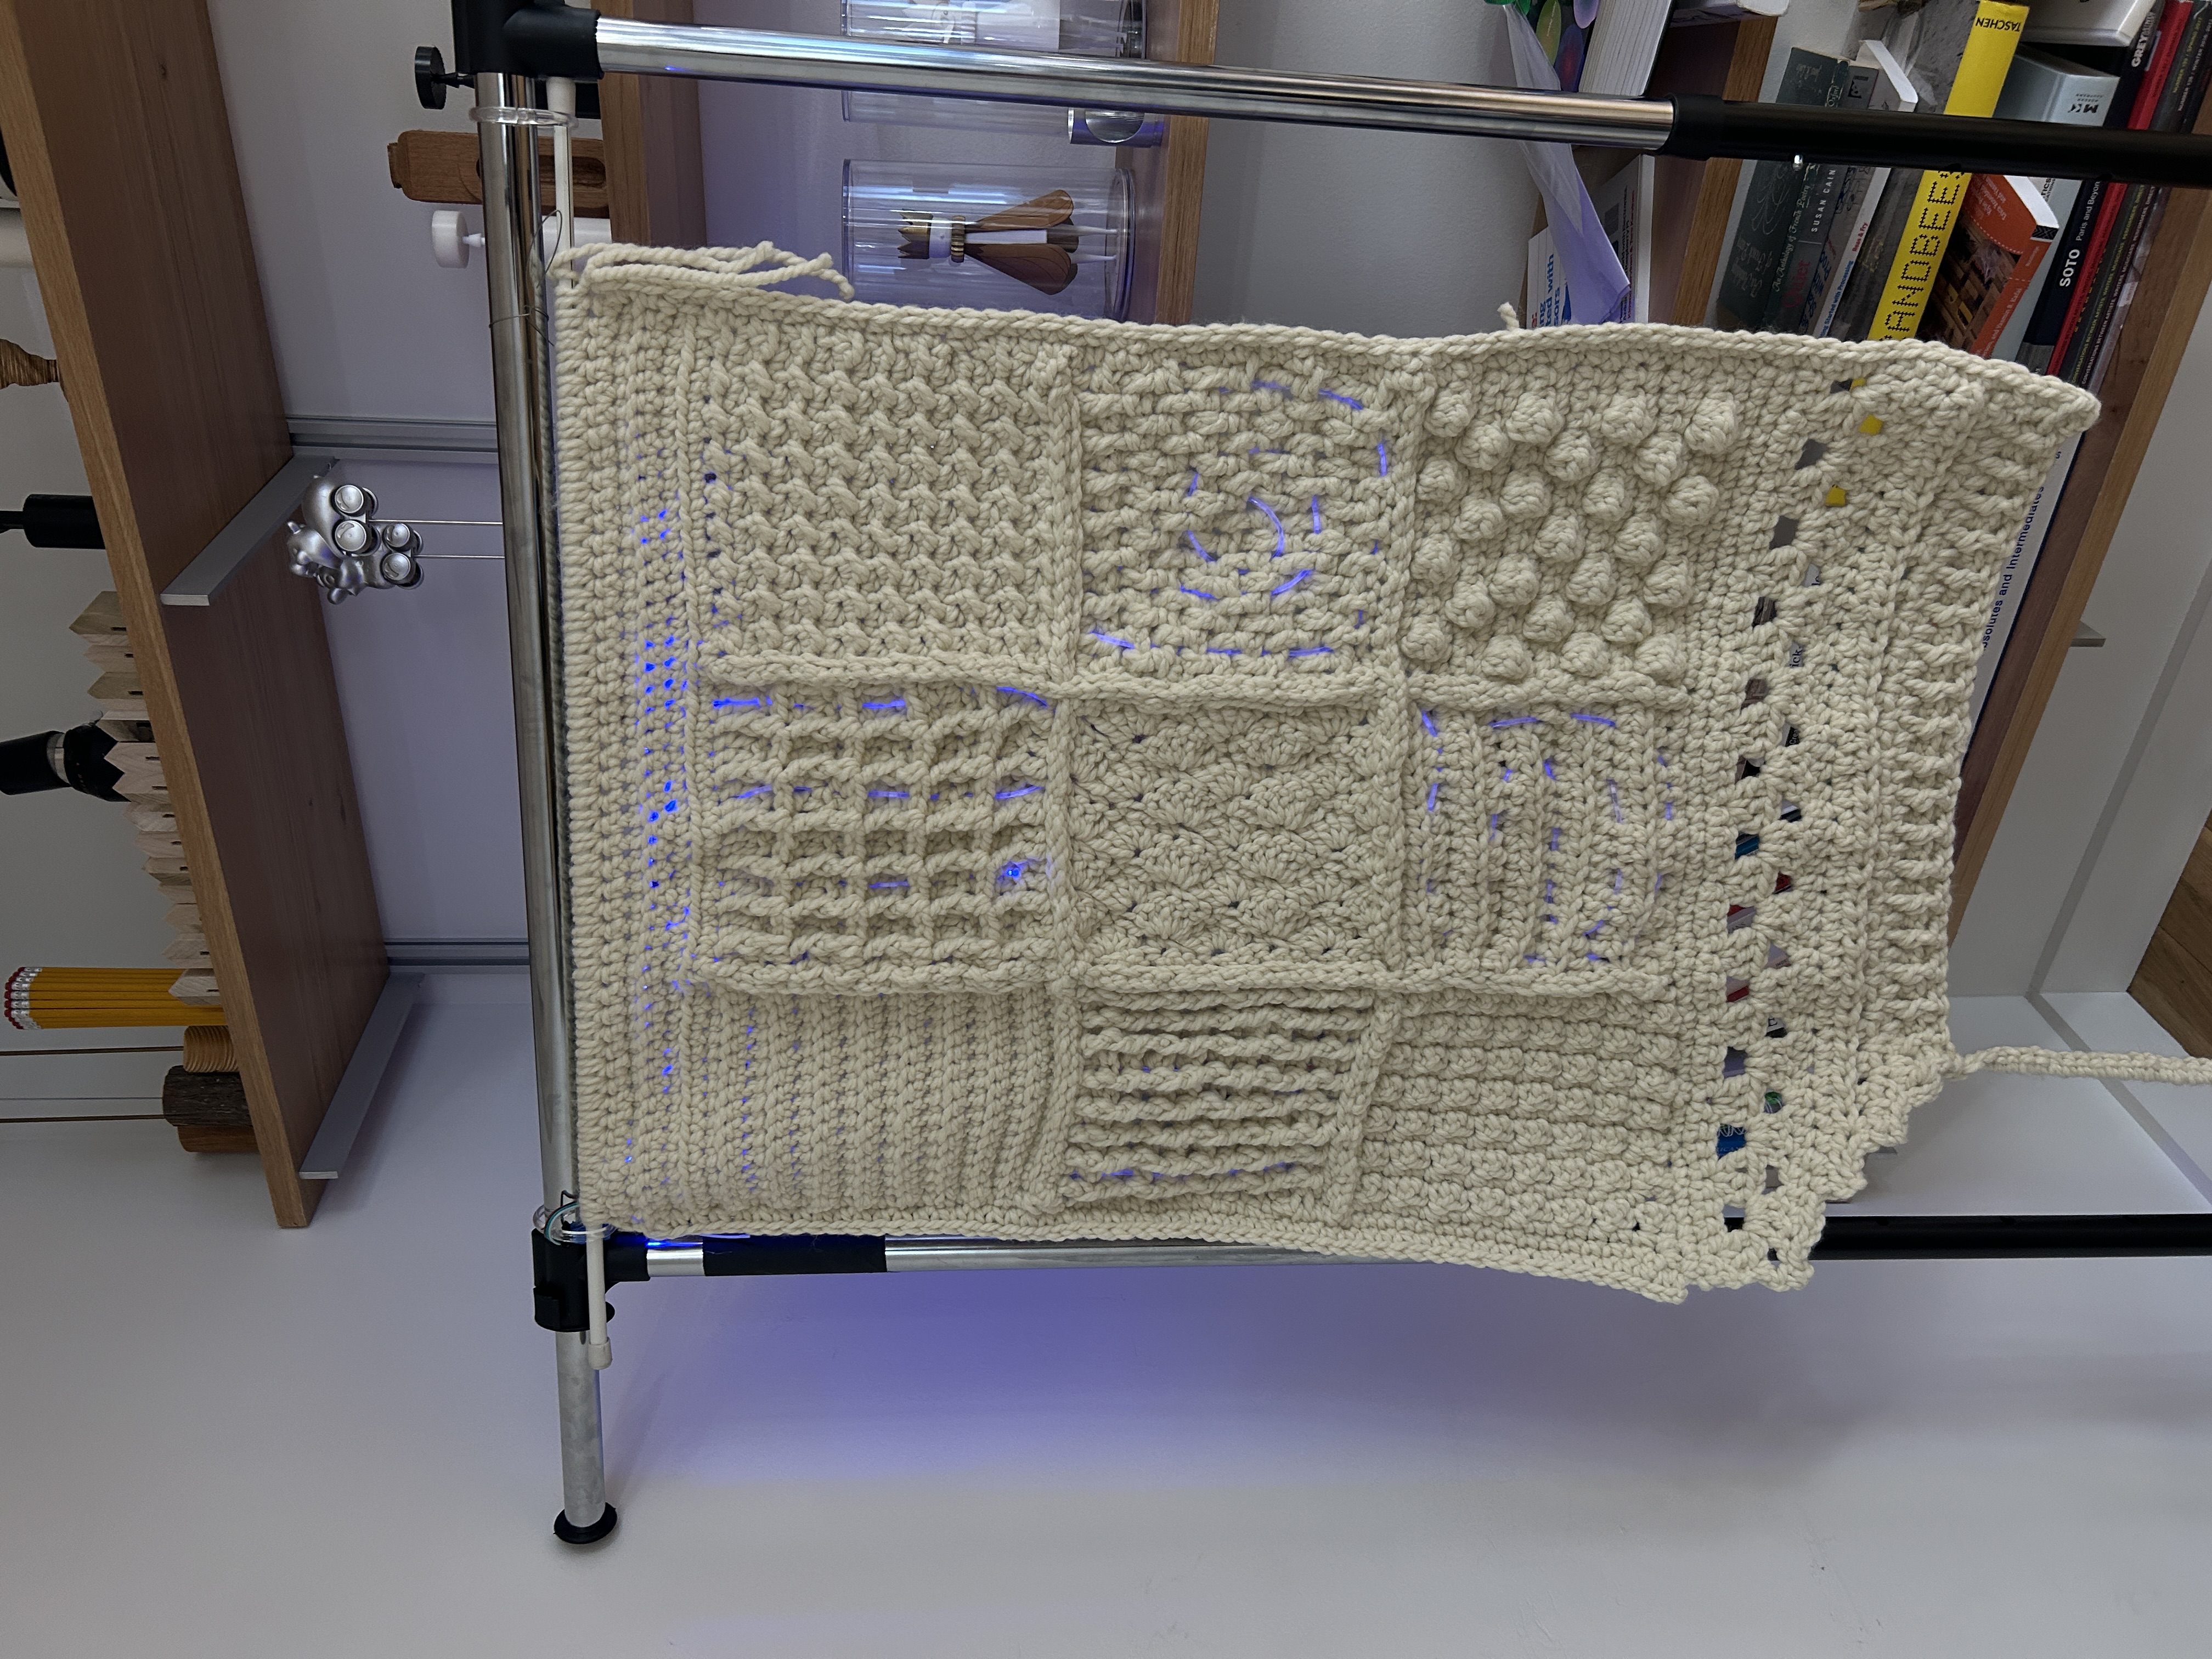
After that, I added a border on the top and bottom. I left the bottom edge uneven, to make it look like the blanket was unfinished, and then I crocheted the top row over a window curtain rod.
![]()
![]()
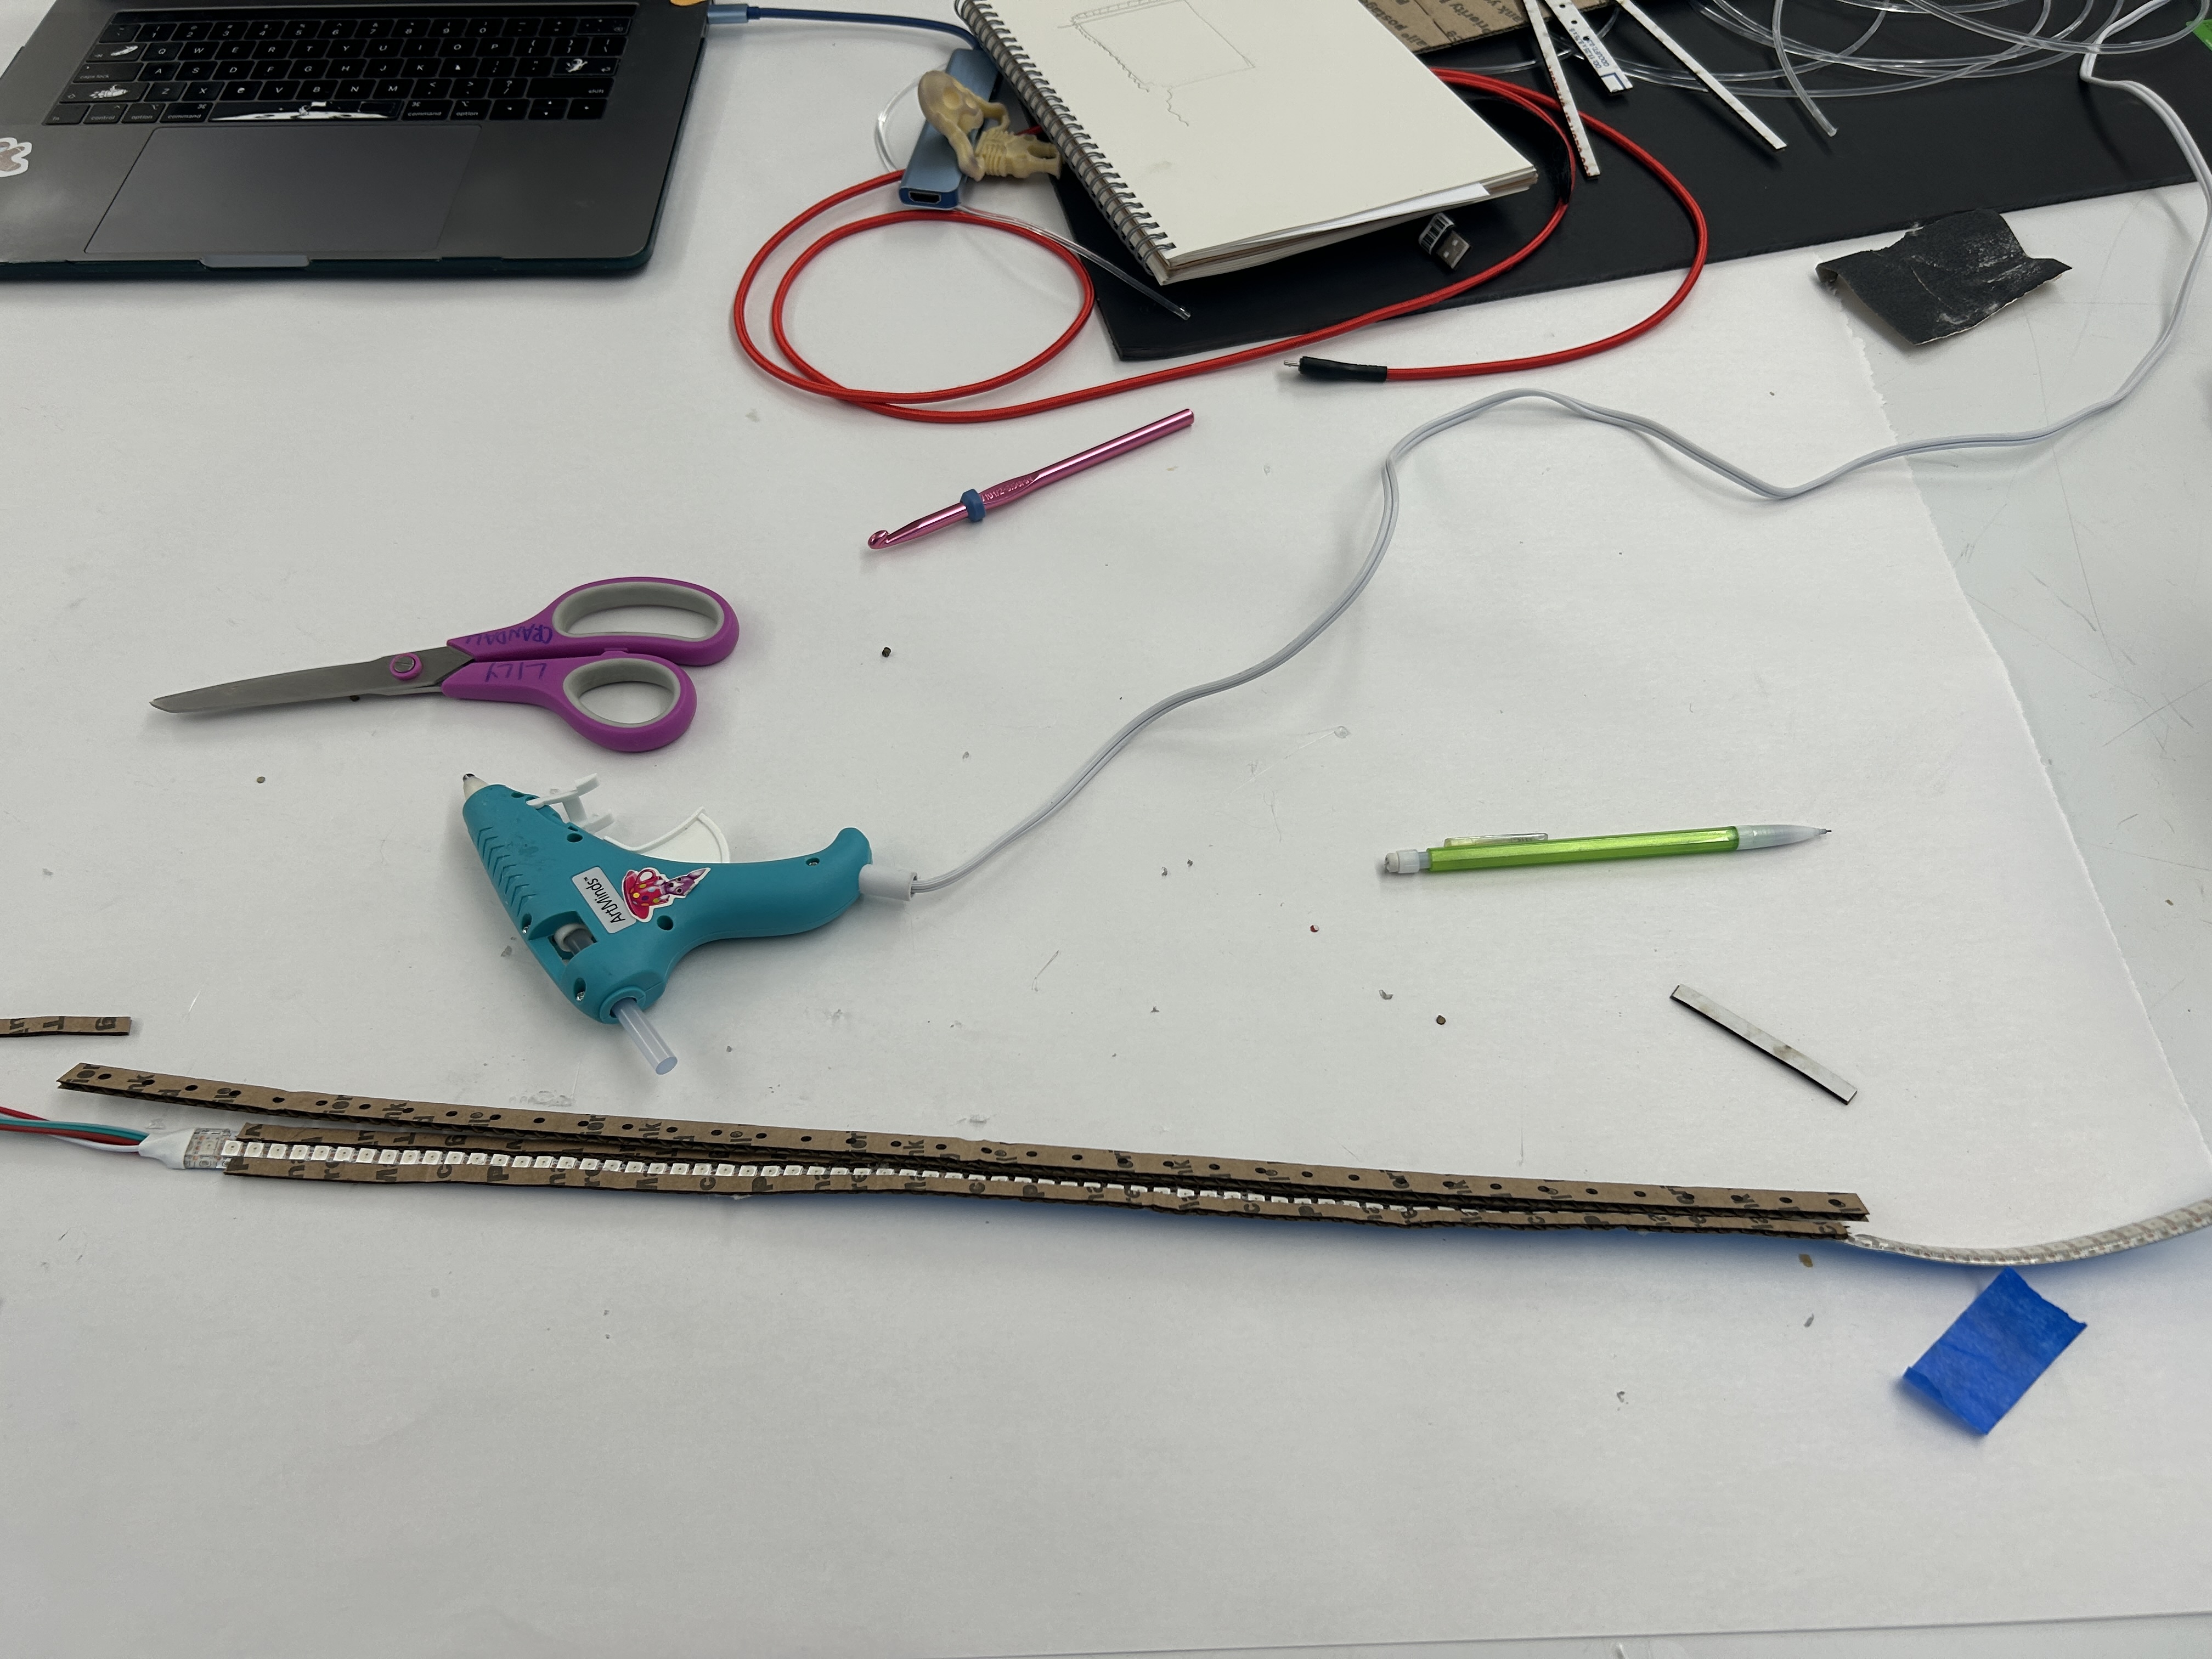
Then, I got to work on the LED strip. I used the same model from the prototype for the cardboard, just scaled it up.
![]()
![]()
Next came the hard part. I knew I needed long wires to get from the top of the blanket, run all the way down the side of it to the bottom, and then I needed a few feet of slack for people to hold the ball of yarn. I had to solder pins onto really long pieces of wire which was super difficult and frustrating. Then, one of the wires didn’t work for the longest time and I couldn’t figure out why. I cut off the ends and re-soldered it, thinking it was human error in soldering that made a faulty connection. But Phil had the idea to remove the resistor to the digital pin wire, because the length of the wire itself was creating enough resistance. Once I took that out, it worked well.
![My mess of wires I worked on for 30 min]()
![The successful soldering]()
![My mess from a full day of work]()
![Crocheting the long wires into the left edge of the blanket to hide them.]()
![Then I got started on weaving the fiber optic cables into the blanket. I spent a ridiculous amount of time on this because I wanted to make the best use of the limited cable I had.]()
![The front of the blanket with fiber optic cables woven through it]()
![The back]()
I made a small box out of foamcore for the cirtuit. It’s not the most solid thing, but it works. I wrapped it in yarn to make it look like a ball of yarn.
![]()
![]()
![]()
Once that was all set, I crocheted over the wires and it was lookin‘ pretty good. It also works which is great.
![Lights responding to the sound of the wheels moving]()
![Lights responding to my voice, speaking into the ball of yarn]()
This is how the light responds to sounds in a room close by, when there is no other sound happening.
![]()
Then I staged it for the ITP Spring Show. All done!
![]()
Code for this project: https://github.com/crandull/StoriedBlanket
Then, I got to work on the LED strip. I used the same model from the prototype for the cardboard, just scaled it up.

Next came the hard part. I knew I needed long wires to get from the top of the blanket, run all the way down the side of it to the bottom, and then I needed a few feet of slack for people to hold the ball of yarn. I had to solder pins onto really long pieces of wire which was super difficult and frustrating. Then, one of the wires didn’t work for the longest time and I couldn’t figure out why. I cut off the ends and re-soldered it, thinking it was human error in soldering that made a faulty connection. But Phil had the idea to remove the resistor to the digital pin wire, because the length of the wire itself was creating enough resistance. Once I took that out, it worked well.


I made a small box out of foamcore for the cirtuit. It’s not the most solid thing, but it works. I wrapped it in yarn to make it look like a ball of yarn.


Once that was all set, I crocheted over the wires and it was lookin‘ pretty good. It also works which is great.
This is how the light responds to sounds in a room close by, when there is no other sound happening.
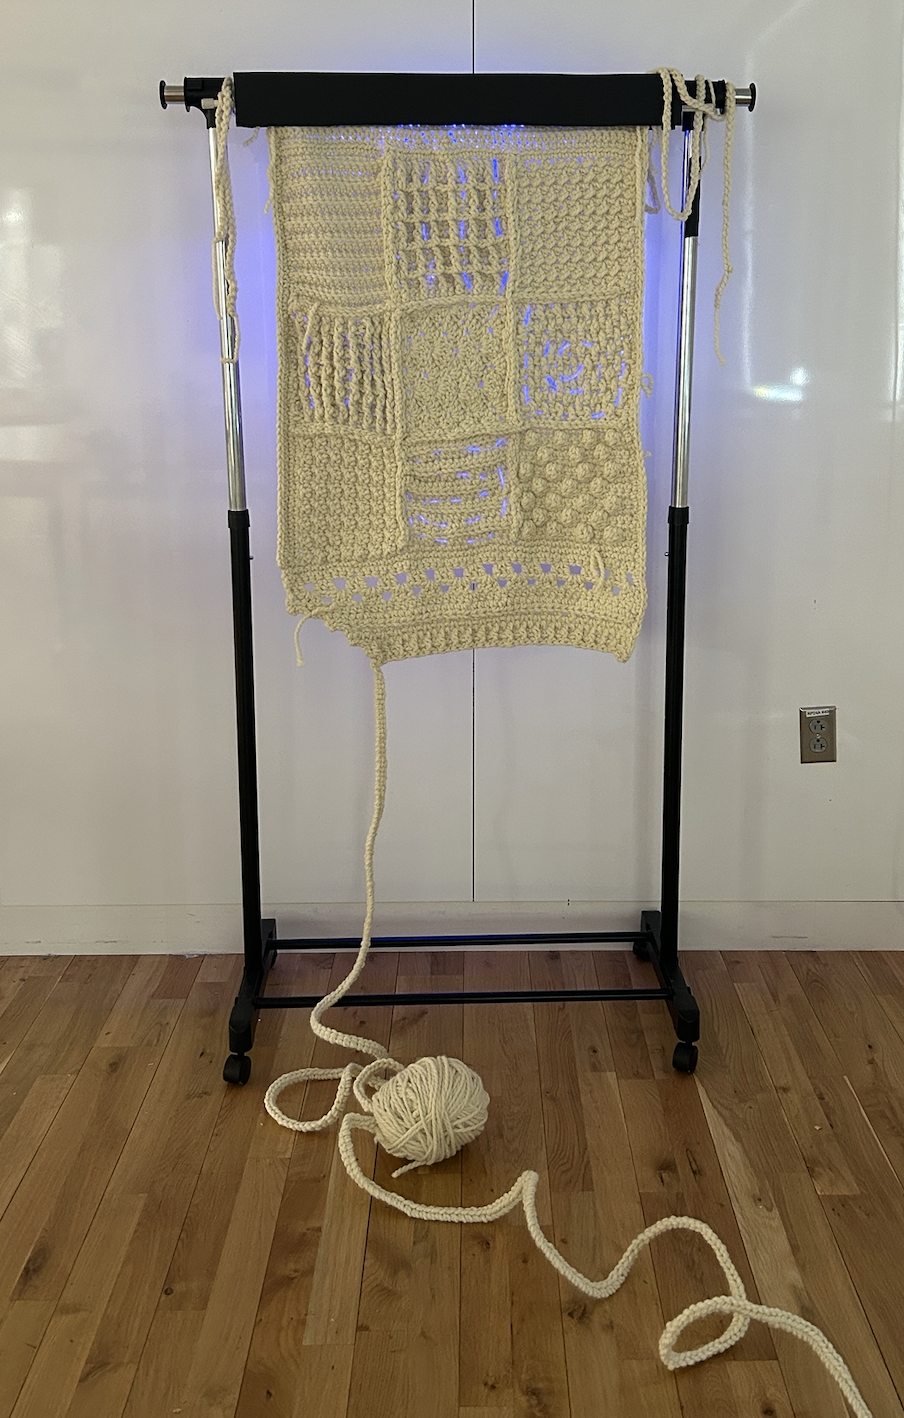
Then I staged it for the ITP Spring Show. All done!
