Shared halls, seventy years apart.
Shared halls seventy years apart is a visual exploration of the research I have done over the last two months into my family’s history working at 370 Jay Street.

Thank you to Jeff, Simone, Phil. ,Elif, Mary, Jo, Priyanka, Cindy, and Michelle for your help with this!
PART 1: Context
In October of 2023 I attended my grandma’s funeral. During the reception, I talked to my great aunt Marie (my grandma’s older sister), who I see maybe once or twice a year. She asked what I’m doing these days and I told her I am in grad school and living in Brooklyn. She told me she used to live in Brooklyn, and when we pulled up her old address in Clinton Hill on a map, we saw that it wasn’t so far from where I live now. Small world.
This wasn’t shocking - her and my grandma and their other sisters grew up in Astoria, and traces of my family are all over the city. It was what she said next that really got me: “Yeah it was convenient living there because I worked just down the street at 370 Jay Street”
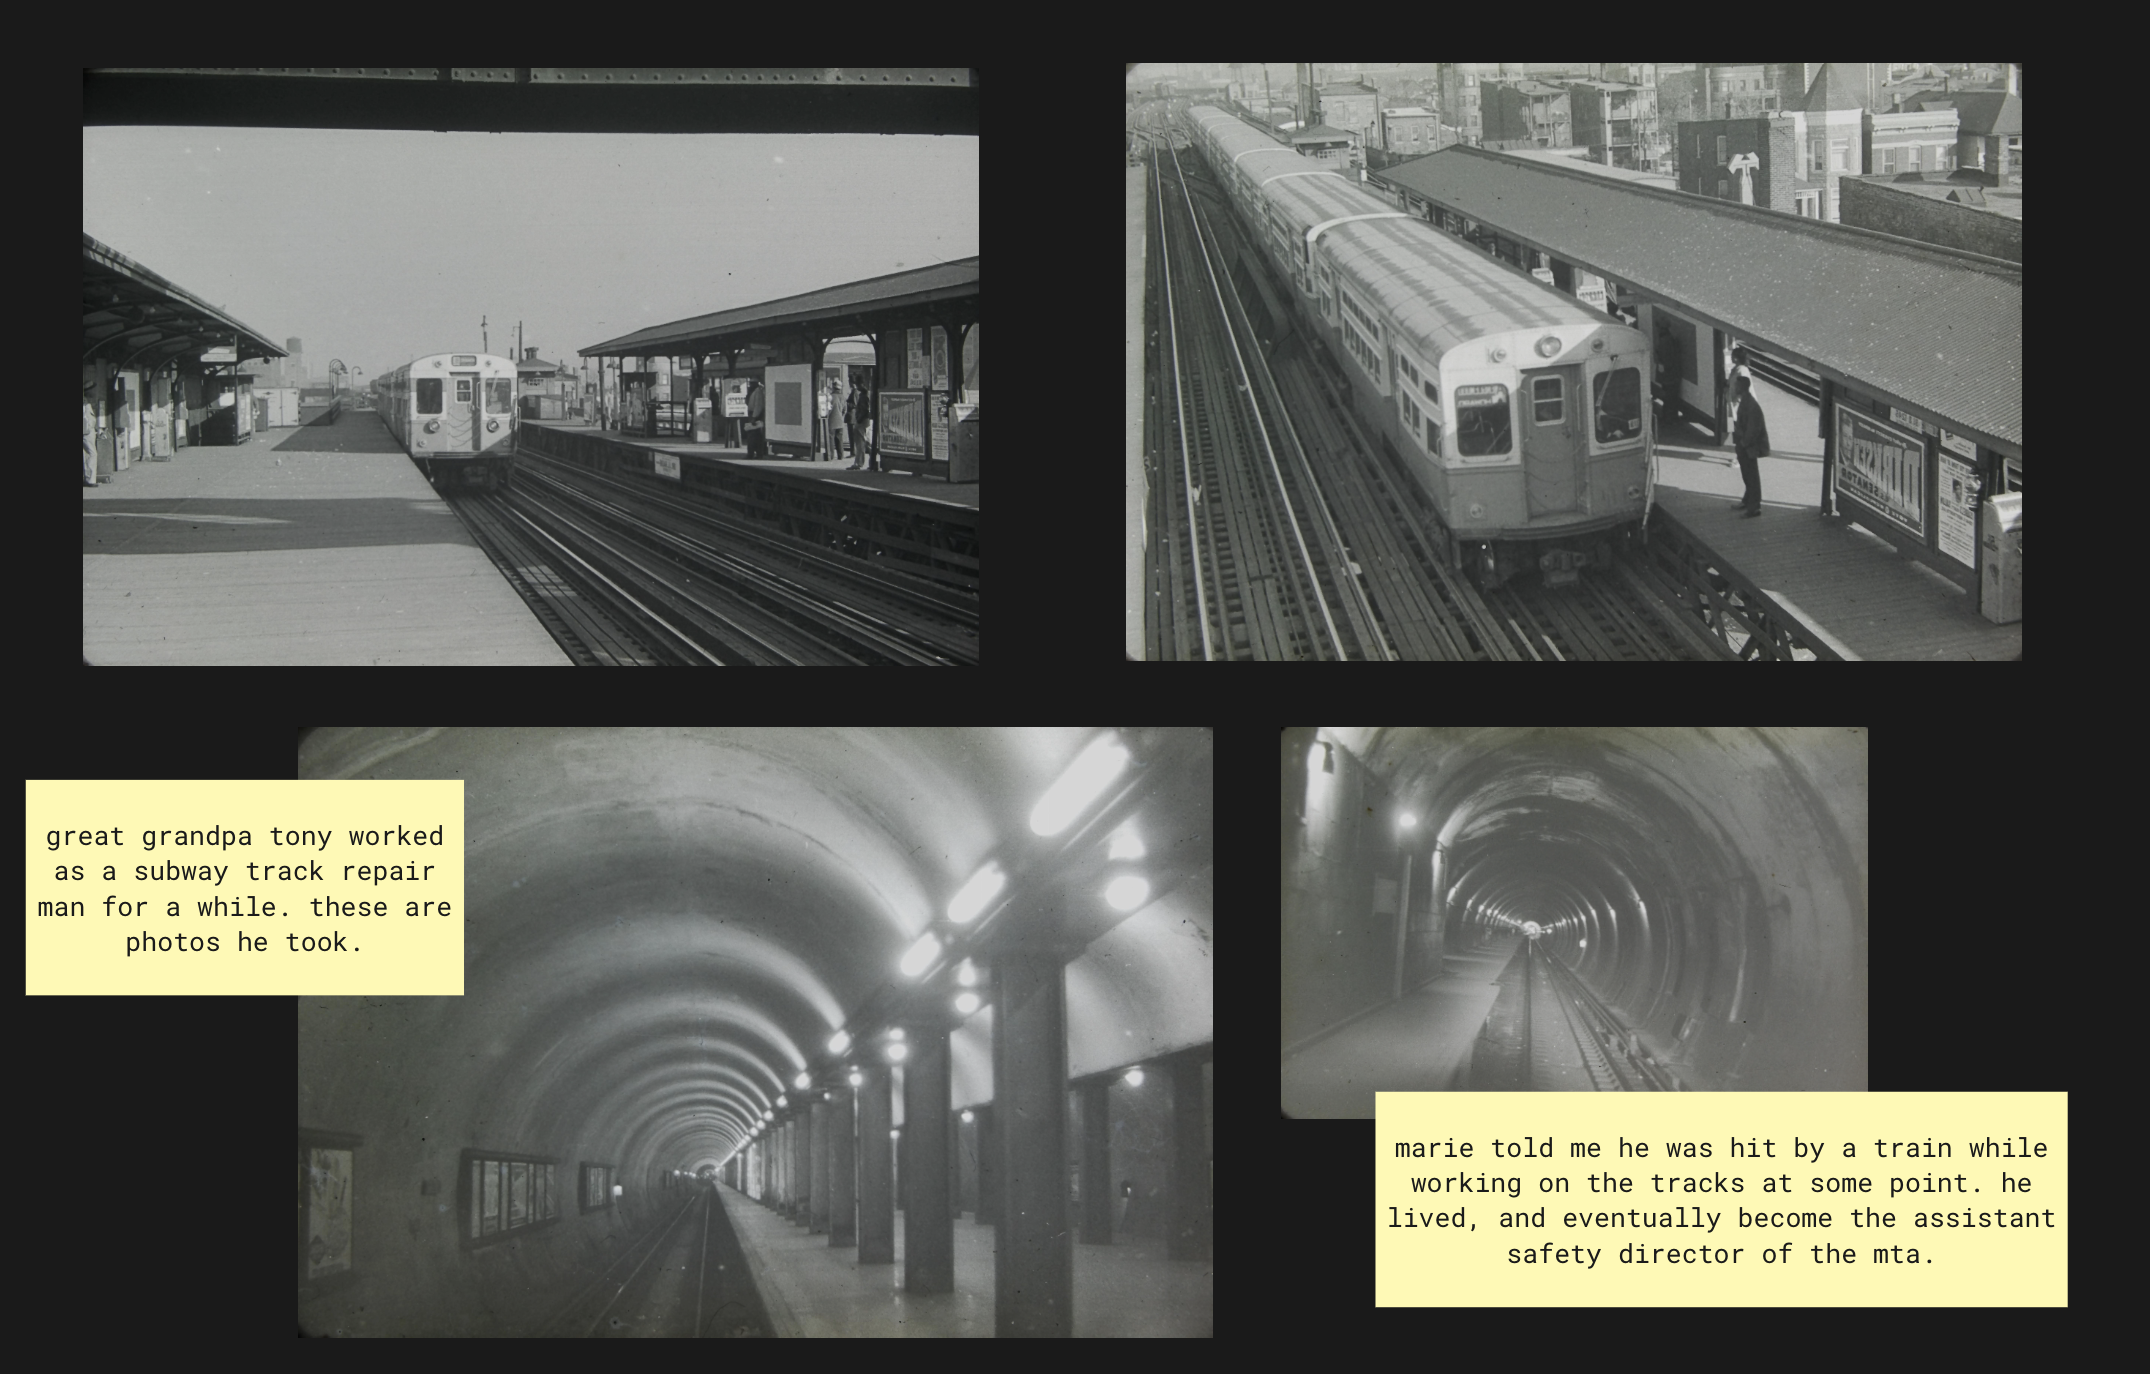
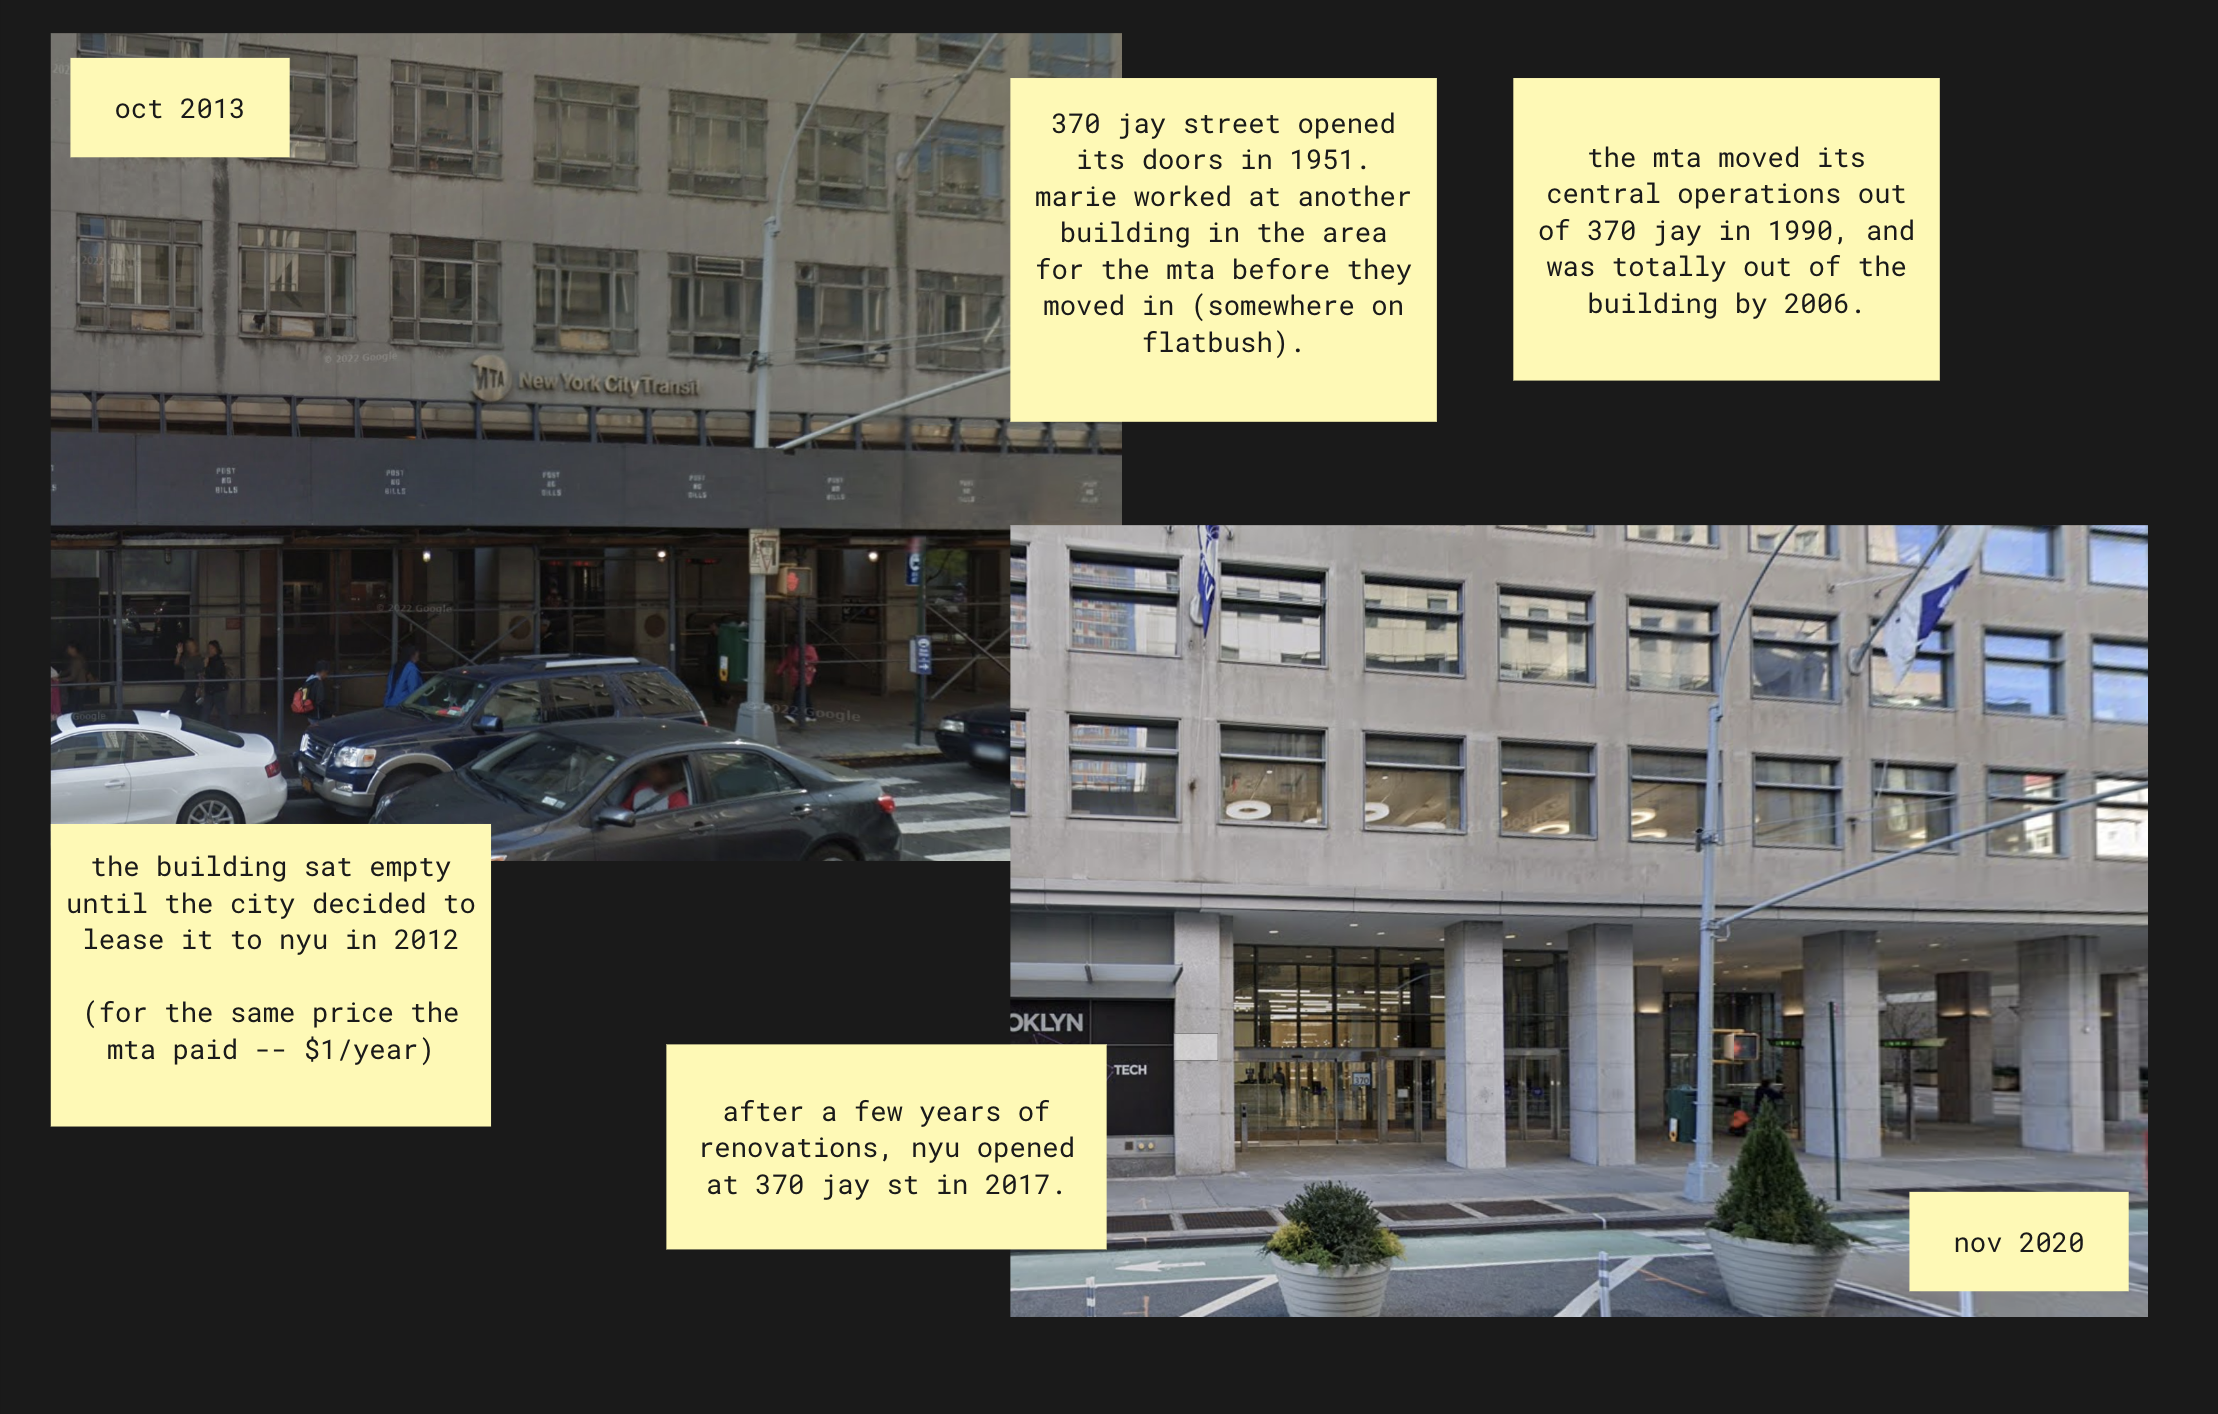
She told me it was in 370 Jay Street, working at what was the Transit Authority (now the MTA) headquarters where she met her late husband, my great Uncle Jimmy, who I never met. She then told me her father, my great grandpa Anthony (Tony) who I also never met, worked in the building as well. While I knew vaguely that my great grandpa worked in construction (there’s was some family lore about him being hit by a subway at some point), I didn’t know any more than that.
I got back home after the funeral and couldn’t stop thinking about it all. I started doing some research online and dug through the vast collection of photographs taken by my relatives and visited Marie out on Long Island to help fill in the gaps.
I wasn’t sure what kind of project to make out of all of this content, so I decided to show it as is - research in progress. Shared halls, seventy years apart is what I’ve got so far.

PART 2: Research
After finding out about my family members’ history with the building, I knew I wanted to create a project to showcase that relationship, but didn’t know what exactly. I started doing research and hoped something would come out of that.
I. My Great Aunt Marie
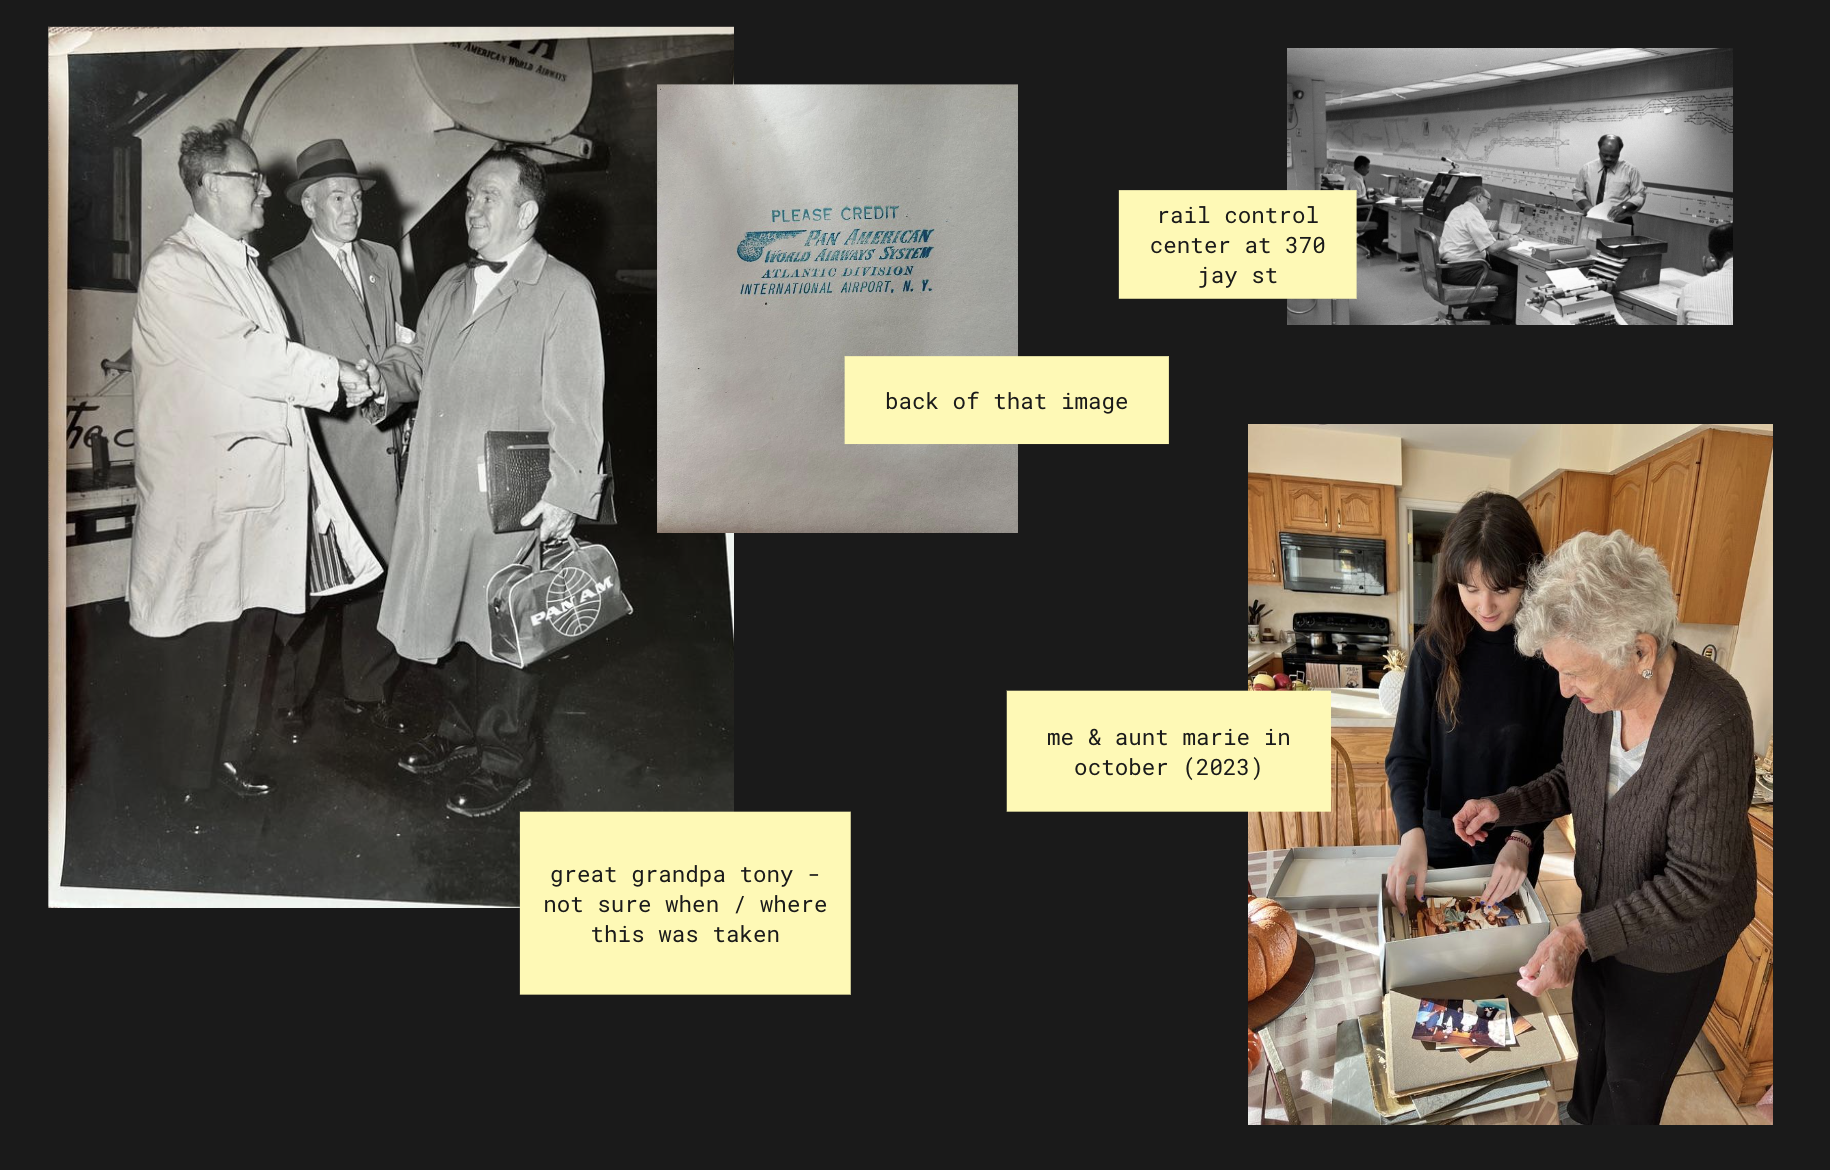
I spent a day with my great Aunt Marie out on Long Island with the goal of learning about her time at 370 Jay Street. By the end of the day, I had hours worth of recorded stories about family members I never knew, New York City history, and a few bits and pieces about her experience at 370 Jay. She had a bunch of family photos stored at her house, photos I had never seen before because they’d never been digitized. She found a few of my great grandpa, her father, which she believed had been taken at 370 Jay (I later confirmed this was true).
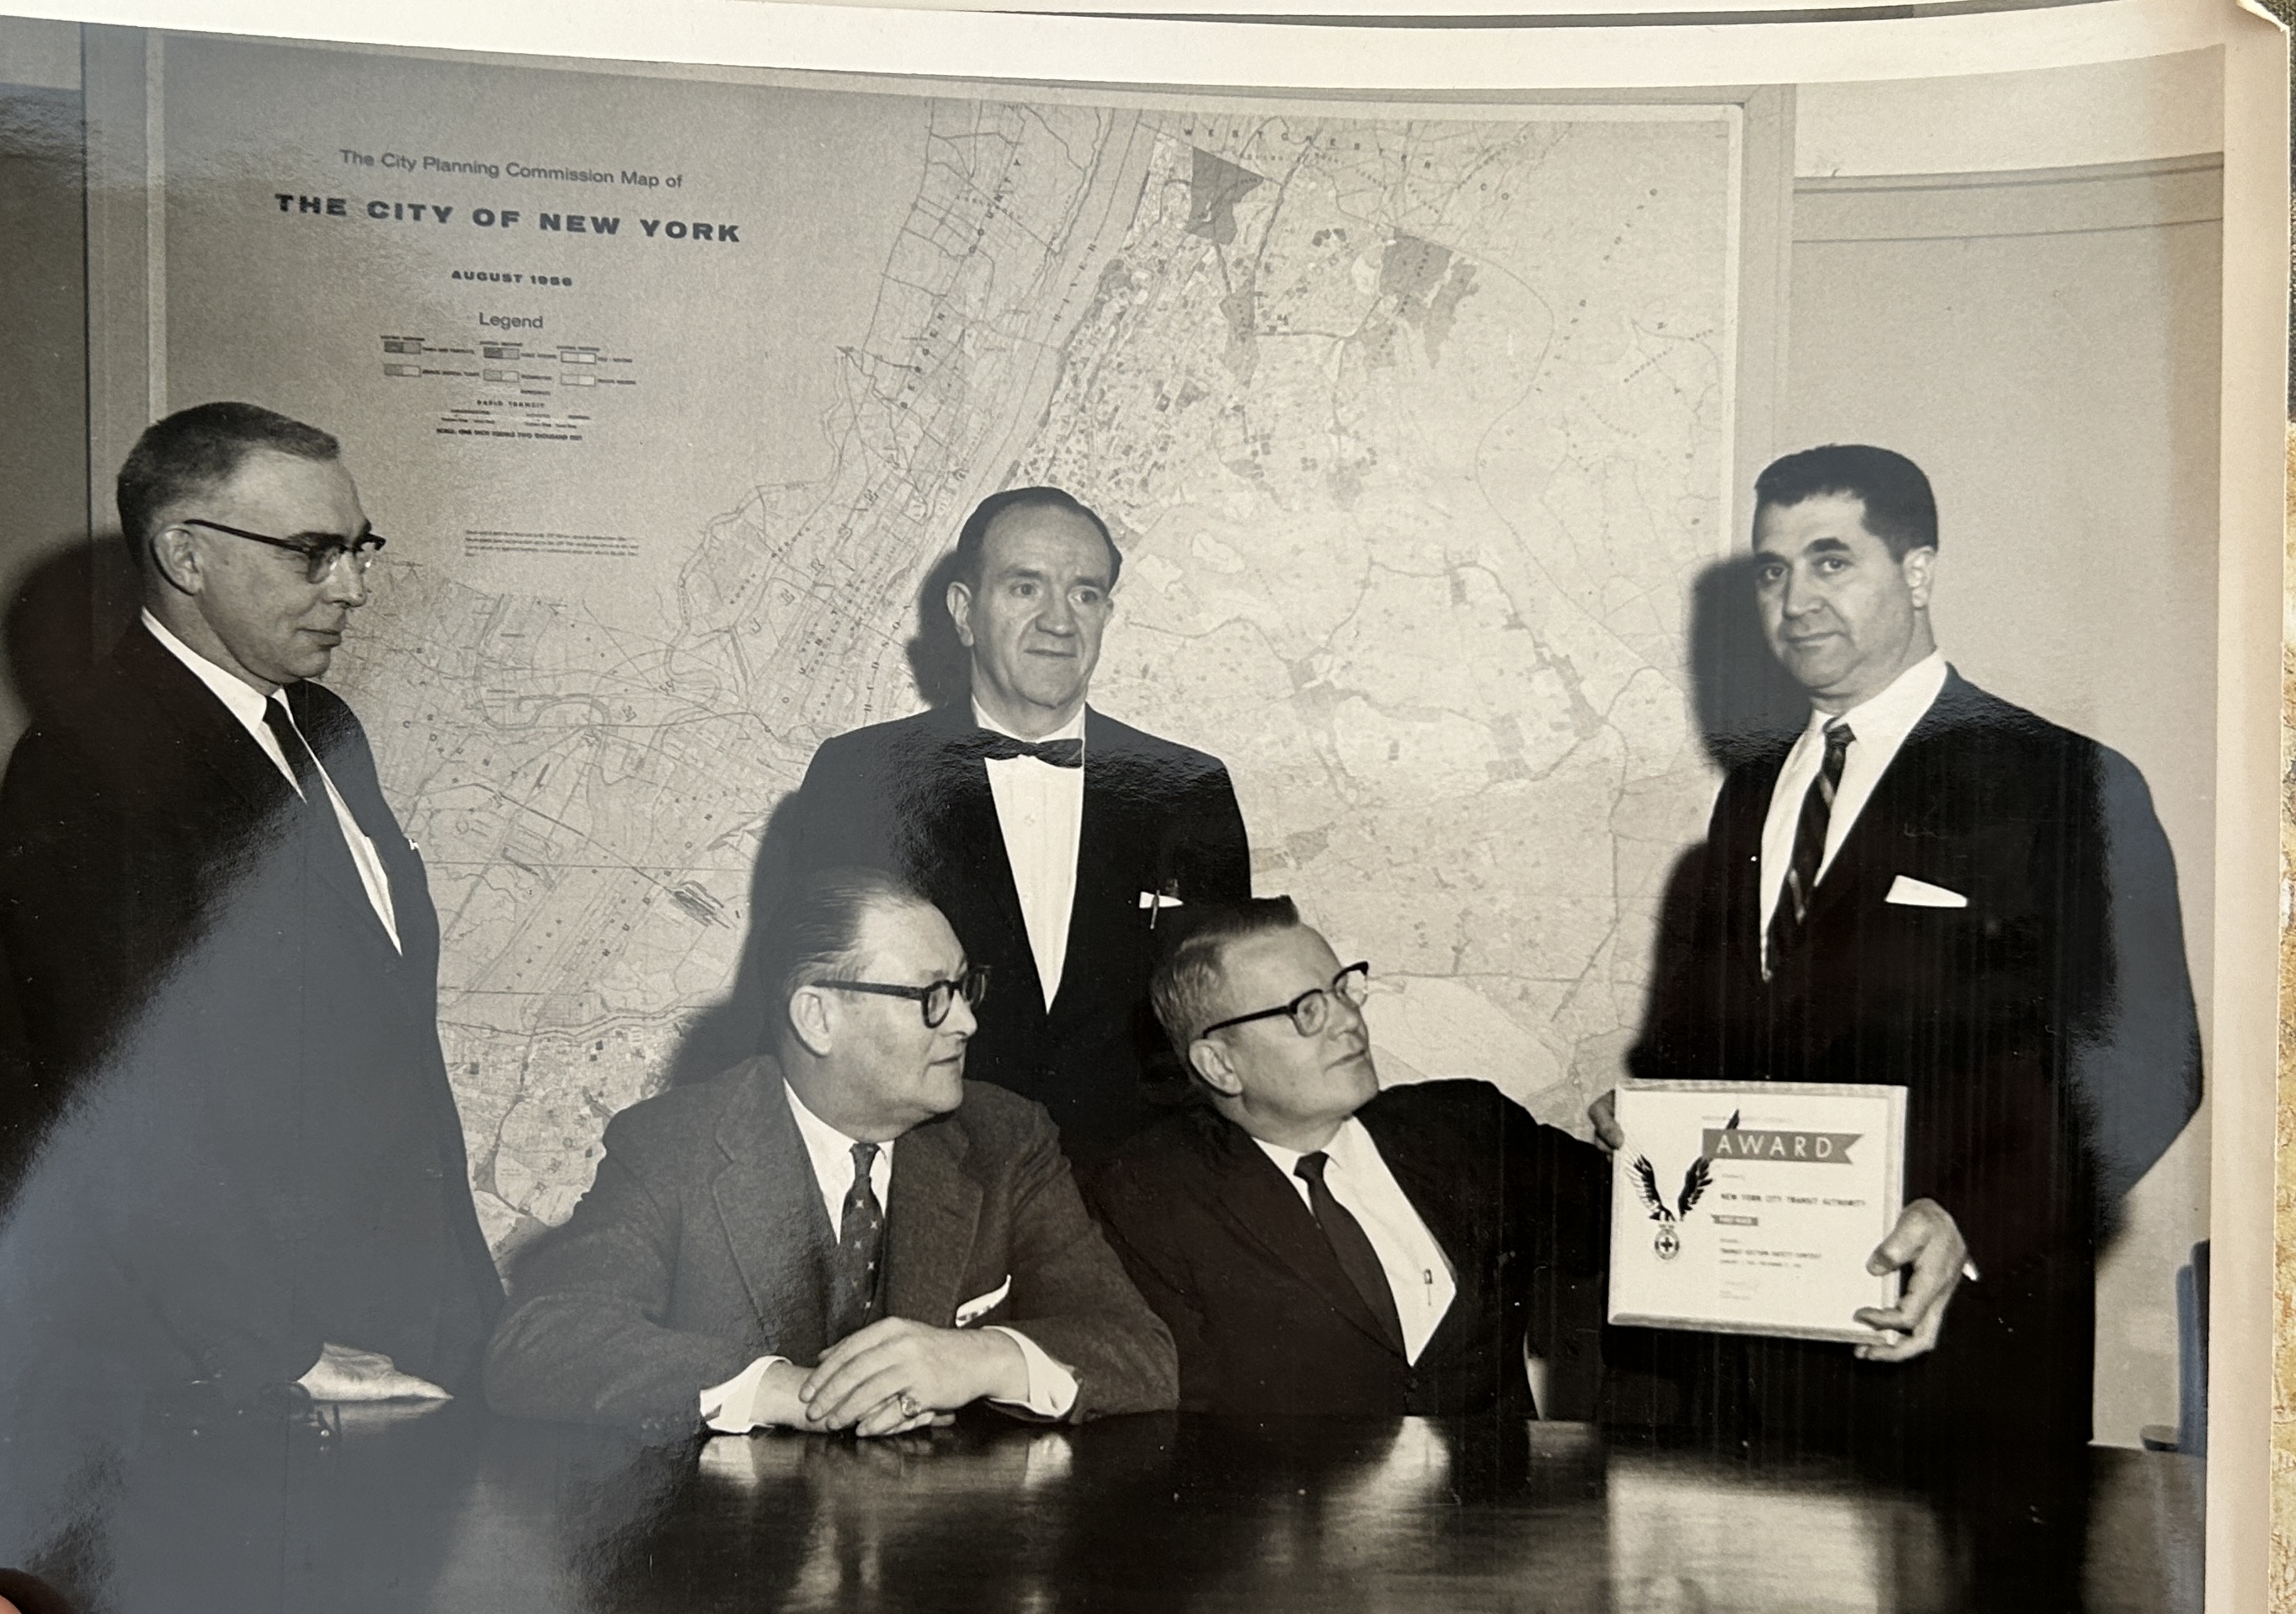
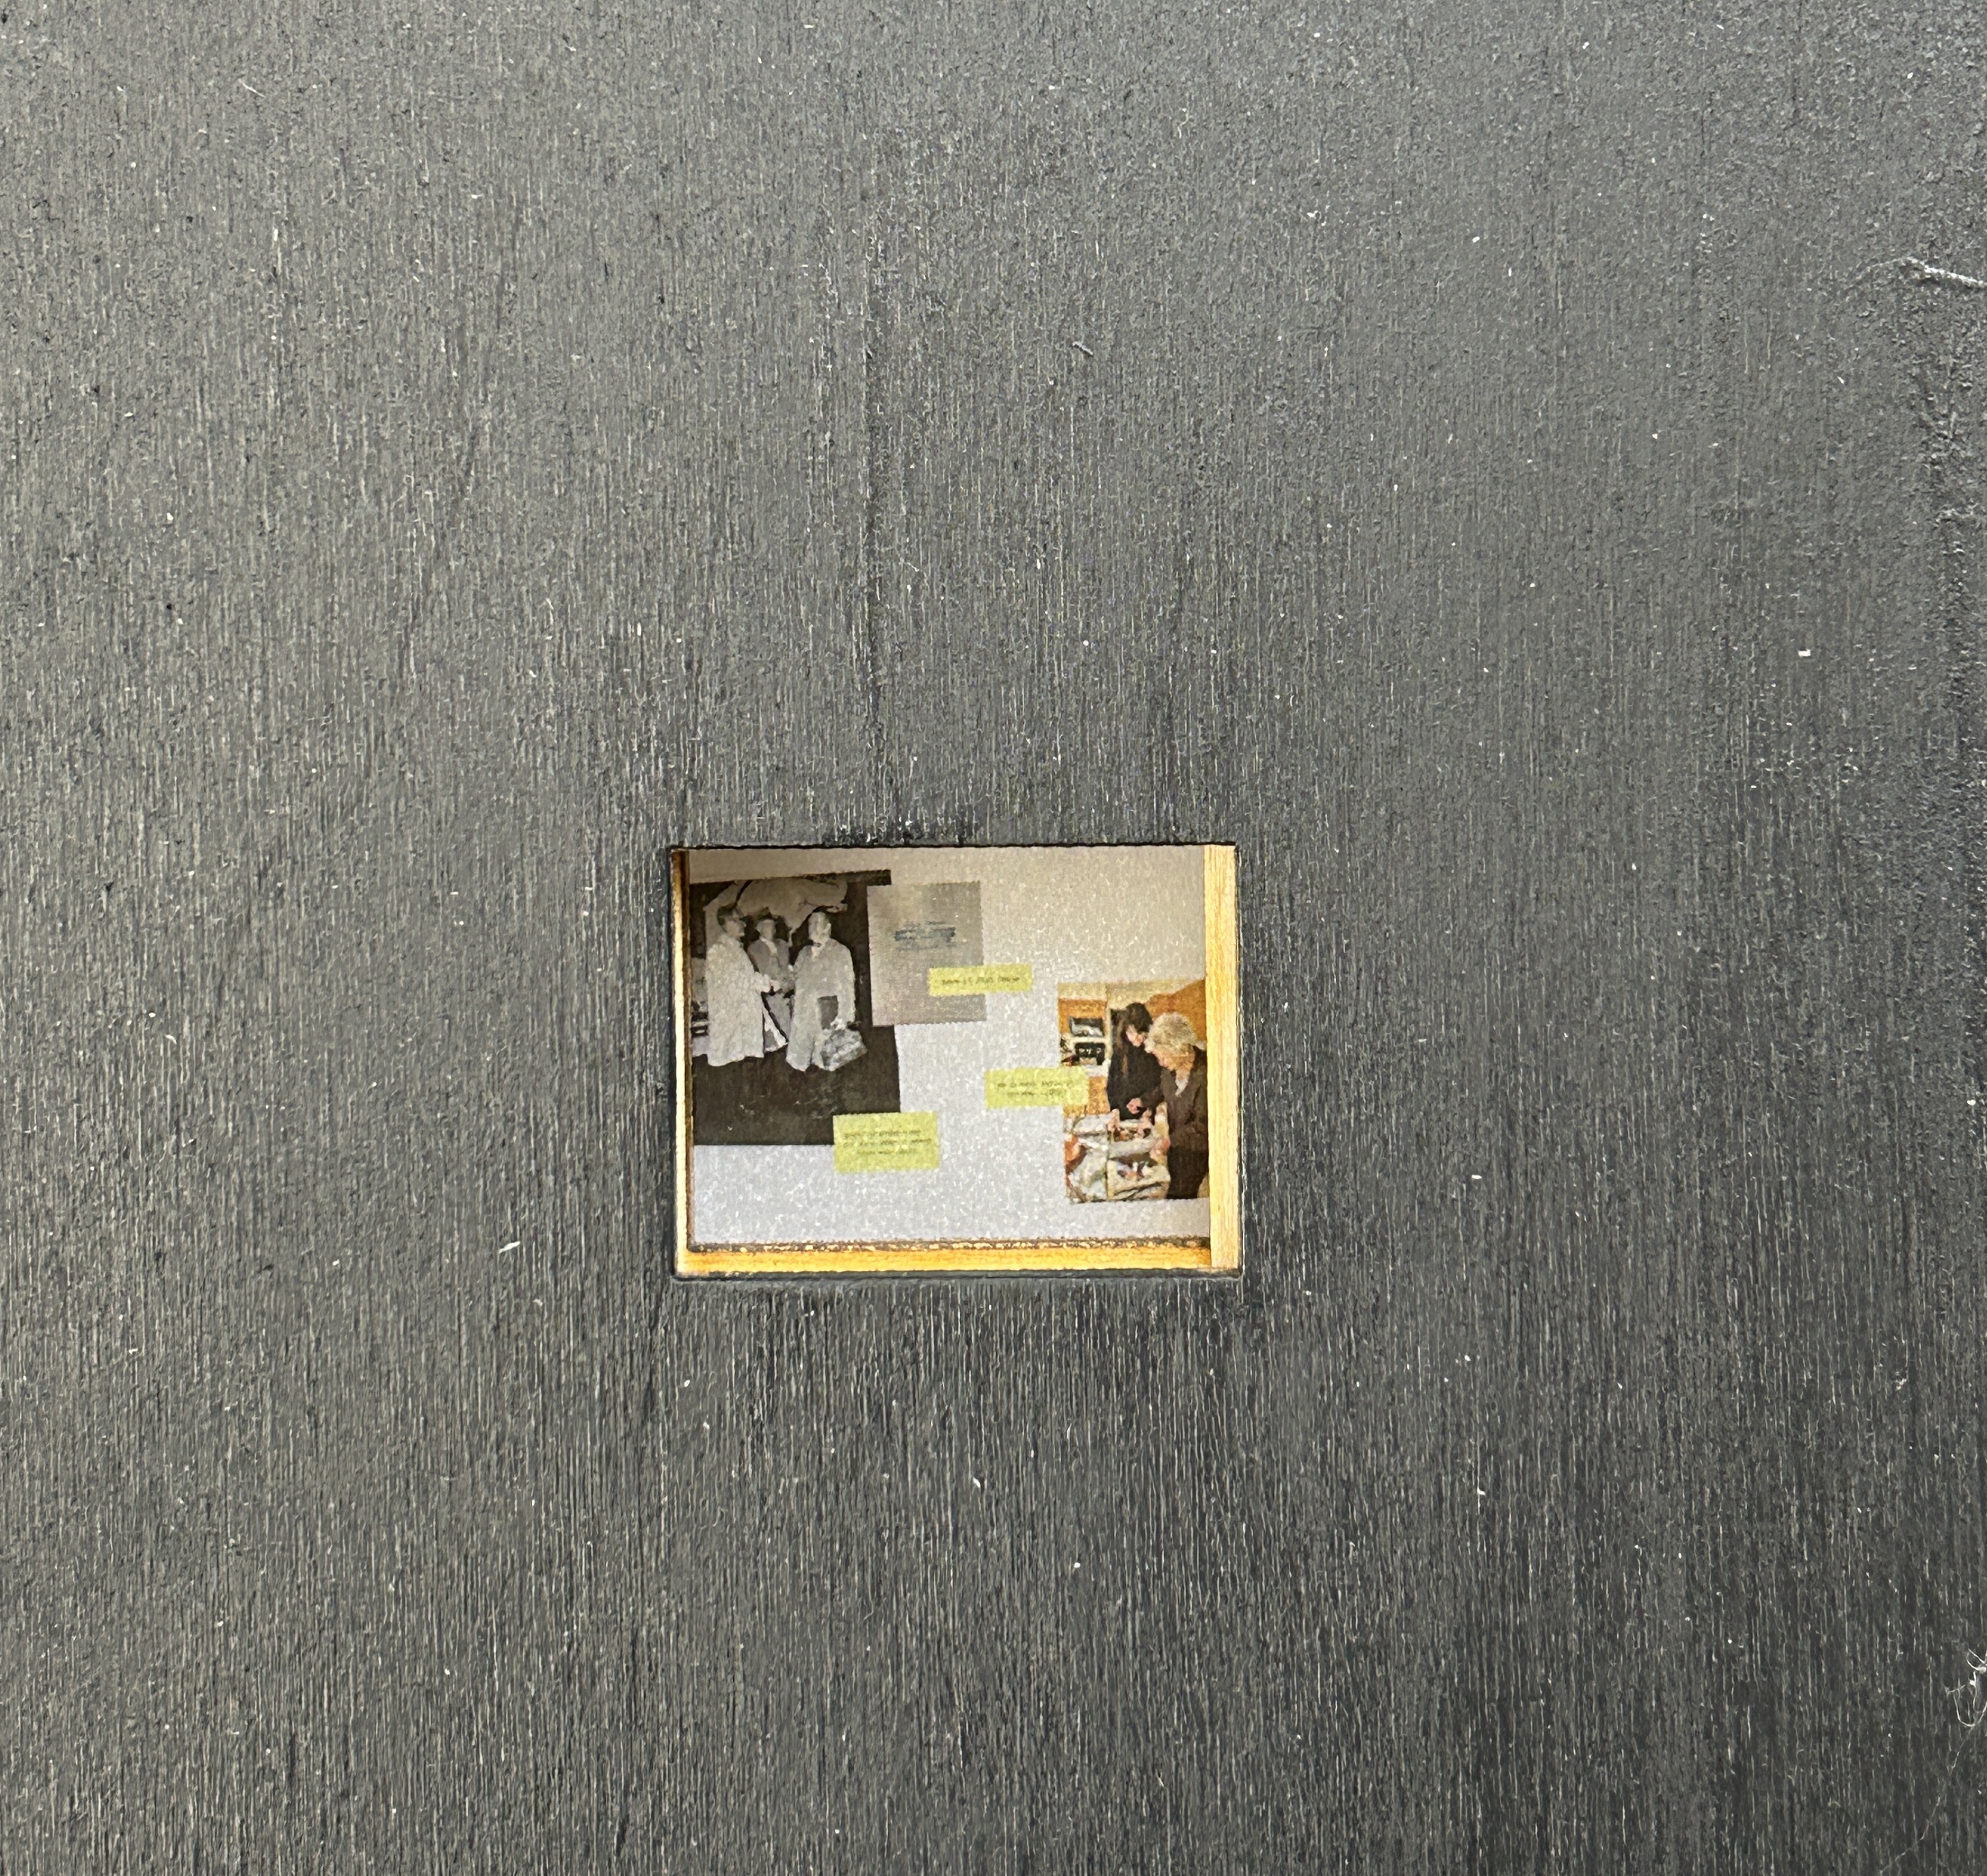
She also had this photo above of her husband, my great uncle Jimmy (right) from when he worked for the MTA. We’re pretty sure this was taken at 370 Jay.
II. Family Photo Archives
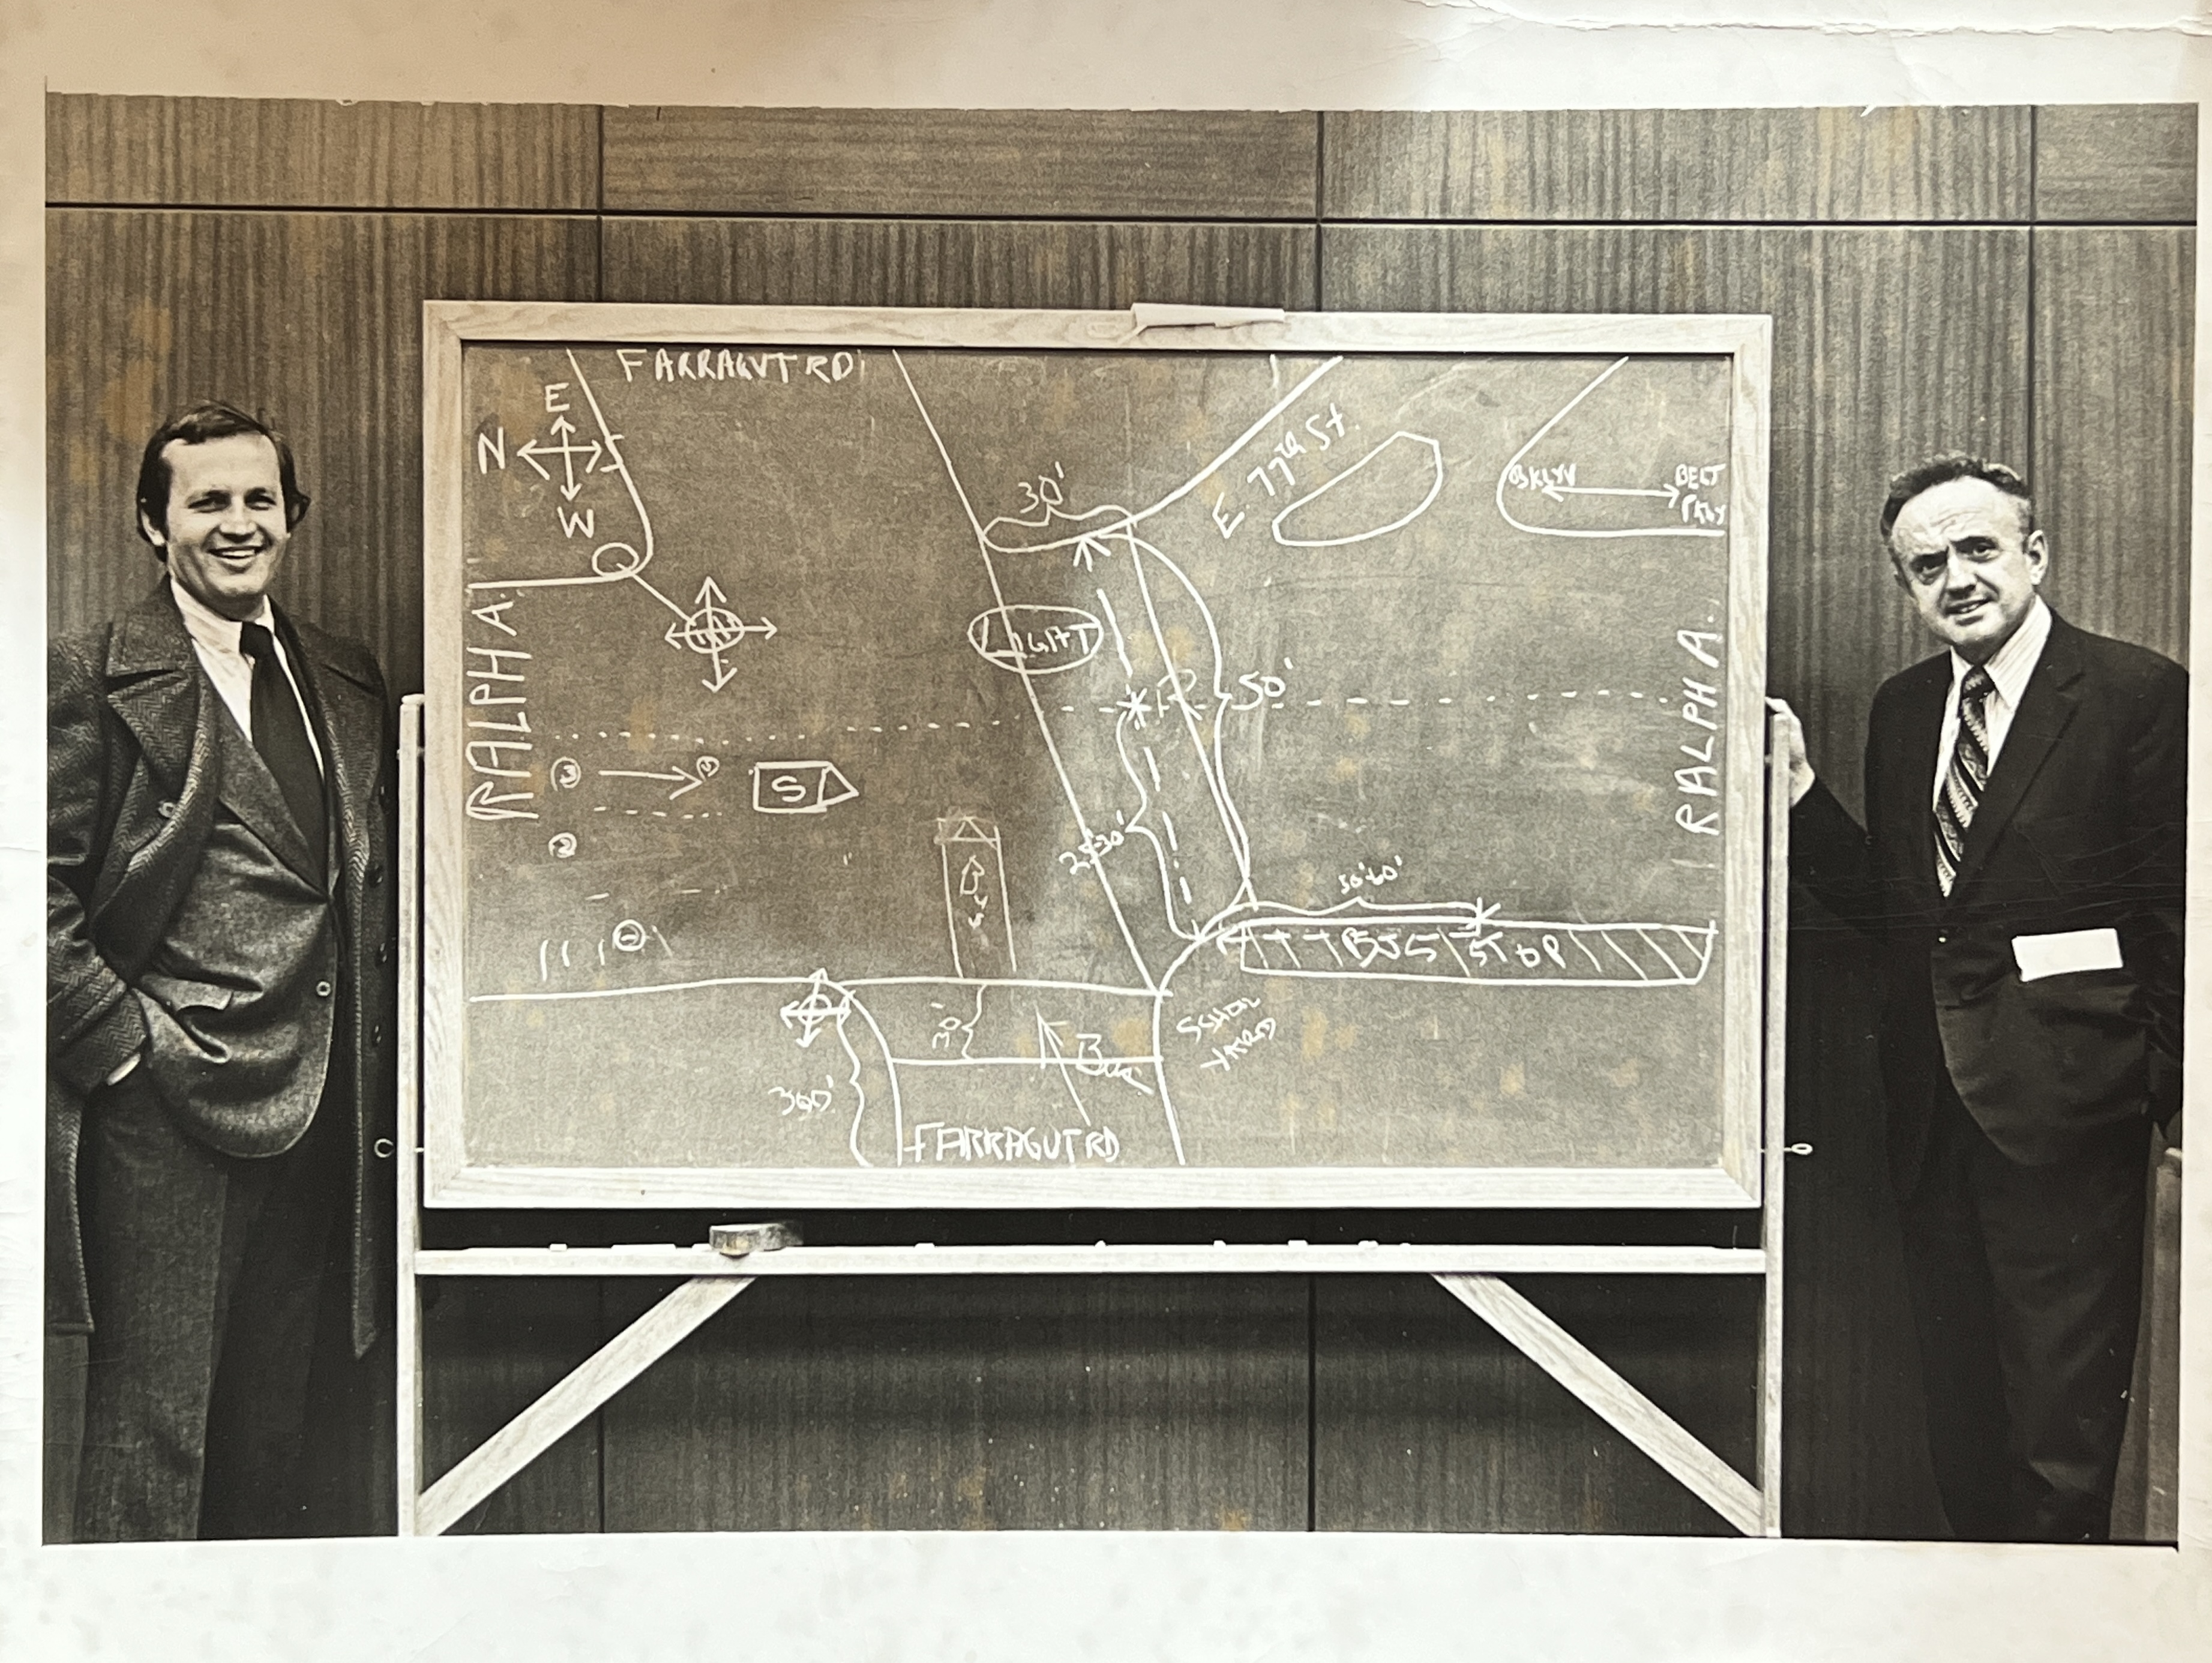
I’m very lucky to have a huge digital archive of family photos, thanks to my aunt who digitized my grandpa Howie’s huge collection of slides. He was a big hobby photographer, and as a result I have thousands of photos of family members and friends from the early 1950s to 90s. Also in that collection were a few slides taken by great-grandpa Tony (who worked at the MTA), of the subway. There are no captions or dates associated with them, so I can’t be sure when he took them.
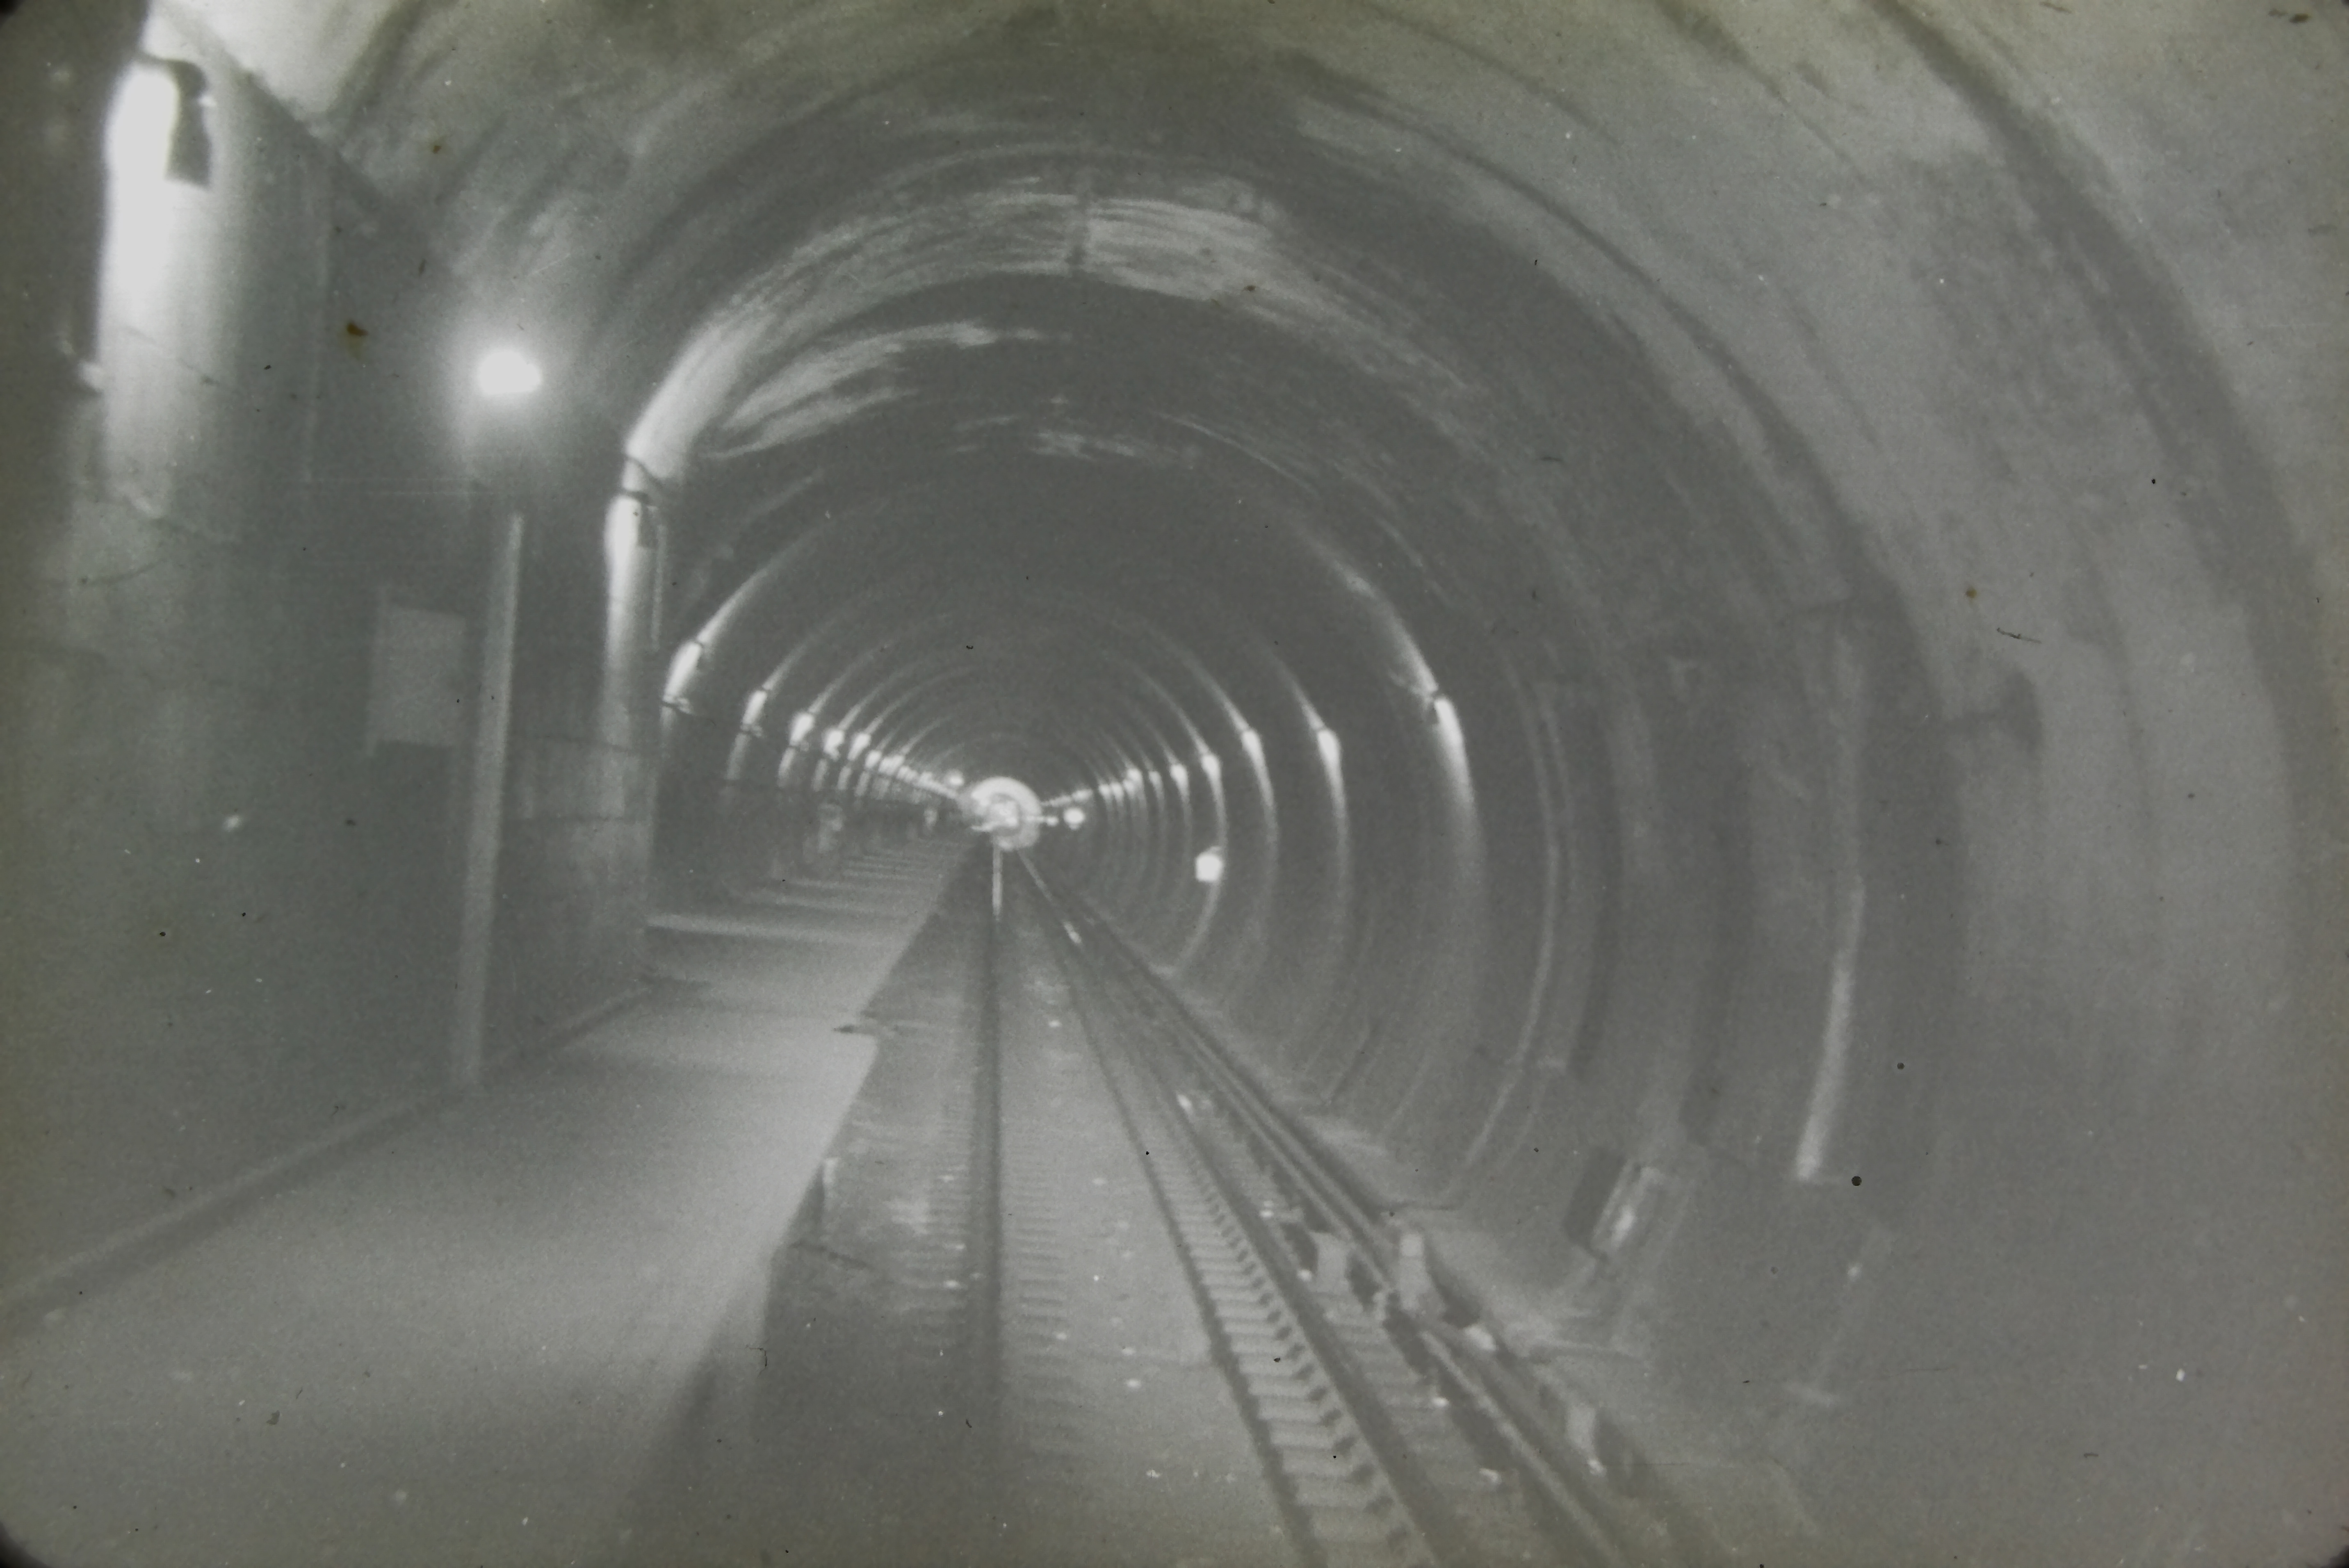
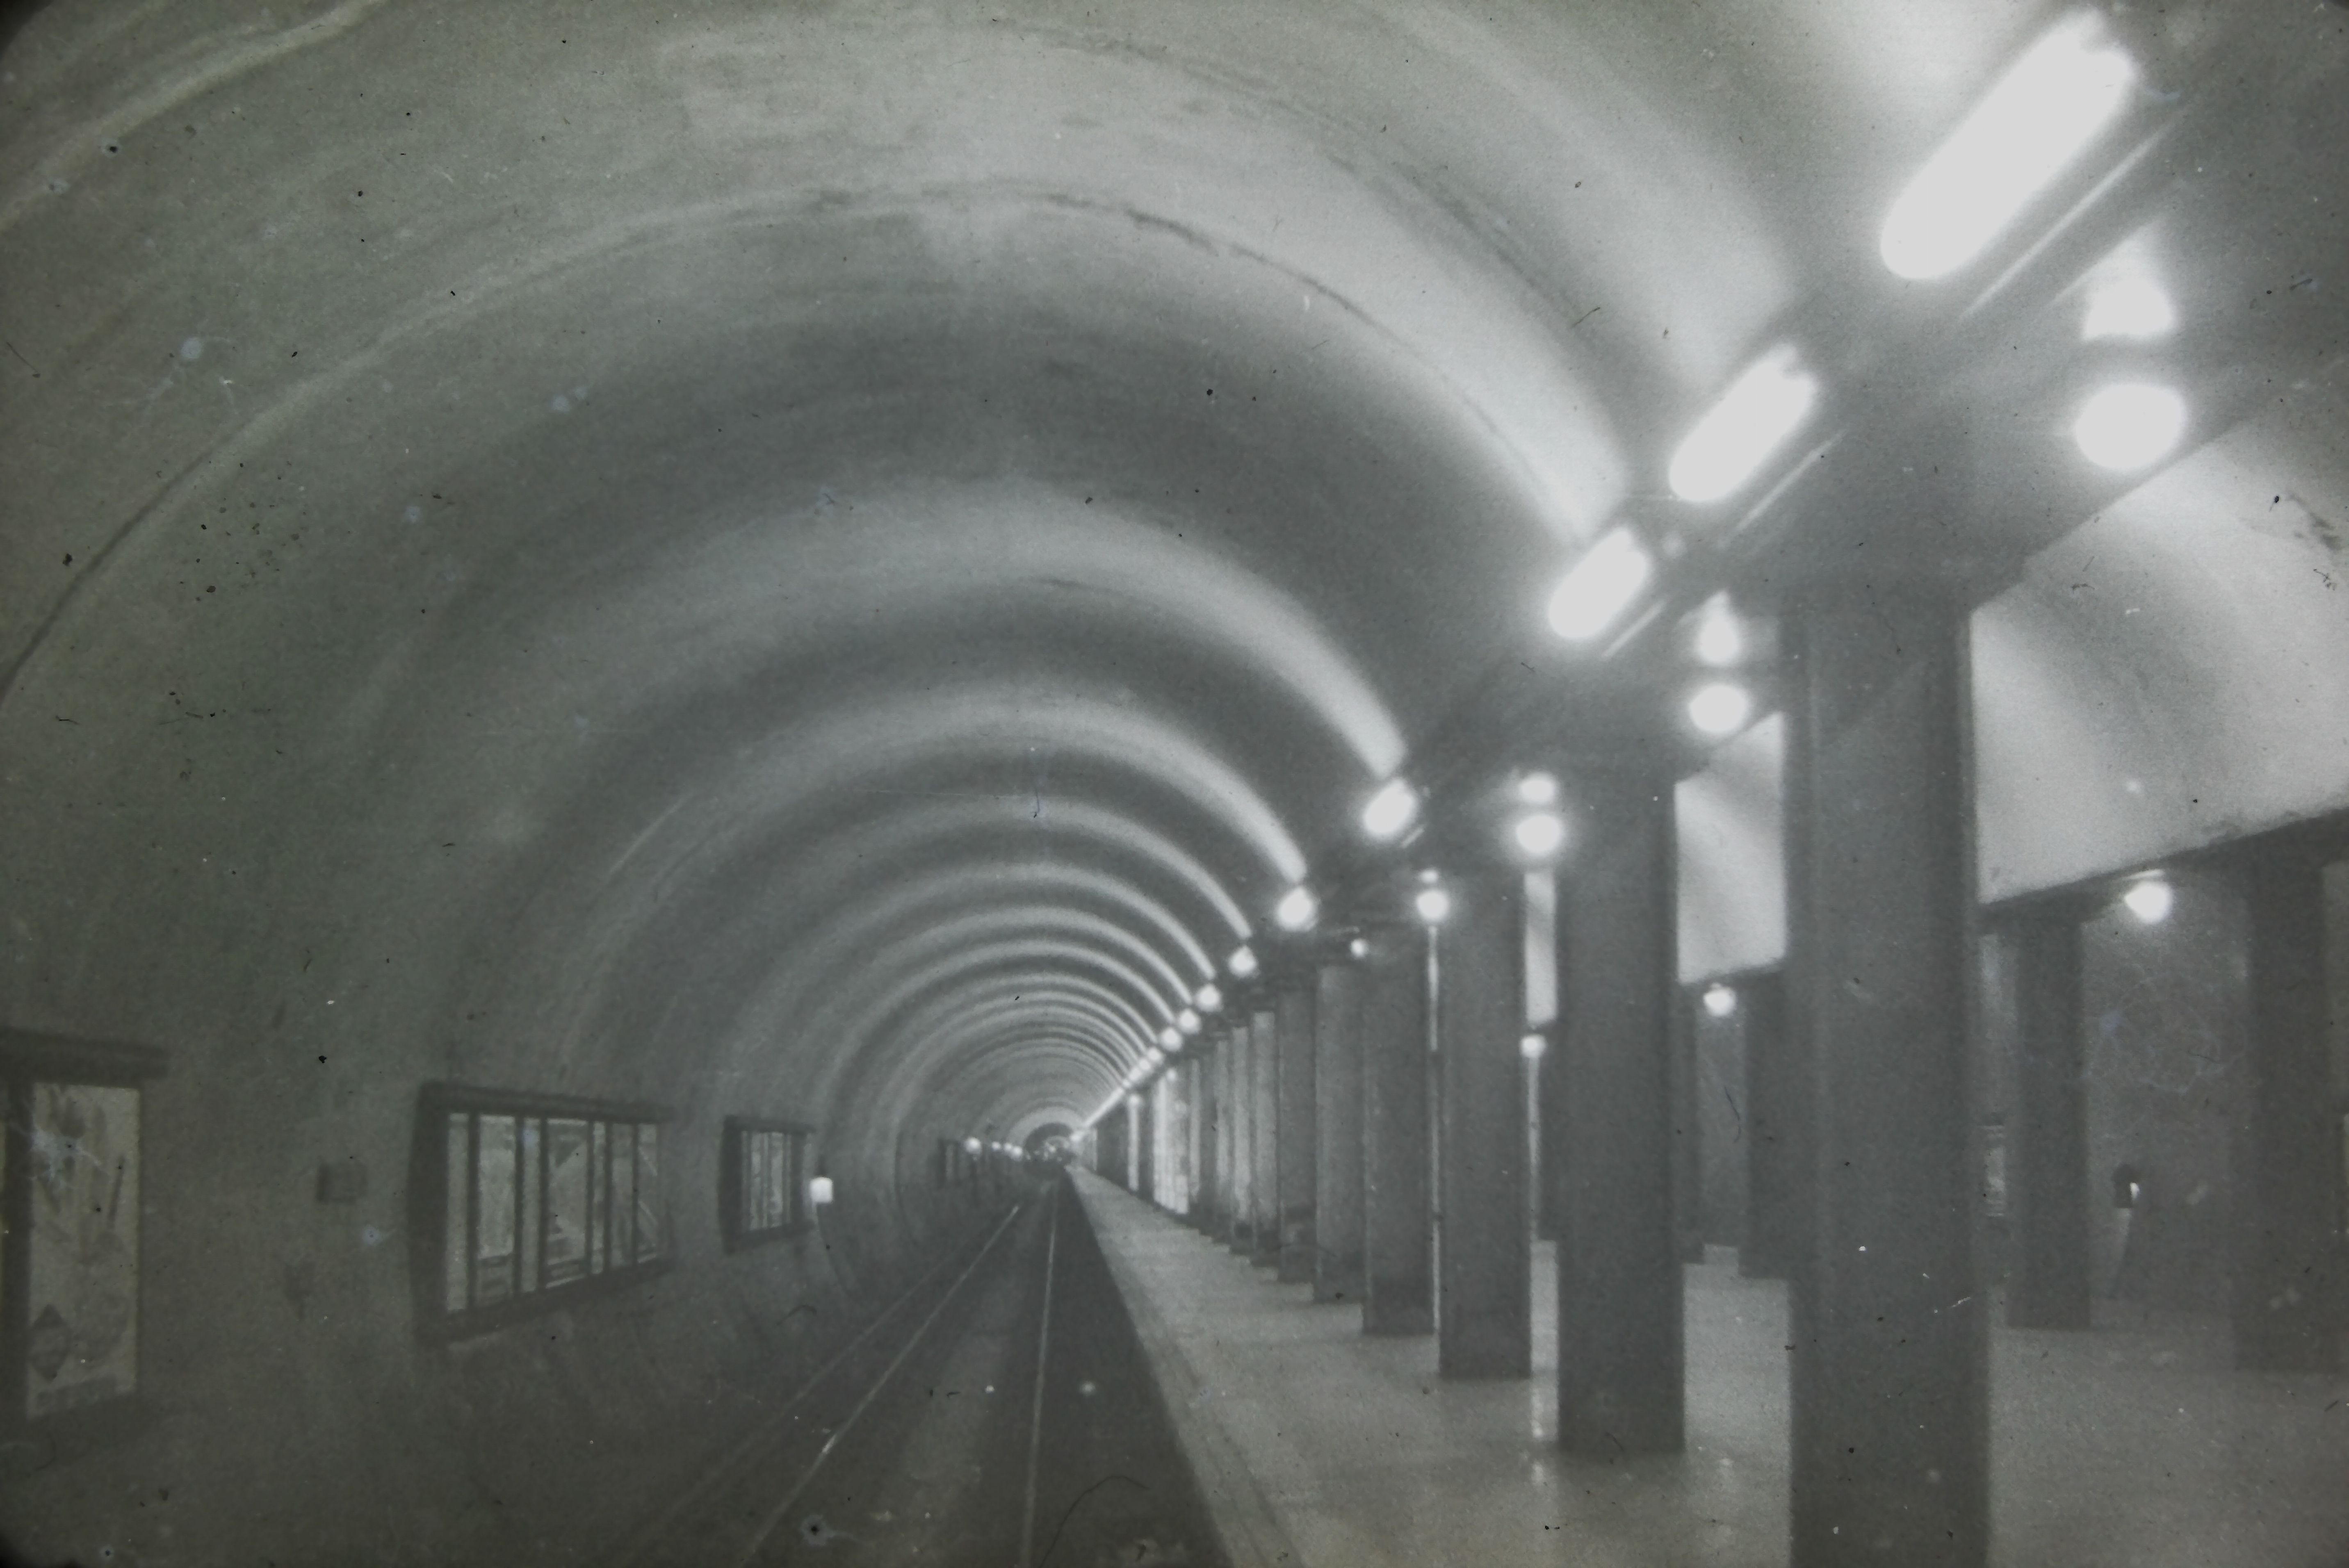
Photos taken by Great Grandpa Tony of the NYC subway.
Dates unknown.

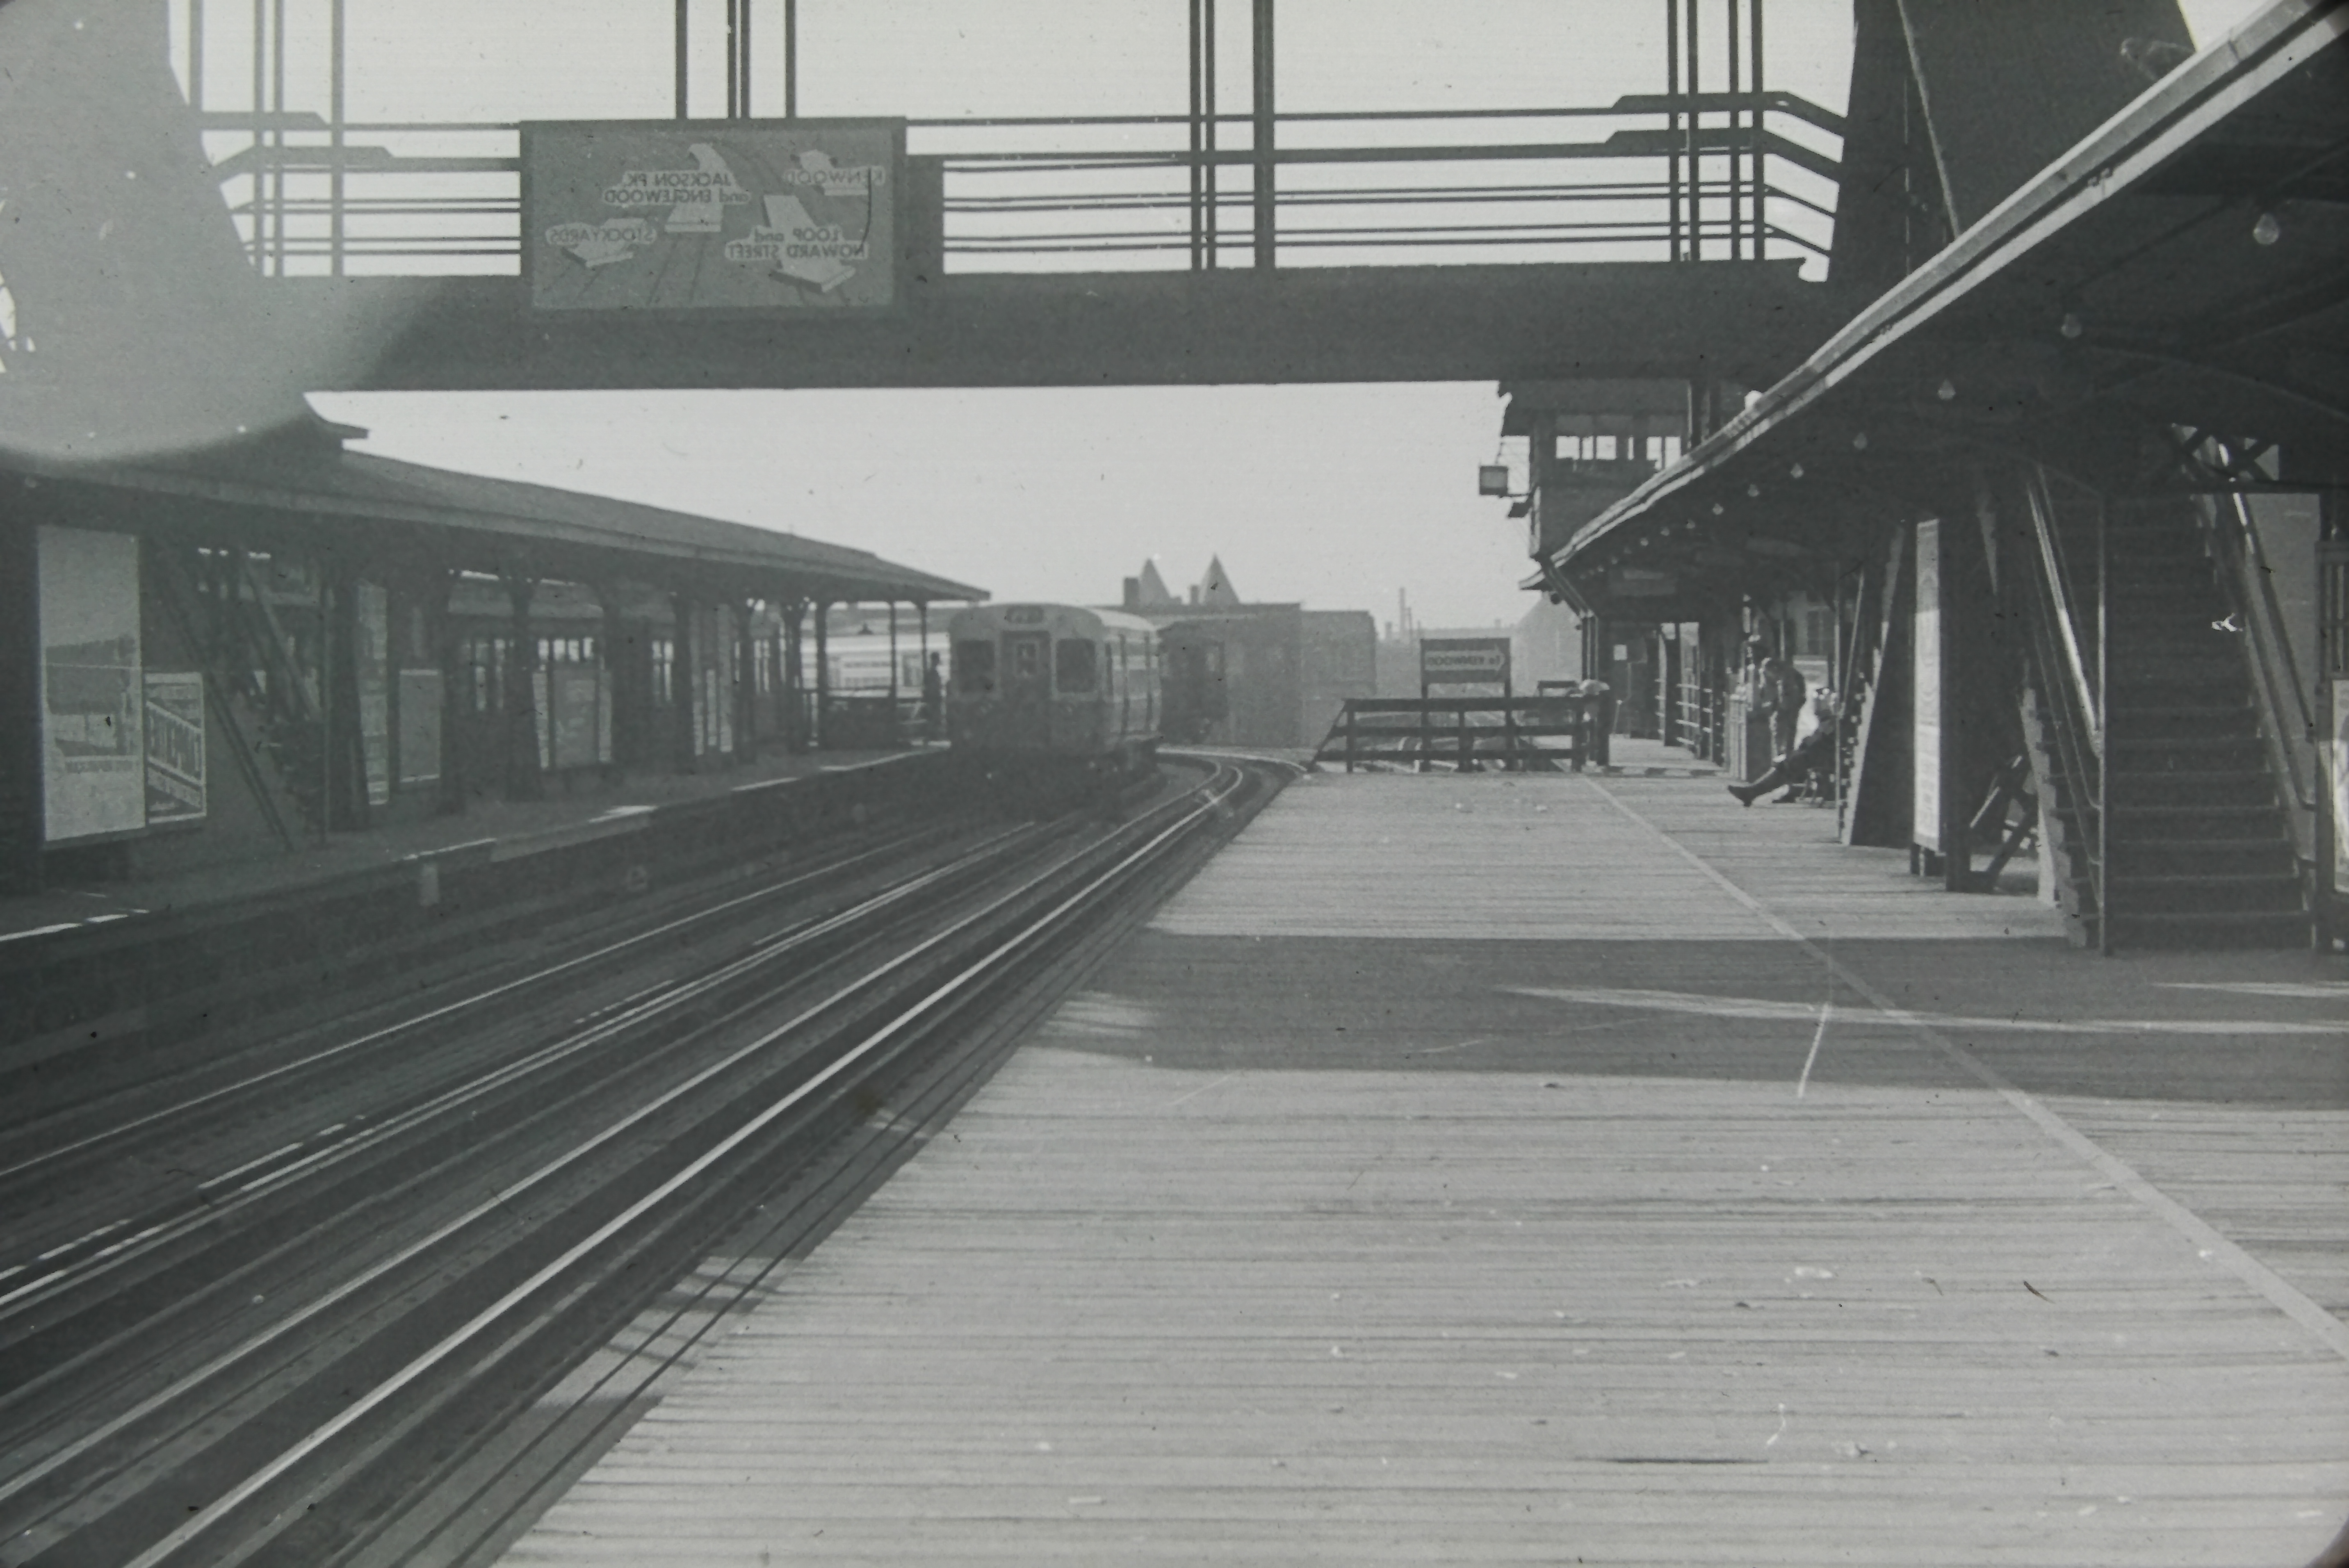
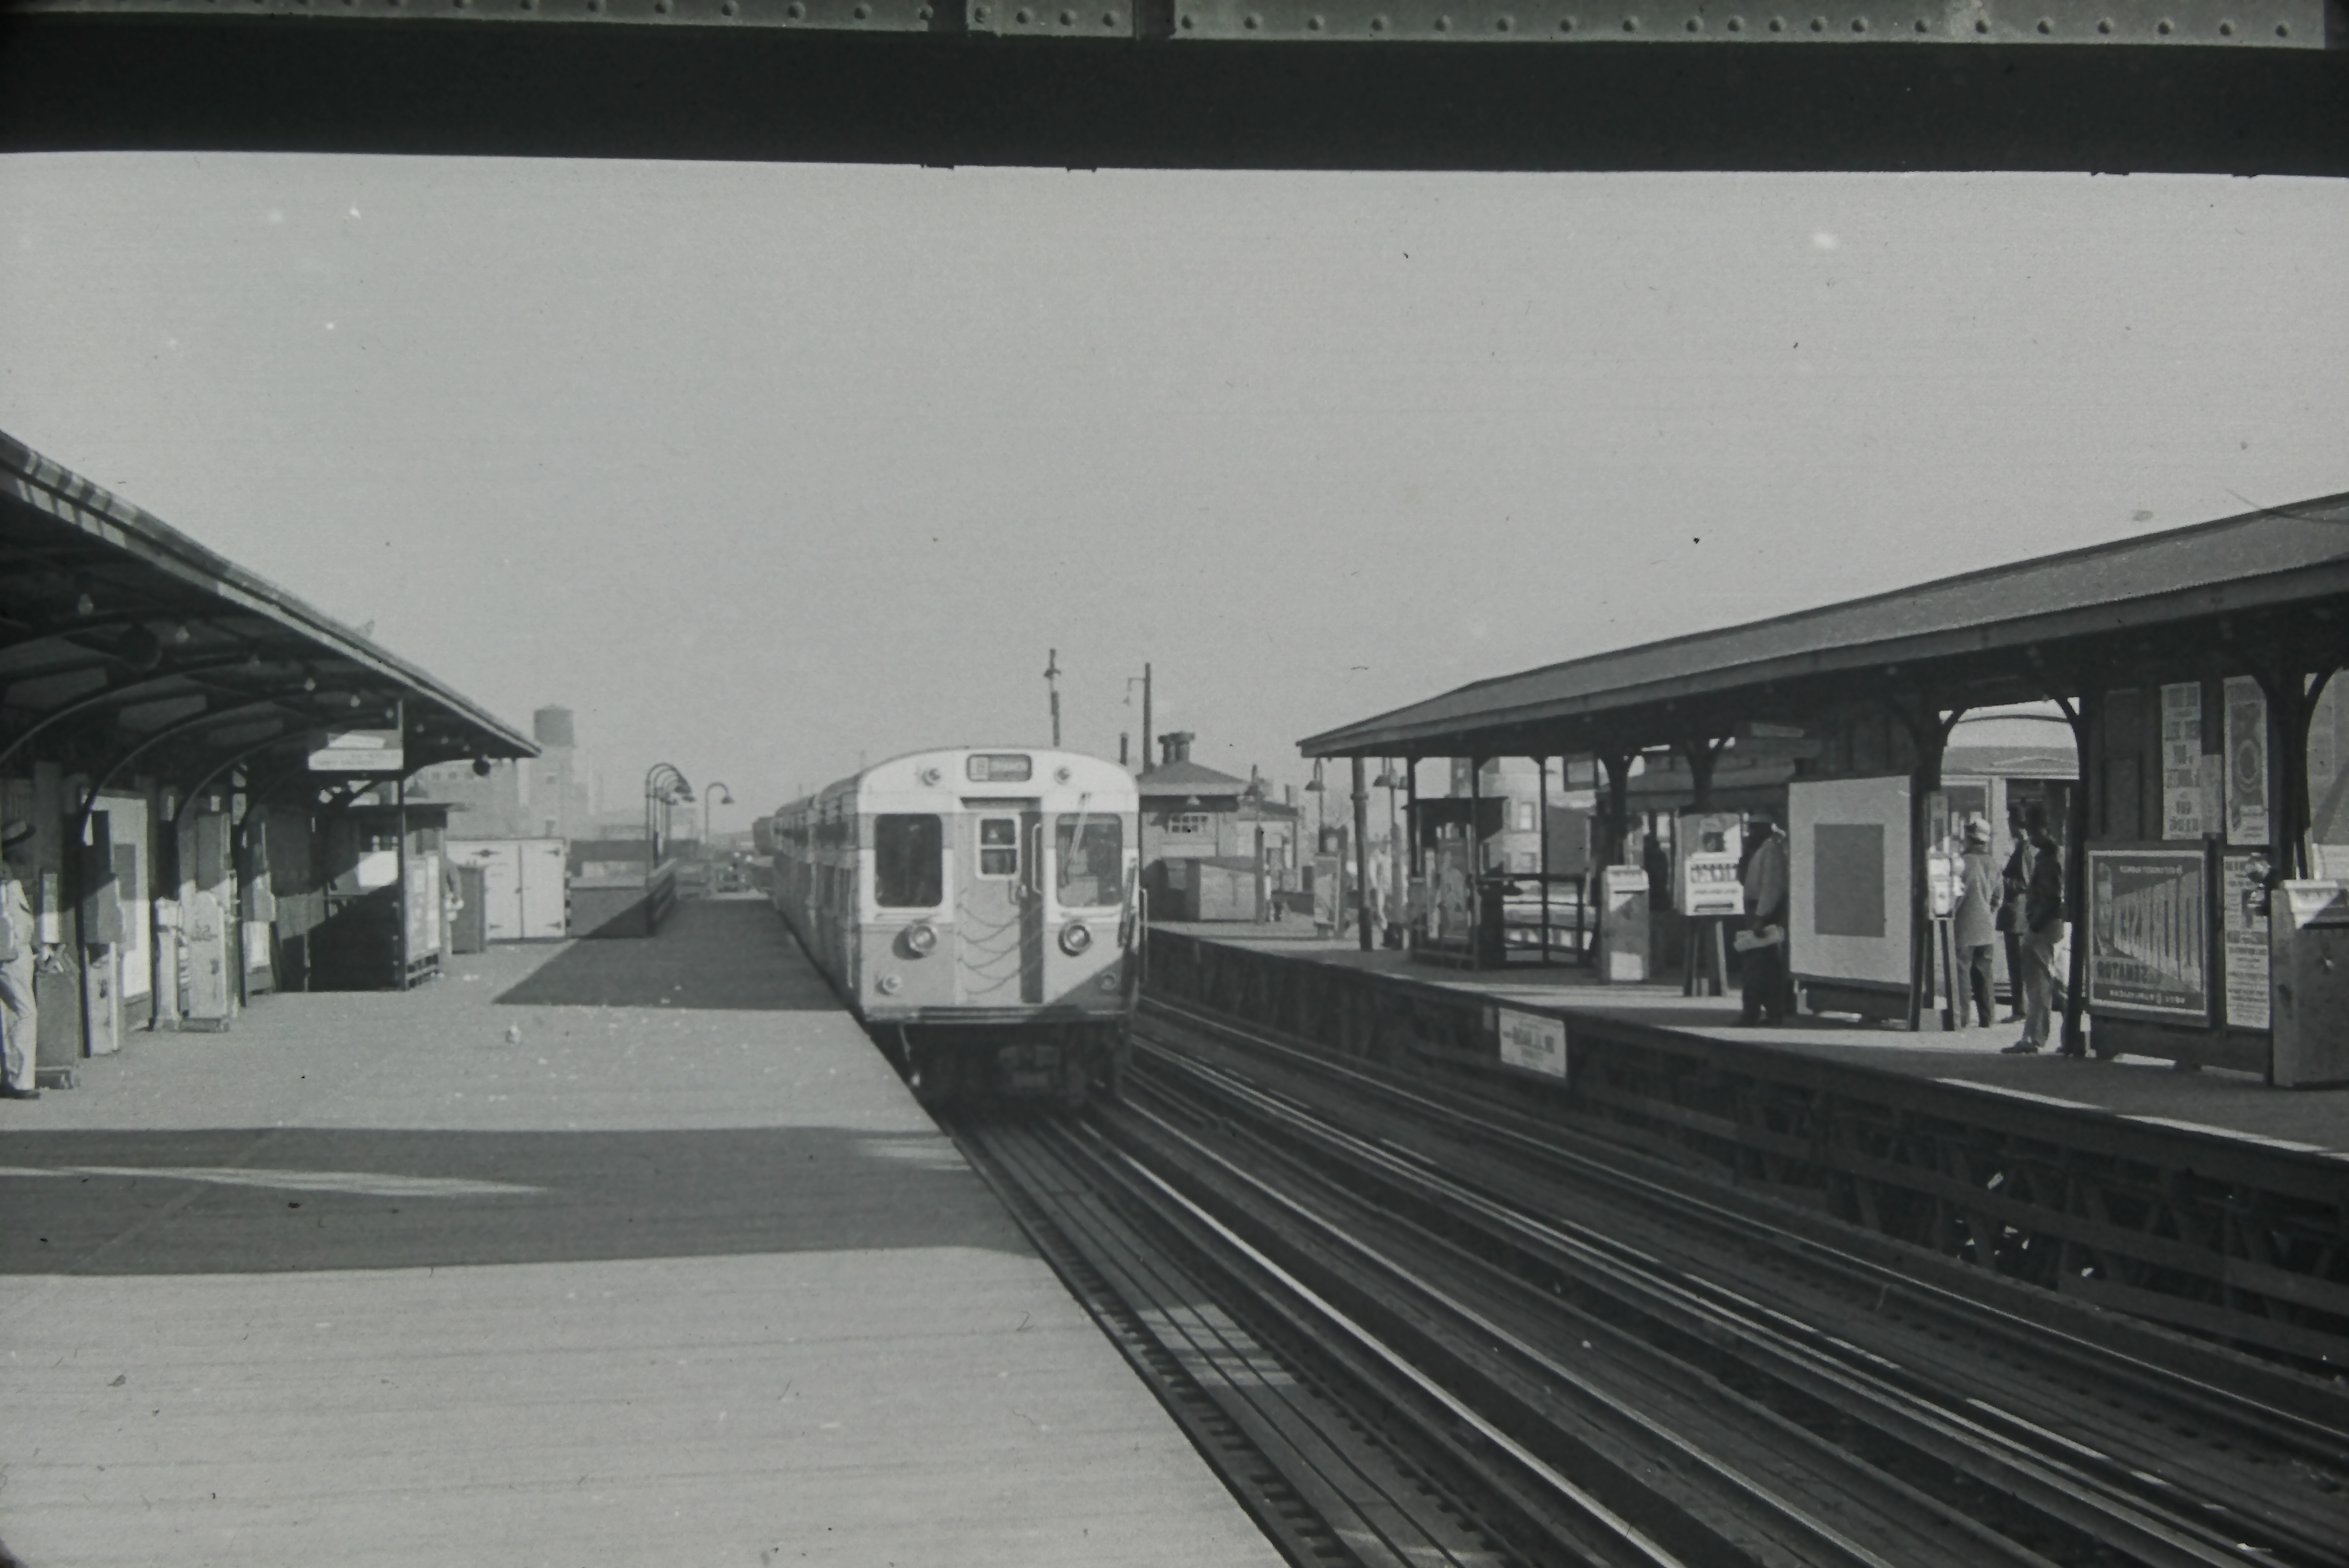
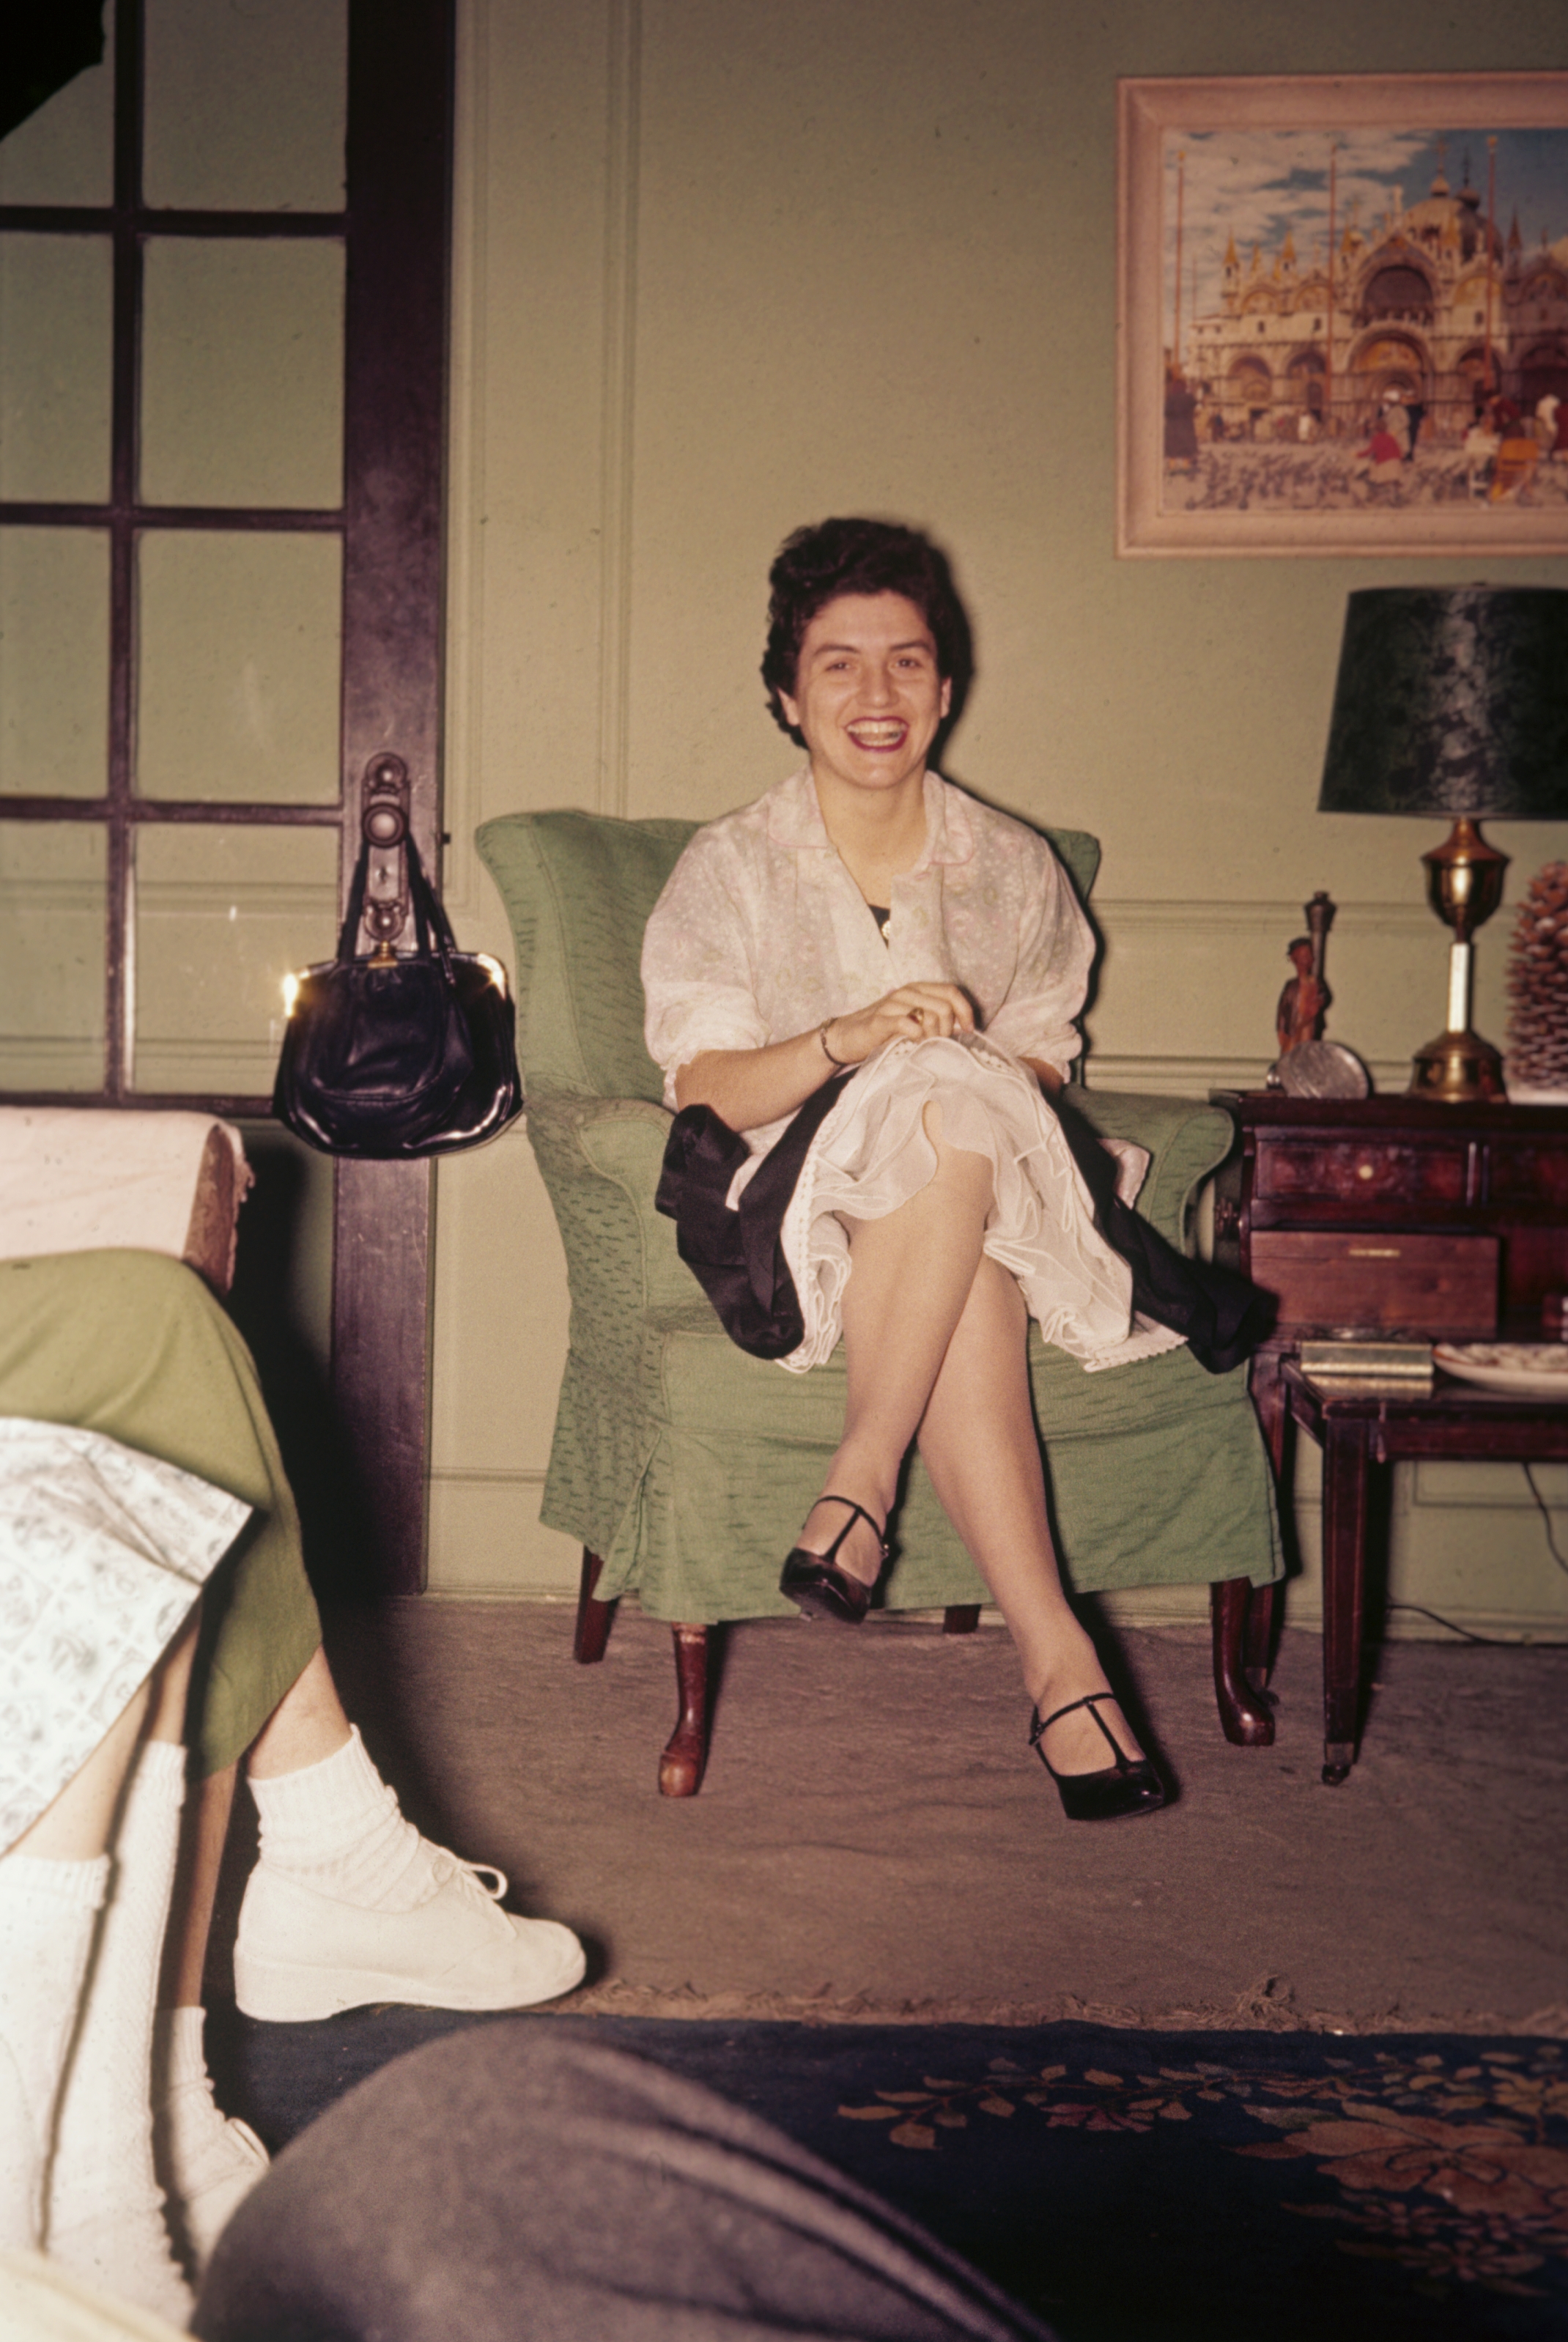
There are not many photos taken by Tony that survived other than the subway ones, but there happen to be a select few that he took of Marie and Jimmy as they were leaving for their honeymoon. Theyre in the lower deck, center frame.

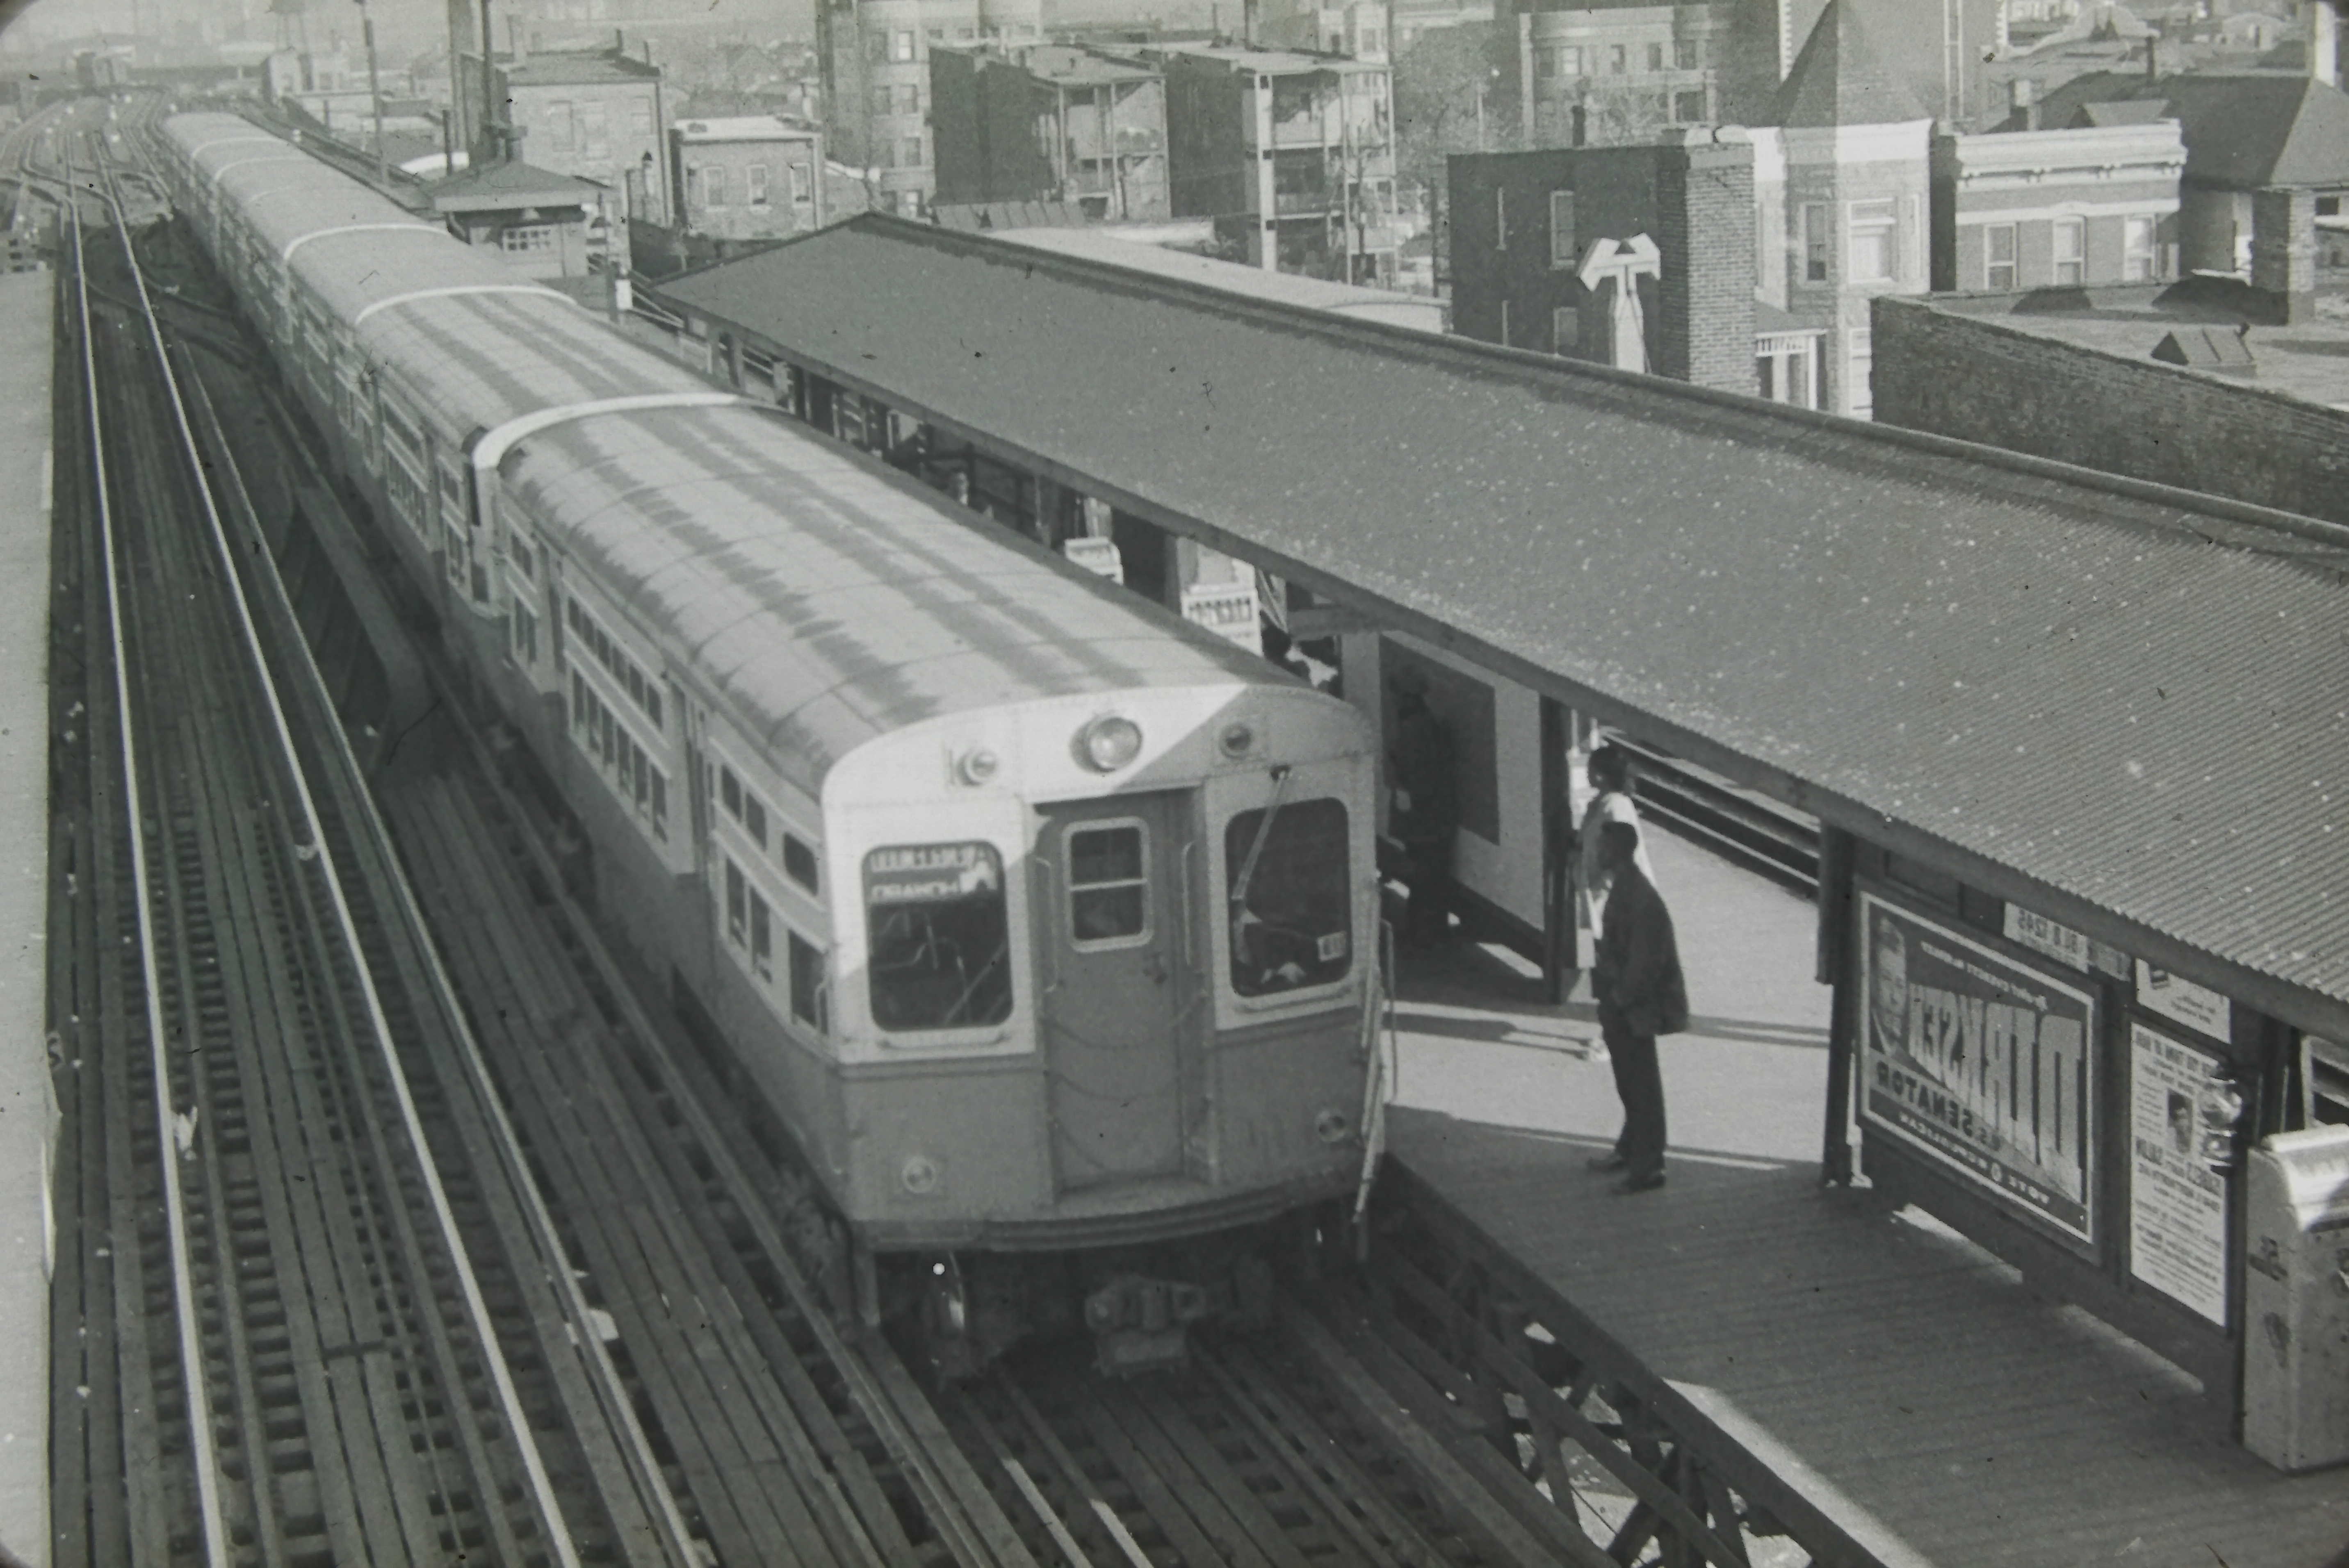
I also found some photos that my grandpa Howie took of Marie and her husband Jimmy, around the time they were working for the MTA.
III. Online Research
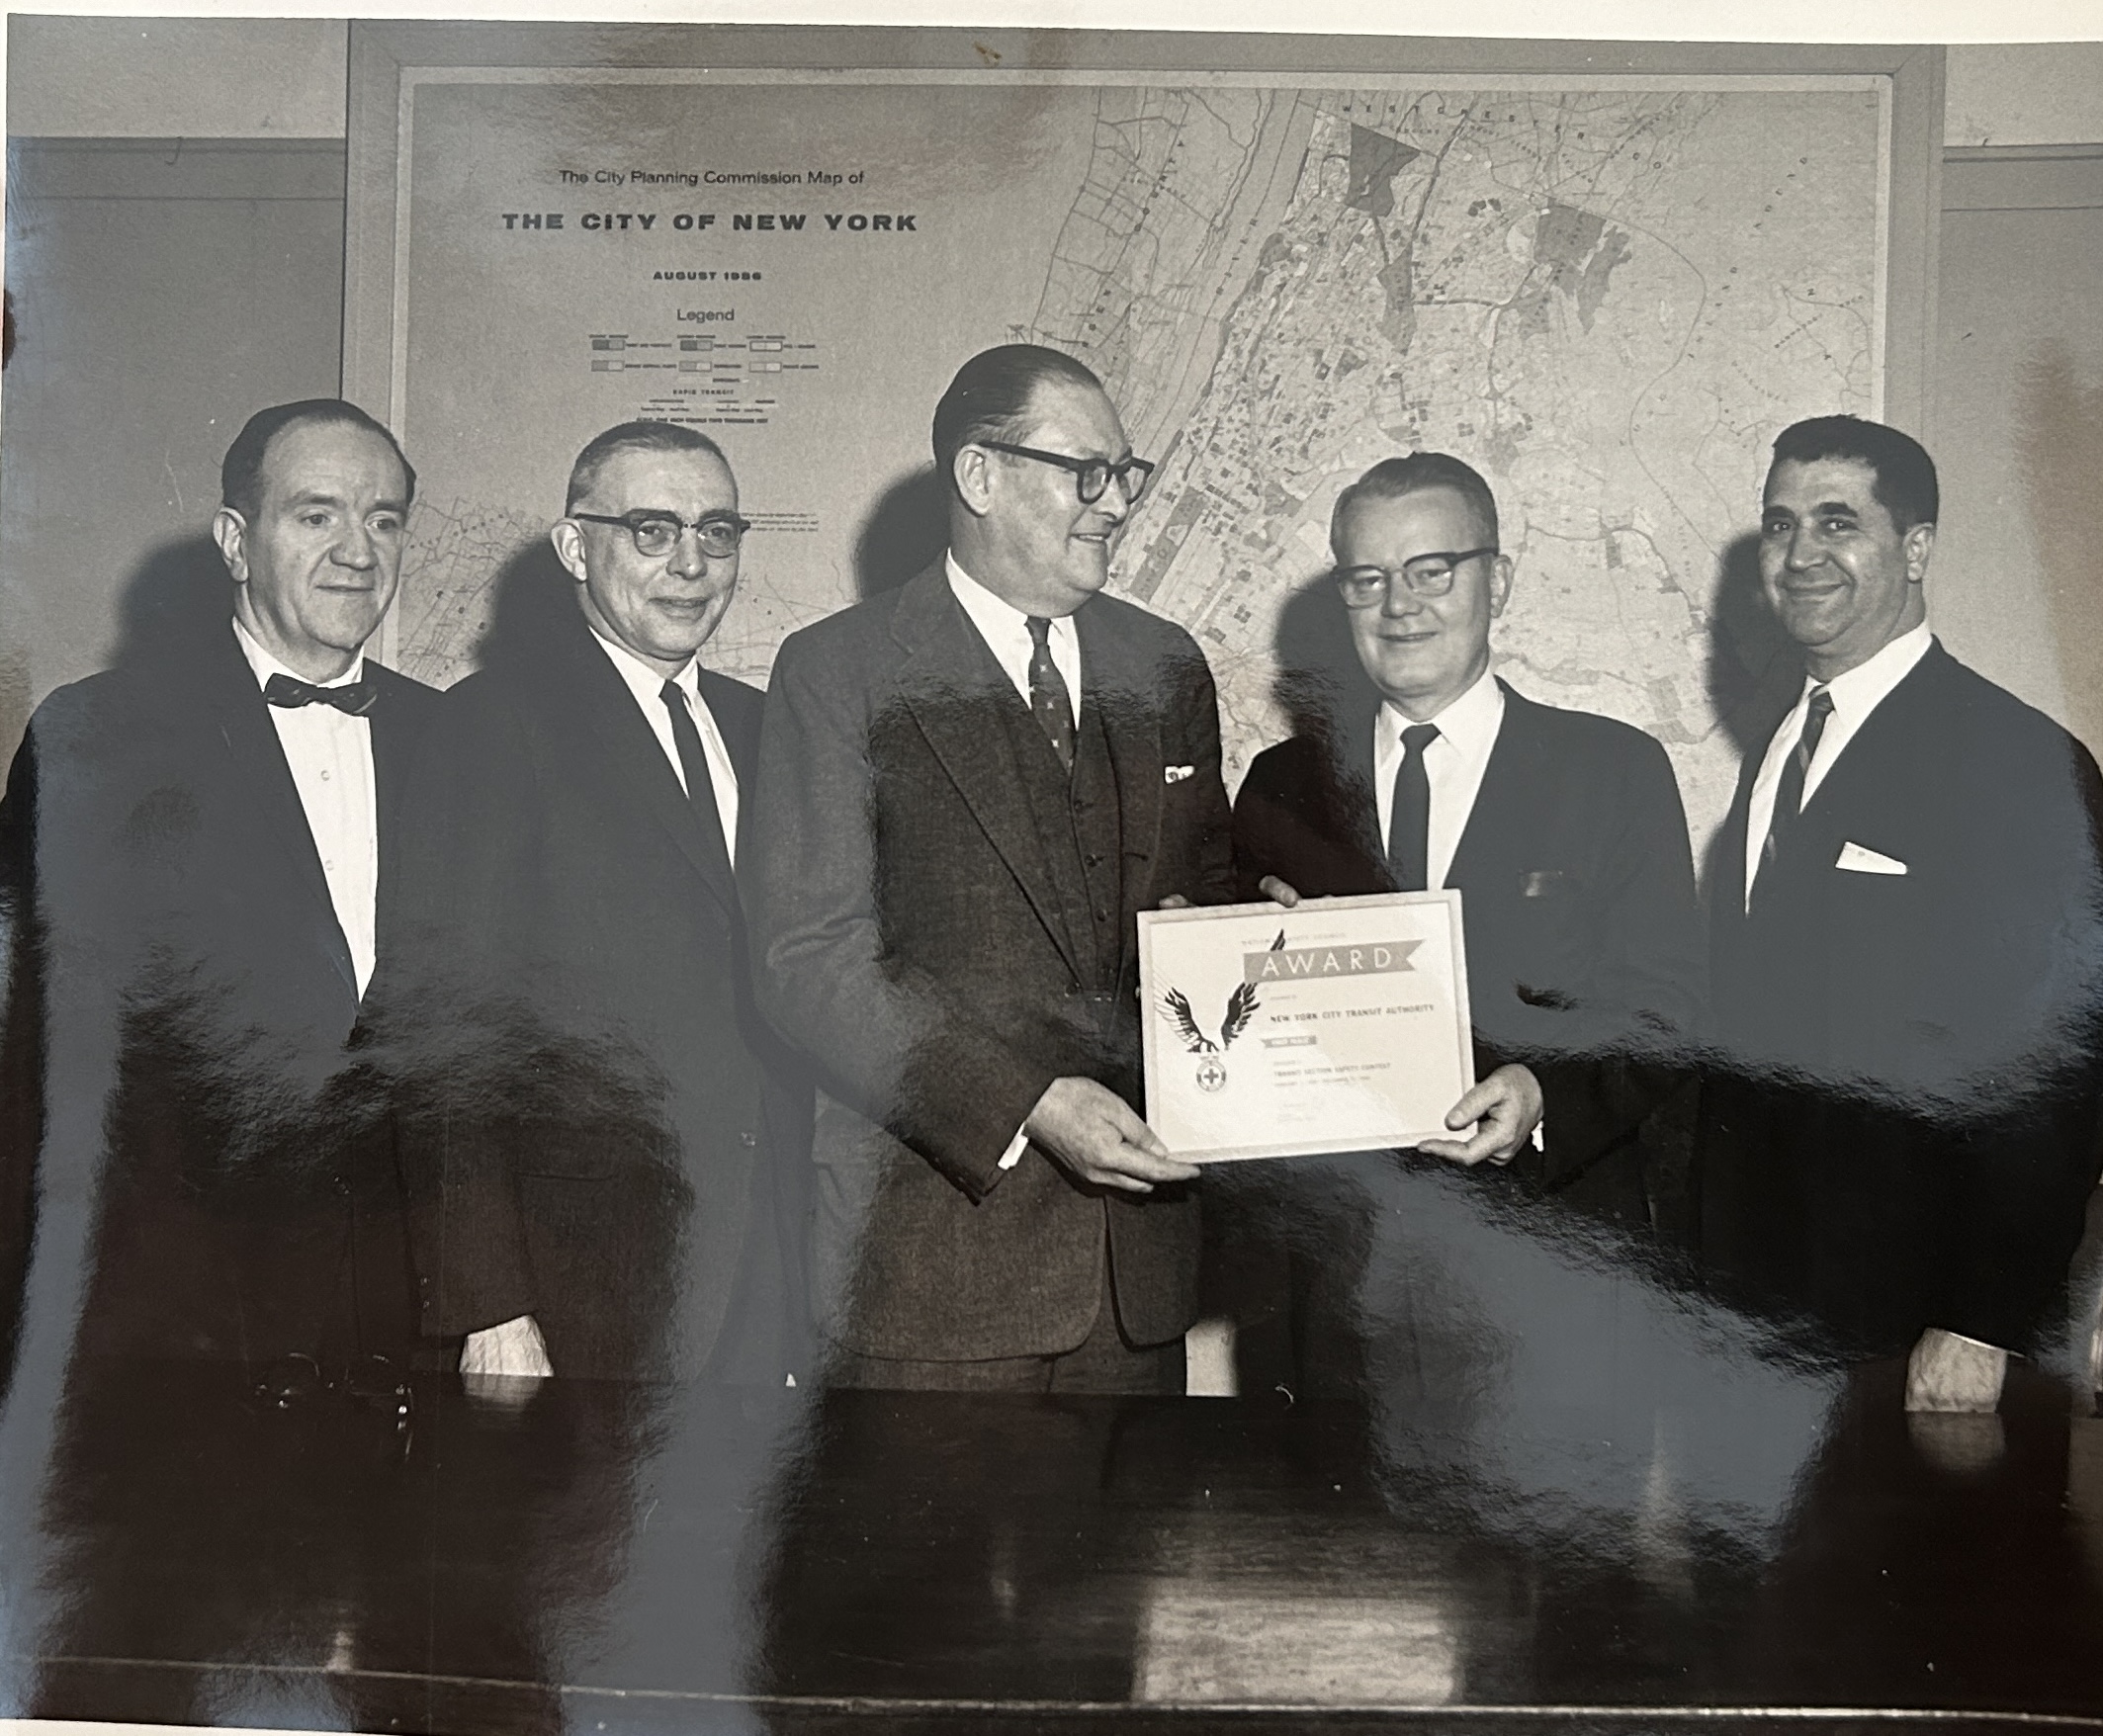
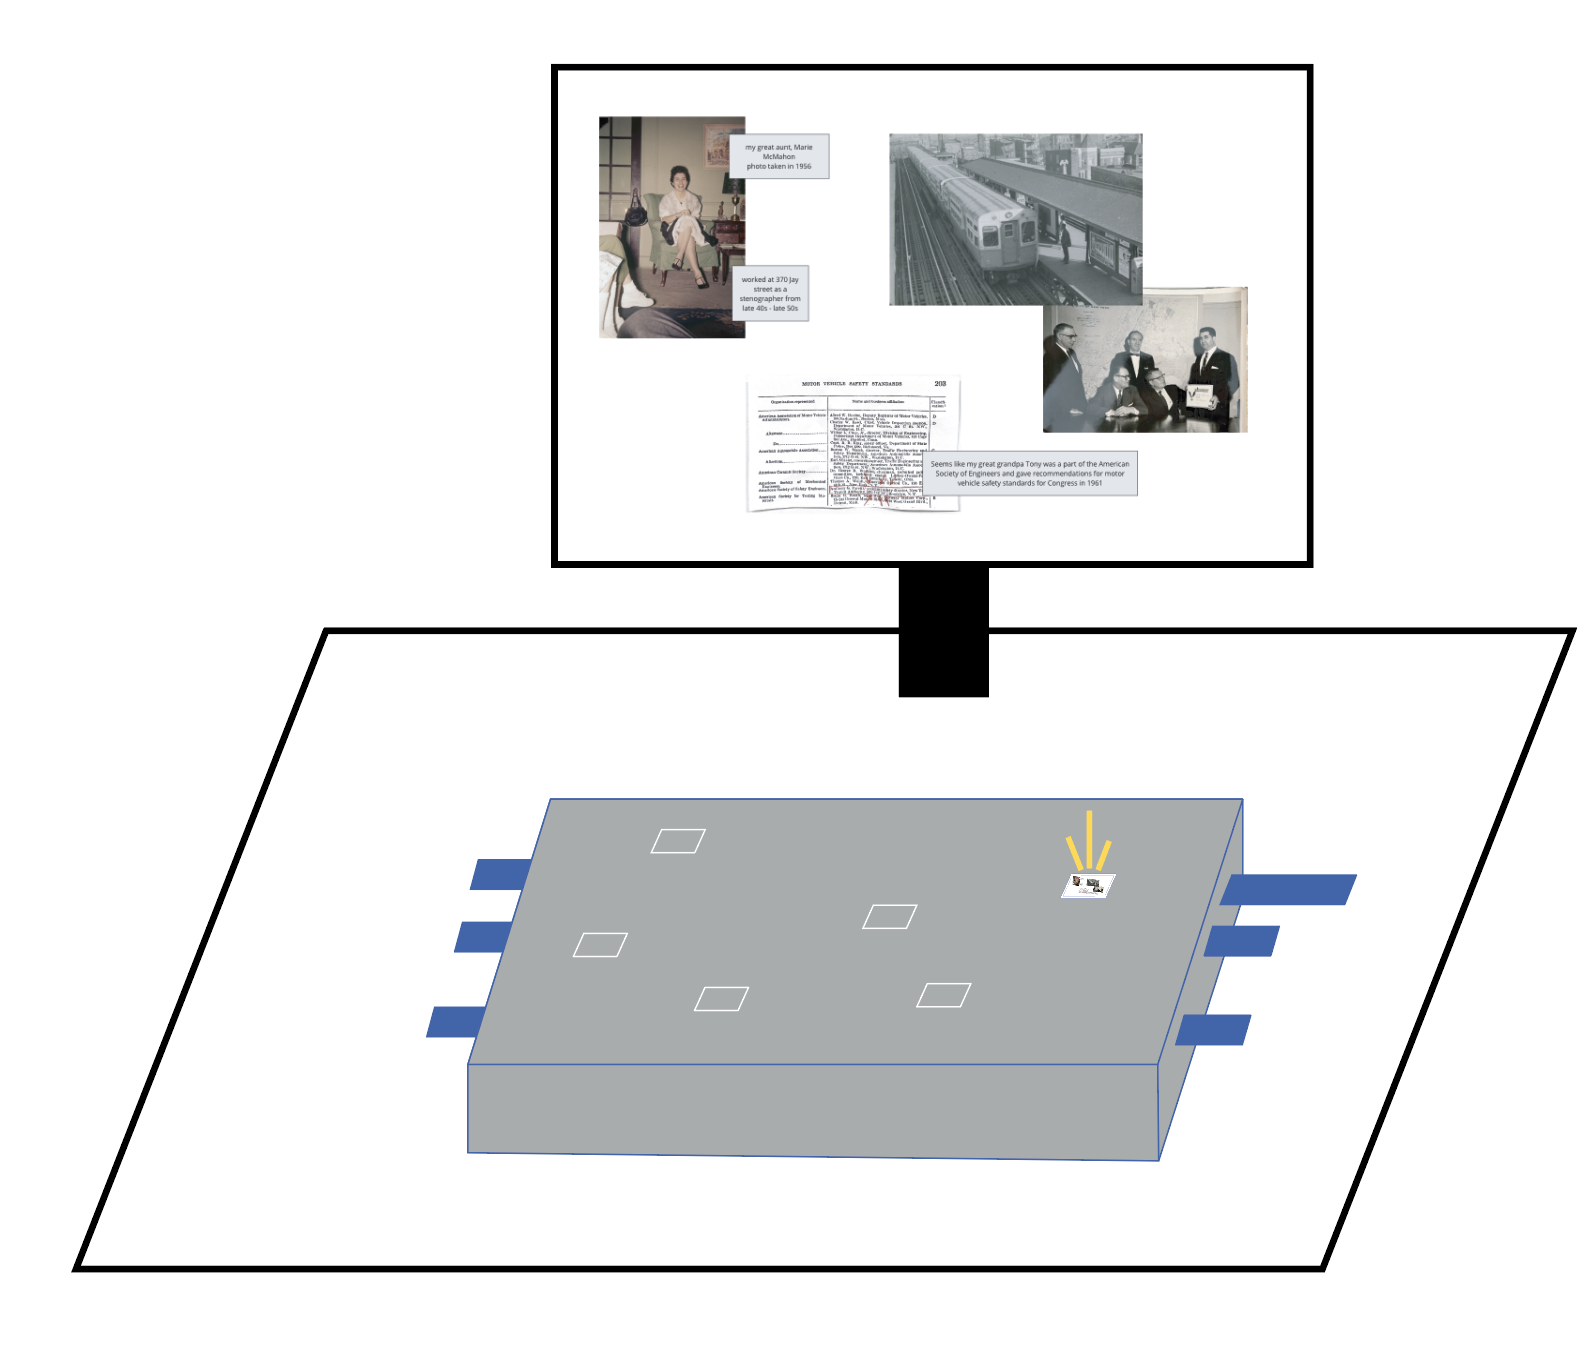
Marie had told me that Tony had a leadership role at the MTA - superintendent of safety or something, so I figured I’d be able to find something about him online. I searched “Anthony Paretti transit authority” on a whim and ended up finding his name in a record of hearings on motor vehicle safety standards.


I learned from this that in 1961, he testified as a representative from the American Society of Safety Engineers for these hearings. From what I read, he advocated for the benefits of wearing a seatbelt. Next to his name, it says he was the assistant safety director at the Transit Authority (the old name of the MTA), and worked at 370 Jay Street. This was a great find.
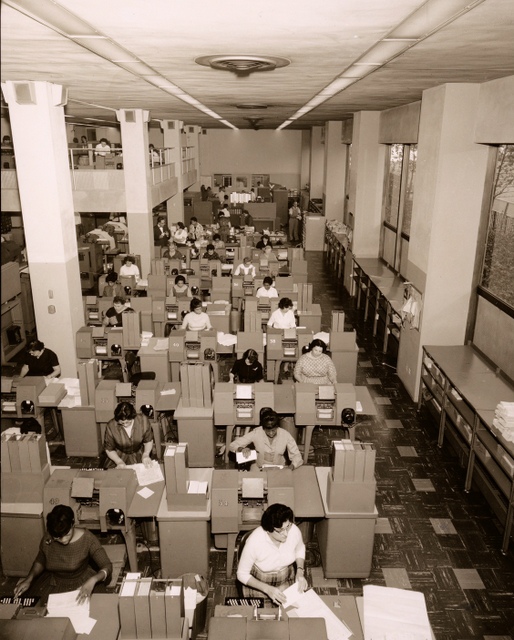

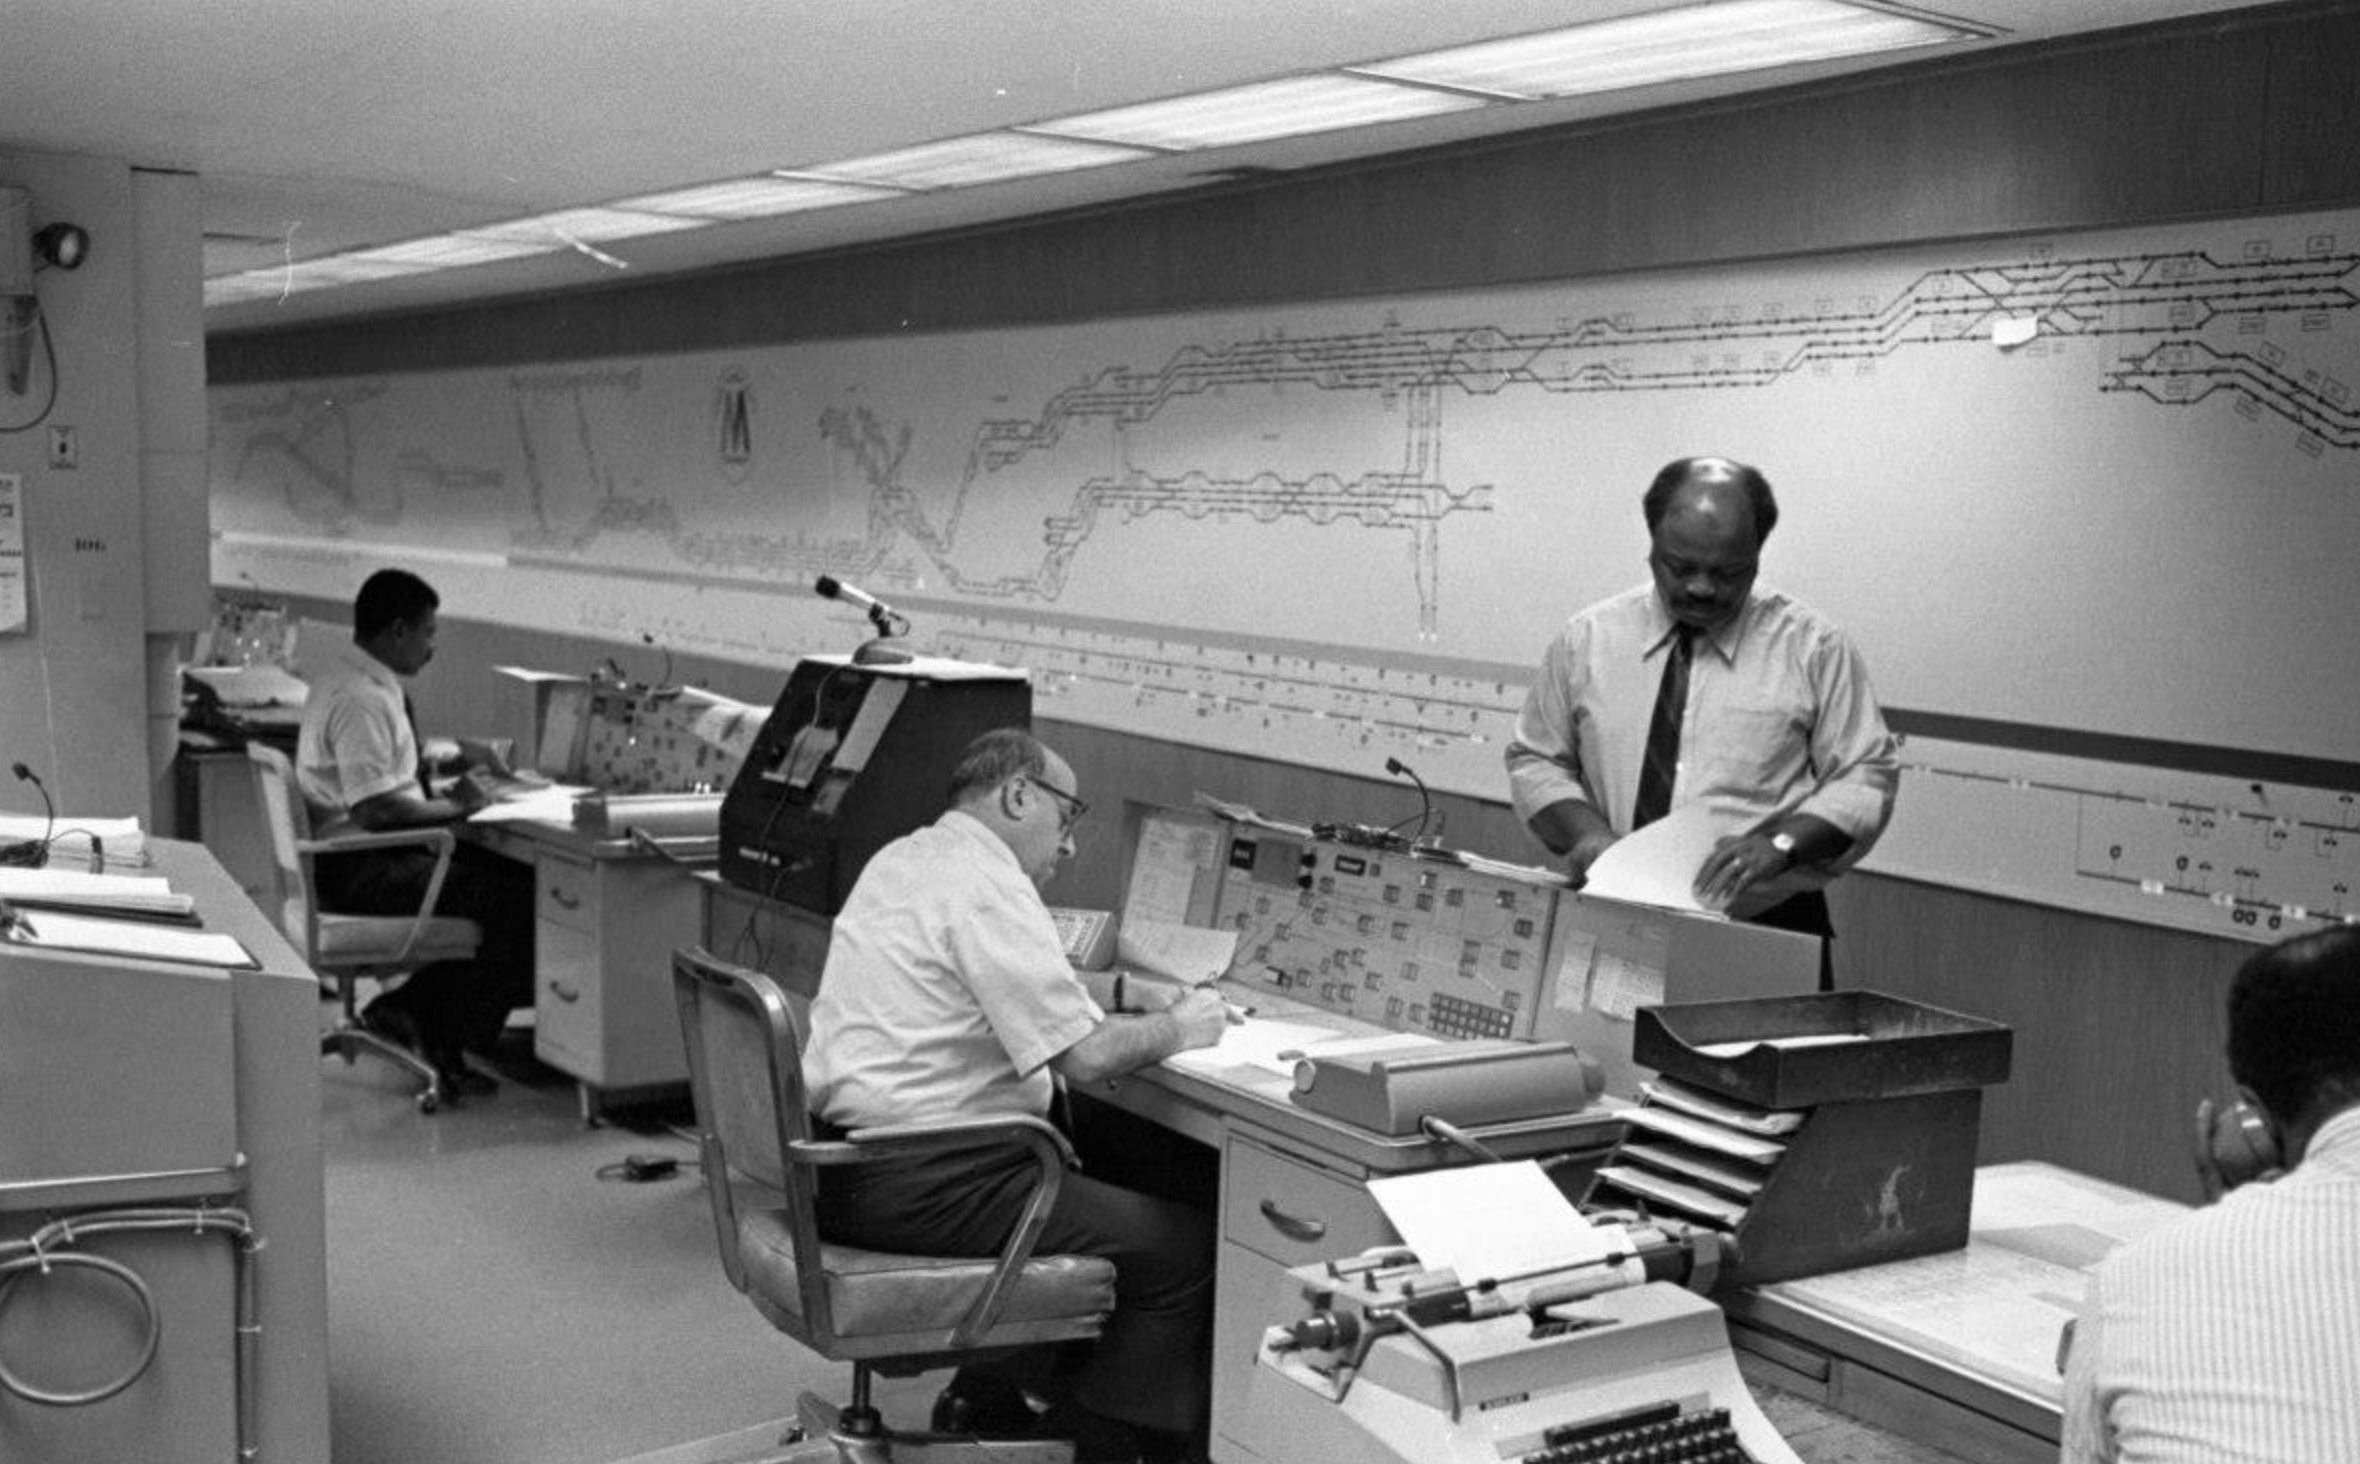
The New York Transit Museum has a huge online collection of photographs that I looked through as well. These are some I found taken at 370 Jay Street.
PART 3: Ideation + Planning
When I was brainstorming what to do with all of this research, I kept coming back to the word “reveal” -- revealing this shared connection between my great aunt and I, this connection between myself and family members I never met, and revealing more about this building I spend almost every day in. With how much I had learned, I decided to move away from creating a concrete, comprehensive history of my family and the building, and instead to just showcase what I had learned so far.
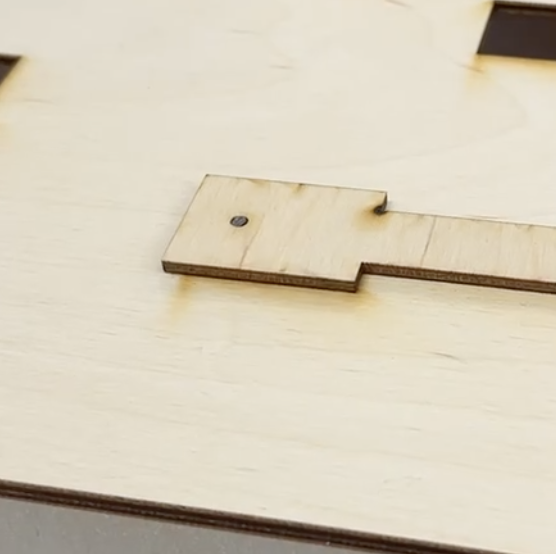
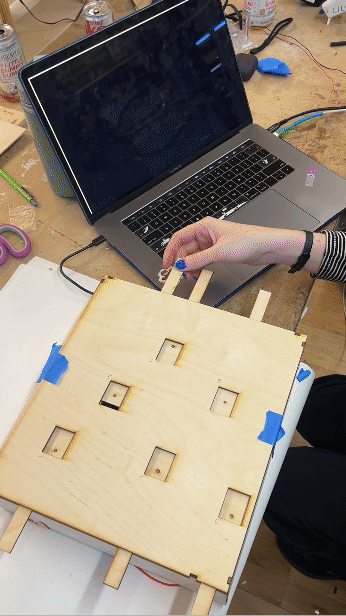
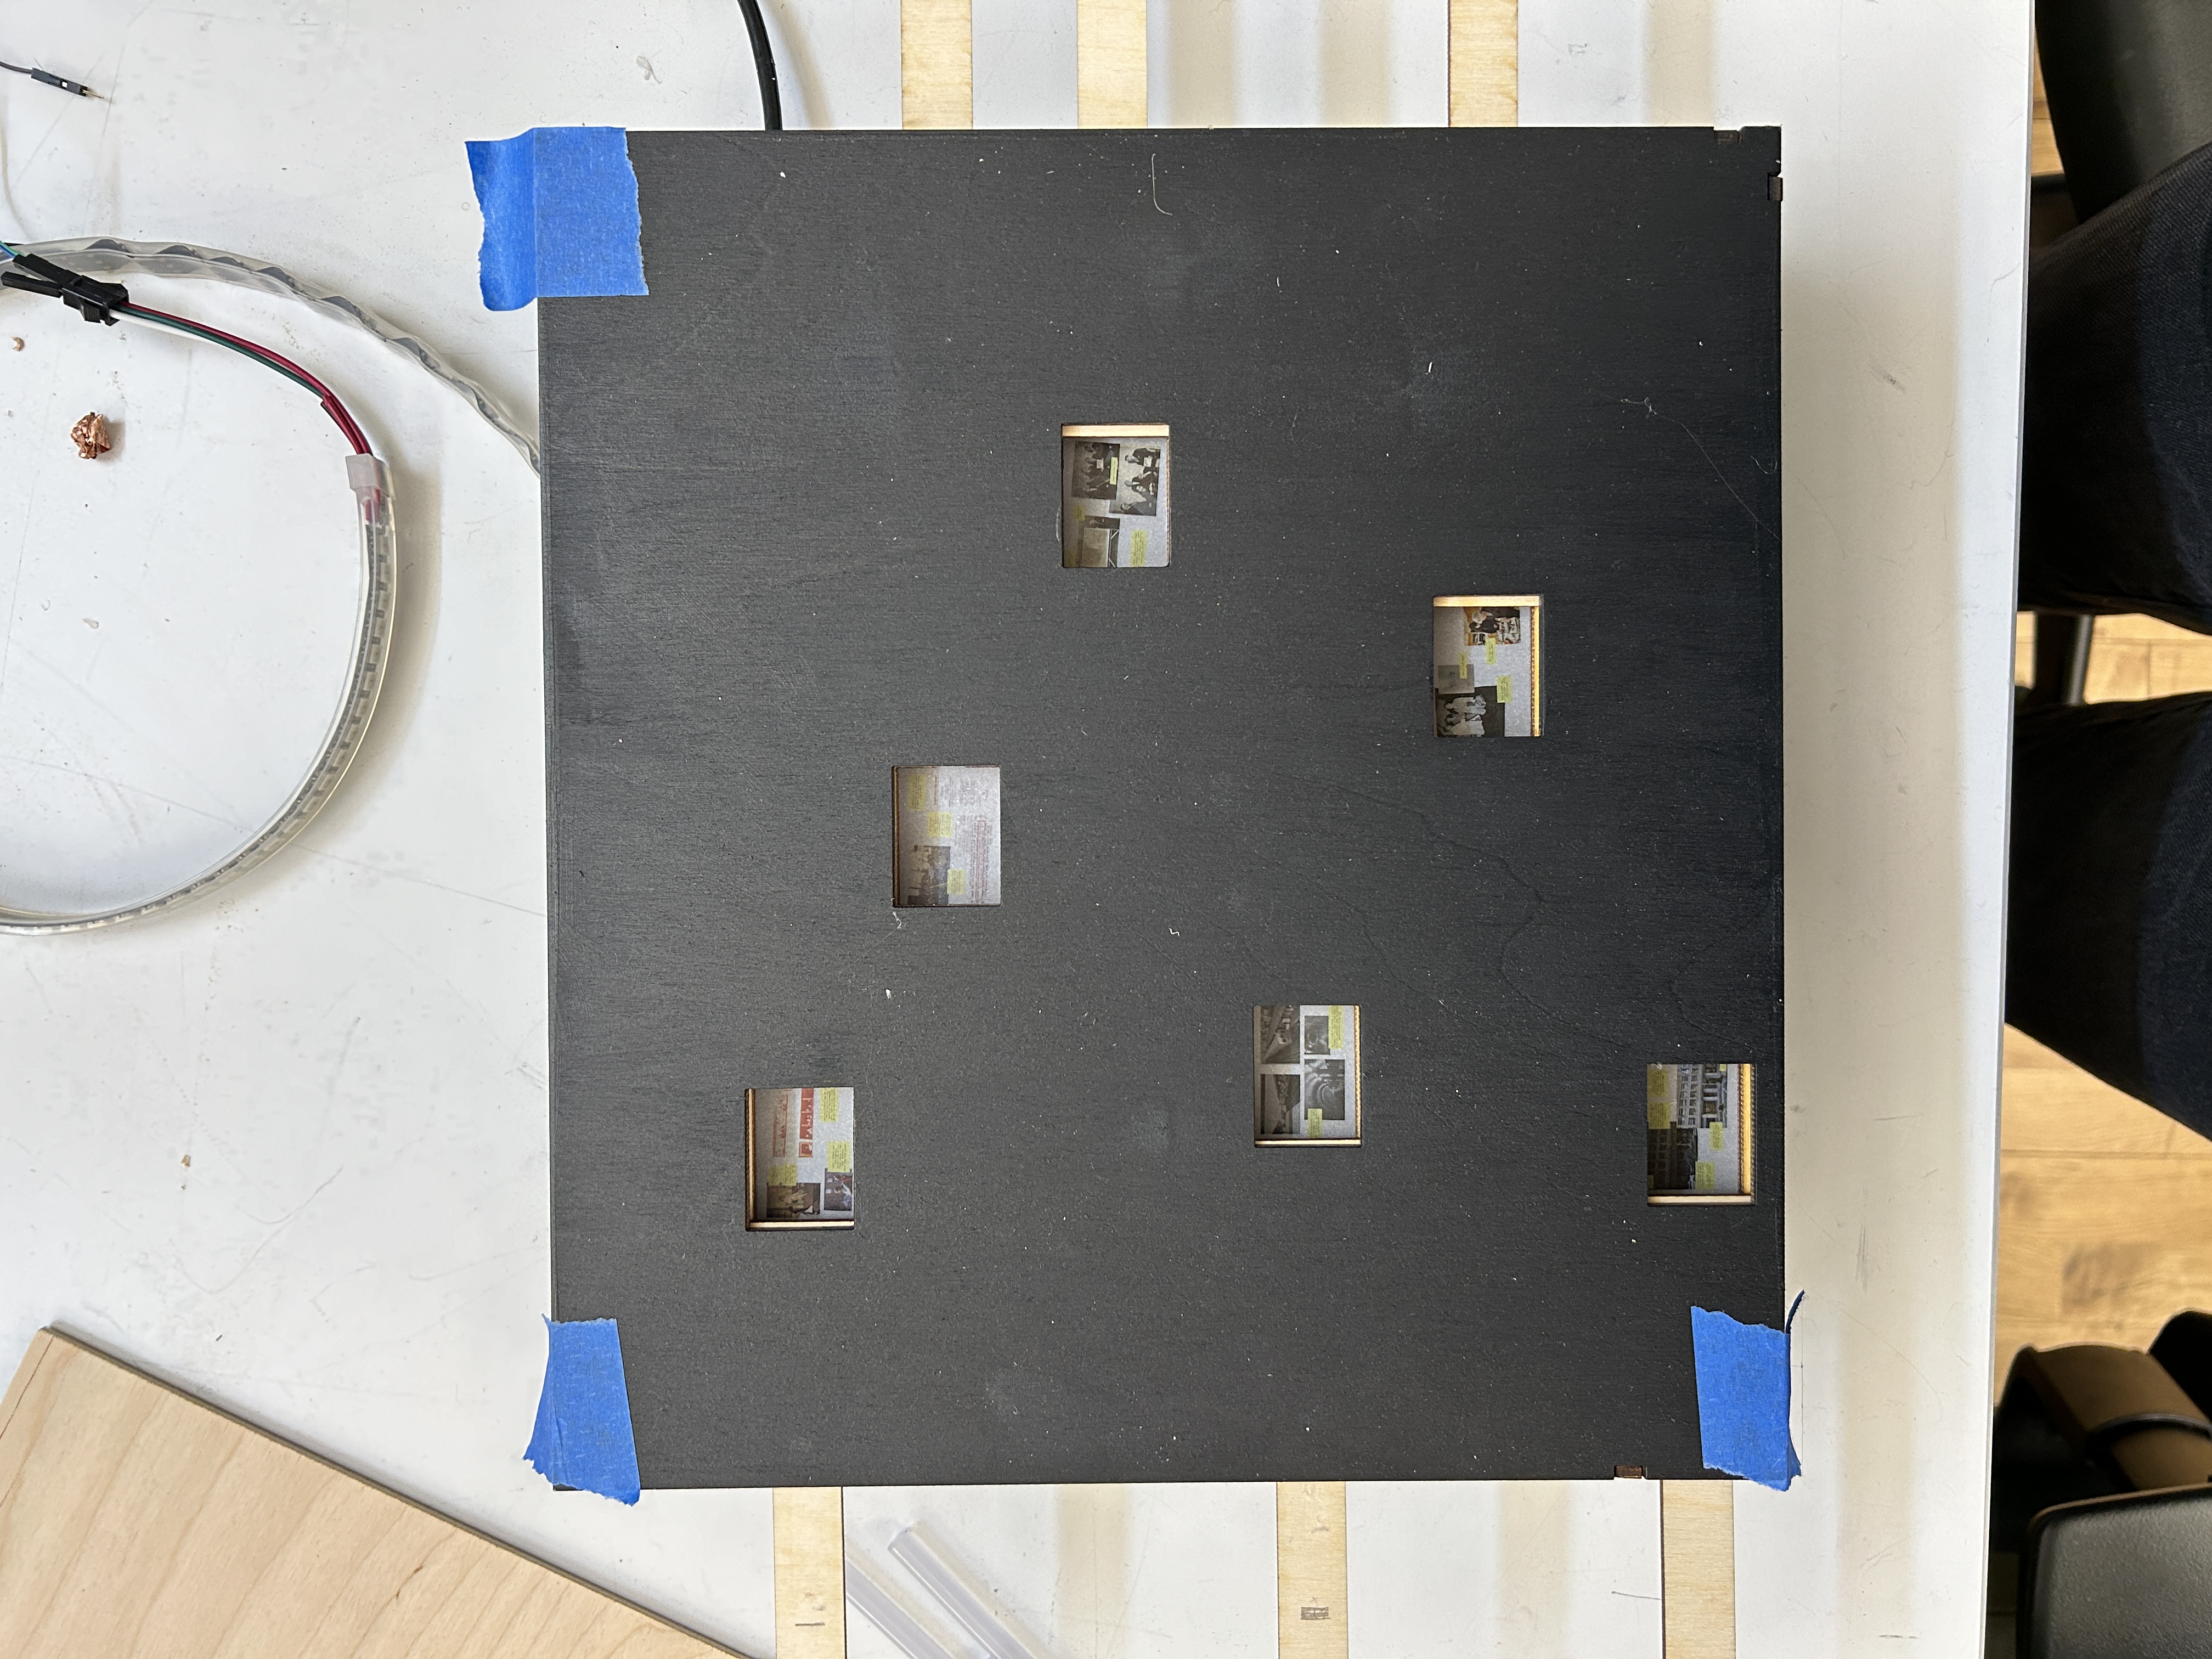
After a lot of sketches, I decided to go with a form I had come up with for another project, an educational toy I made a few months prior. Instead of revealing the answer to a question about bees and honey, I’d reveal an image, or collage of ima


Paper sketches

Digital planning
I spent a lot of time figuring out what the physical form would look like. I went through many ideations -- the facade of the building, a blueprint, a family photo album. This was what I ended up with:
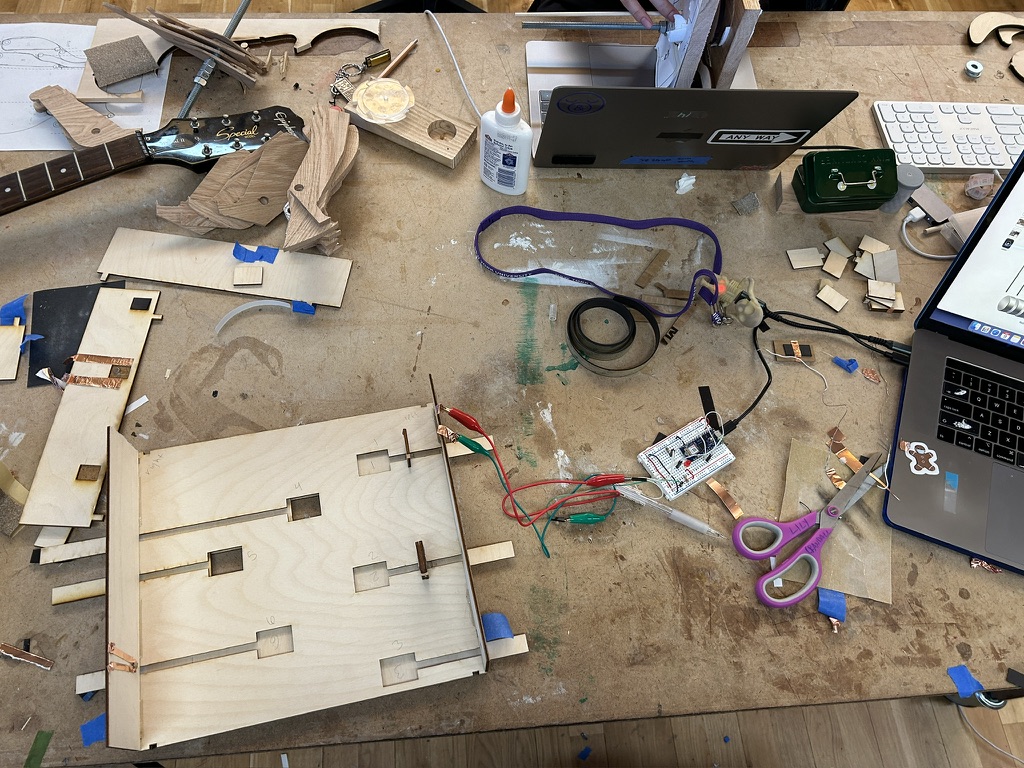
PART 4: Fabrication
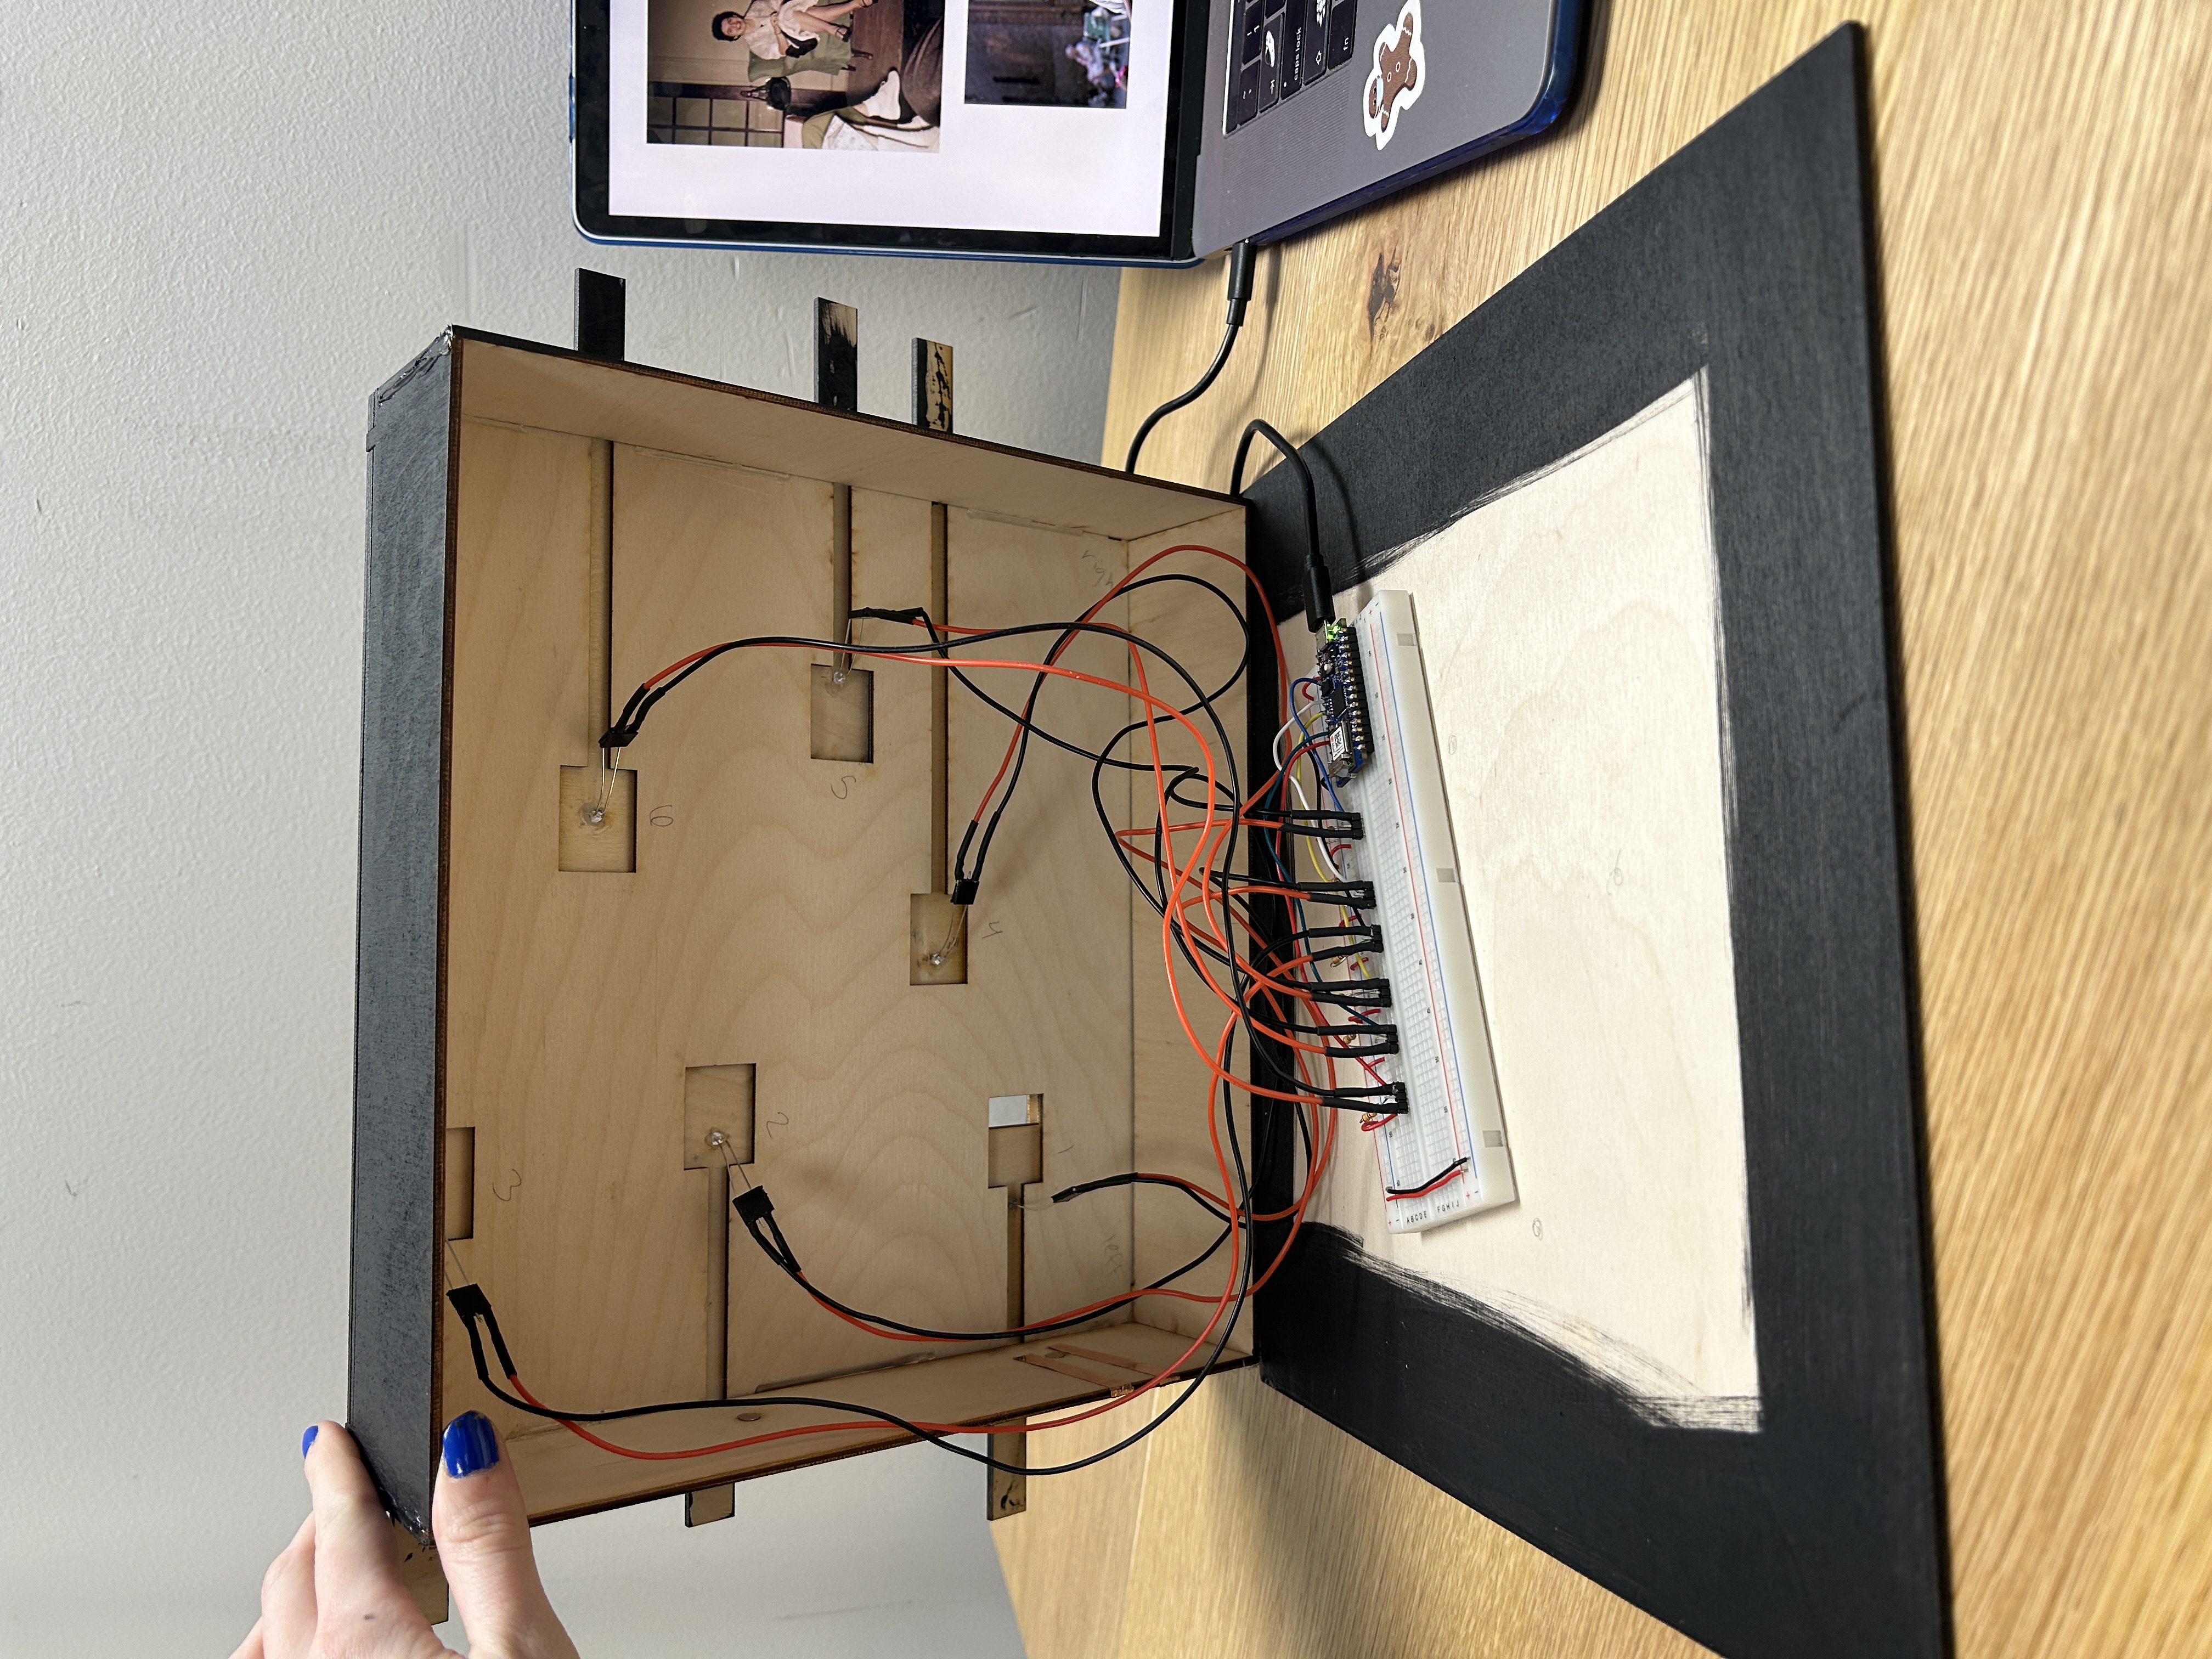
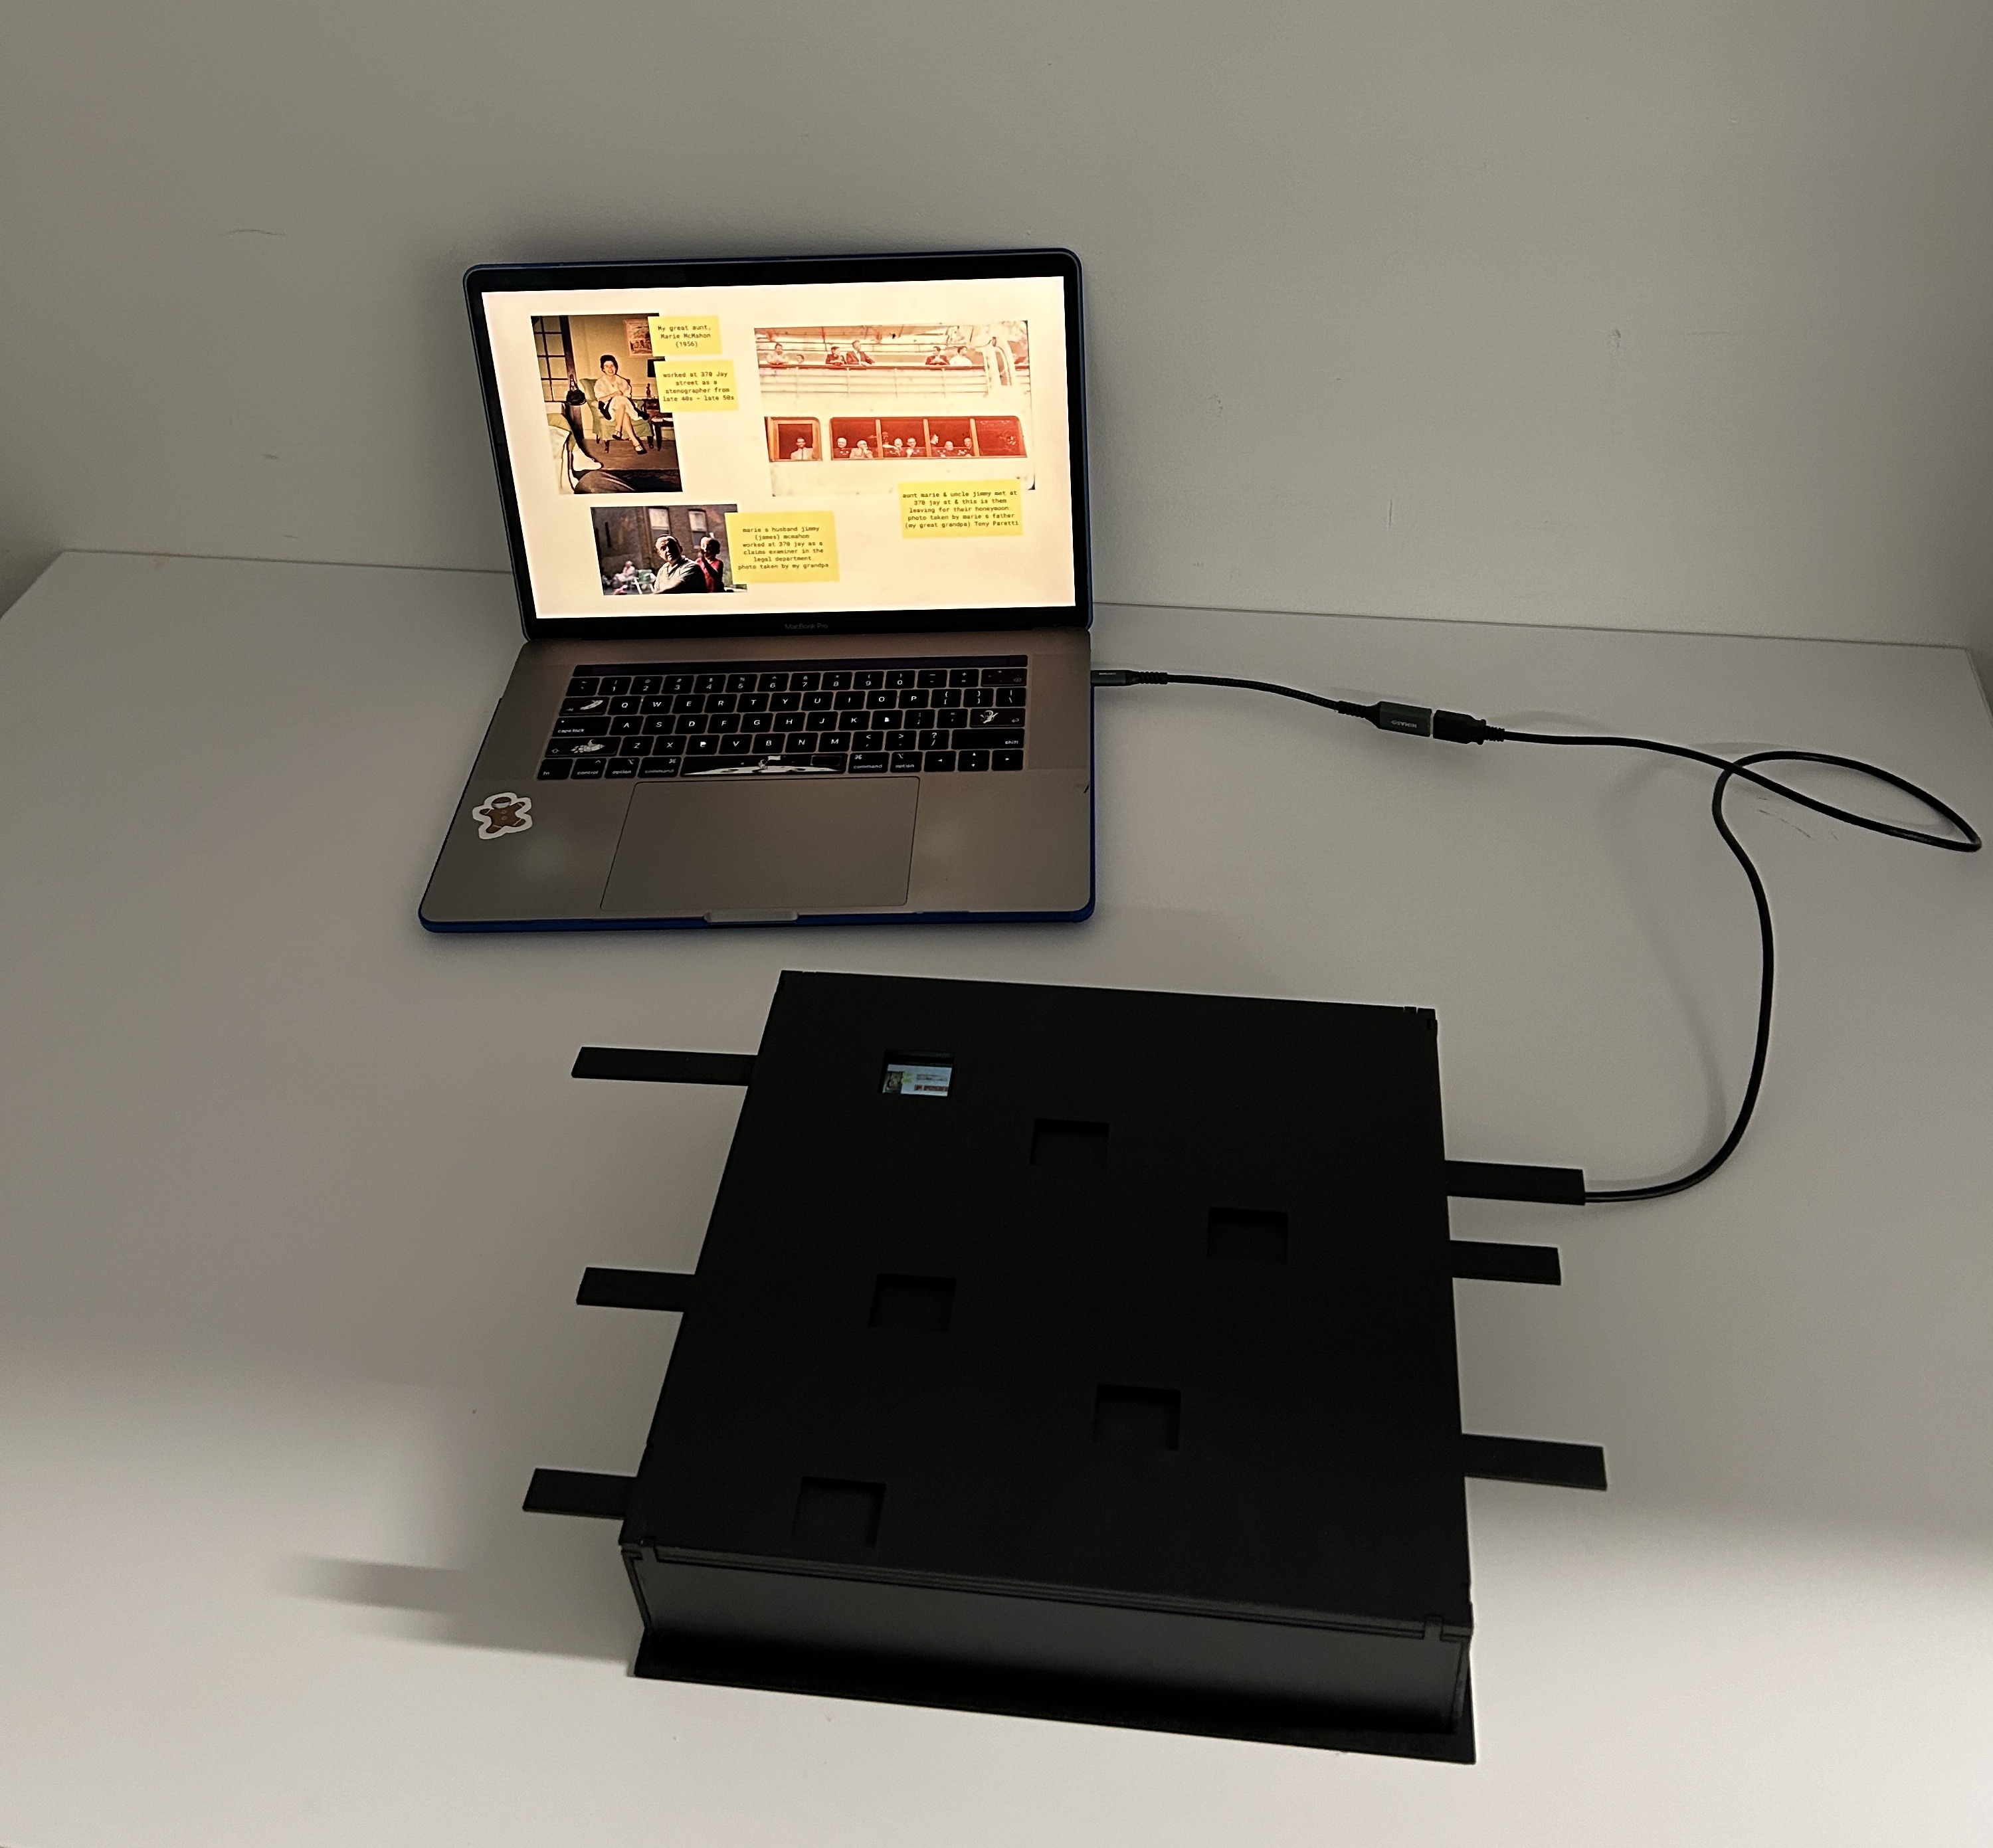
Although I could use the same designs I created for Honey by the Numbers, the challenge with this project was for the tabs to act as a digital switch, sending data to a p5 sketch to trigger a specific collage to be shown on the screen. I experimented with a few different types of switches.
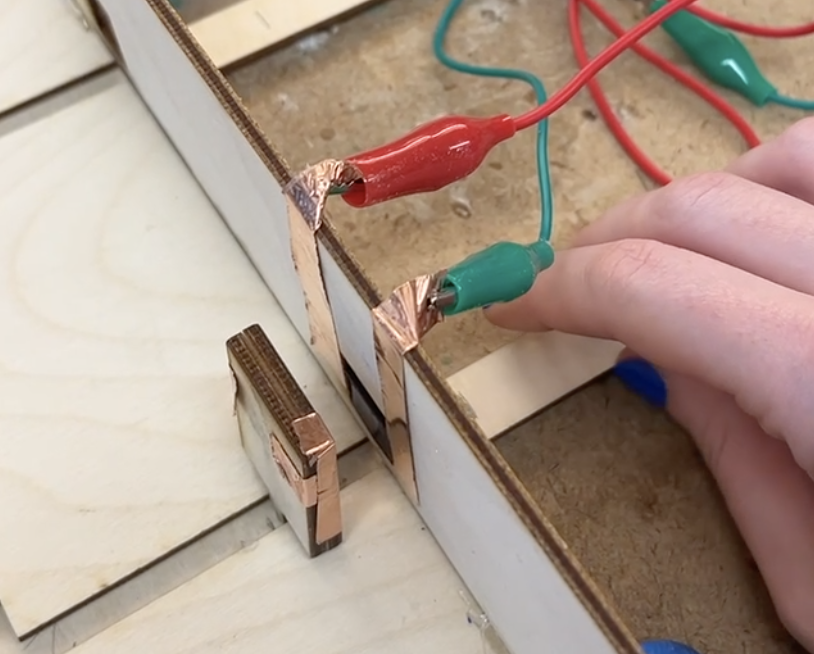
Circuit #1: Copper tape
I thought it would be simple to have a piece of copper tape on the underside of each tab close a circuit when its pulled, by connecting two pieces of copper tape on the side of the box. This kind of worked, but it was hard to get a stable connection. It worked only while I pressed the tab to the two pieces of tape. This was not ideal.

Circuit #2: Copper tape + magnets
I tried adding a magnet to both the side of the box and the tab in the hopes that this would create a stronger connection. Again, this kind of worked. Definitely better than before, but not very stable. If I let go of it, the light turned off.

Circuit #3: Inlaying the magnets
I forgot to record this, but I tried inlaying the magnets so they were flush with the side of the box and the tab. This also did not really work.
Moving on
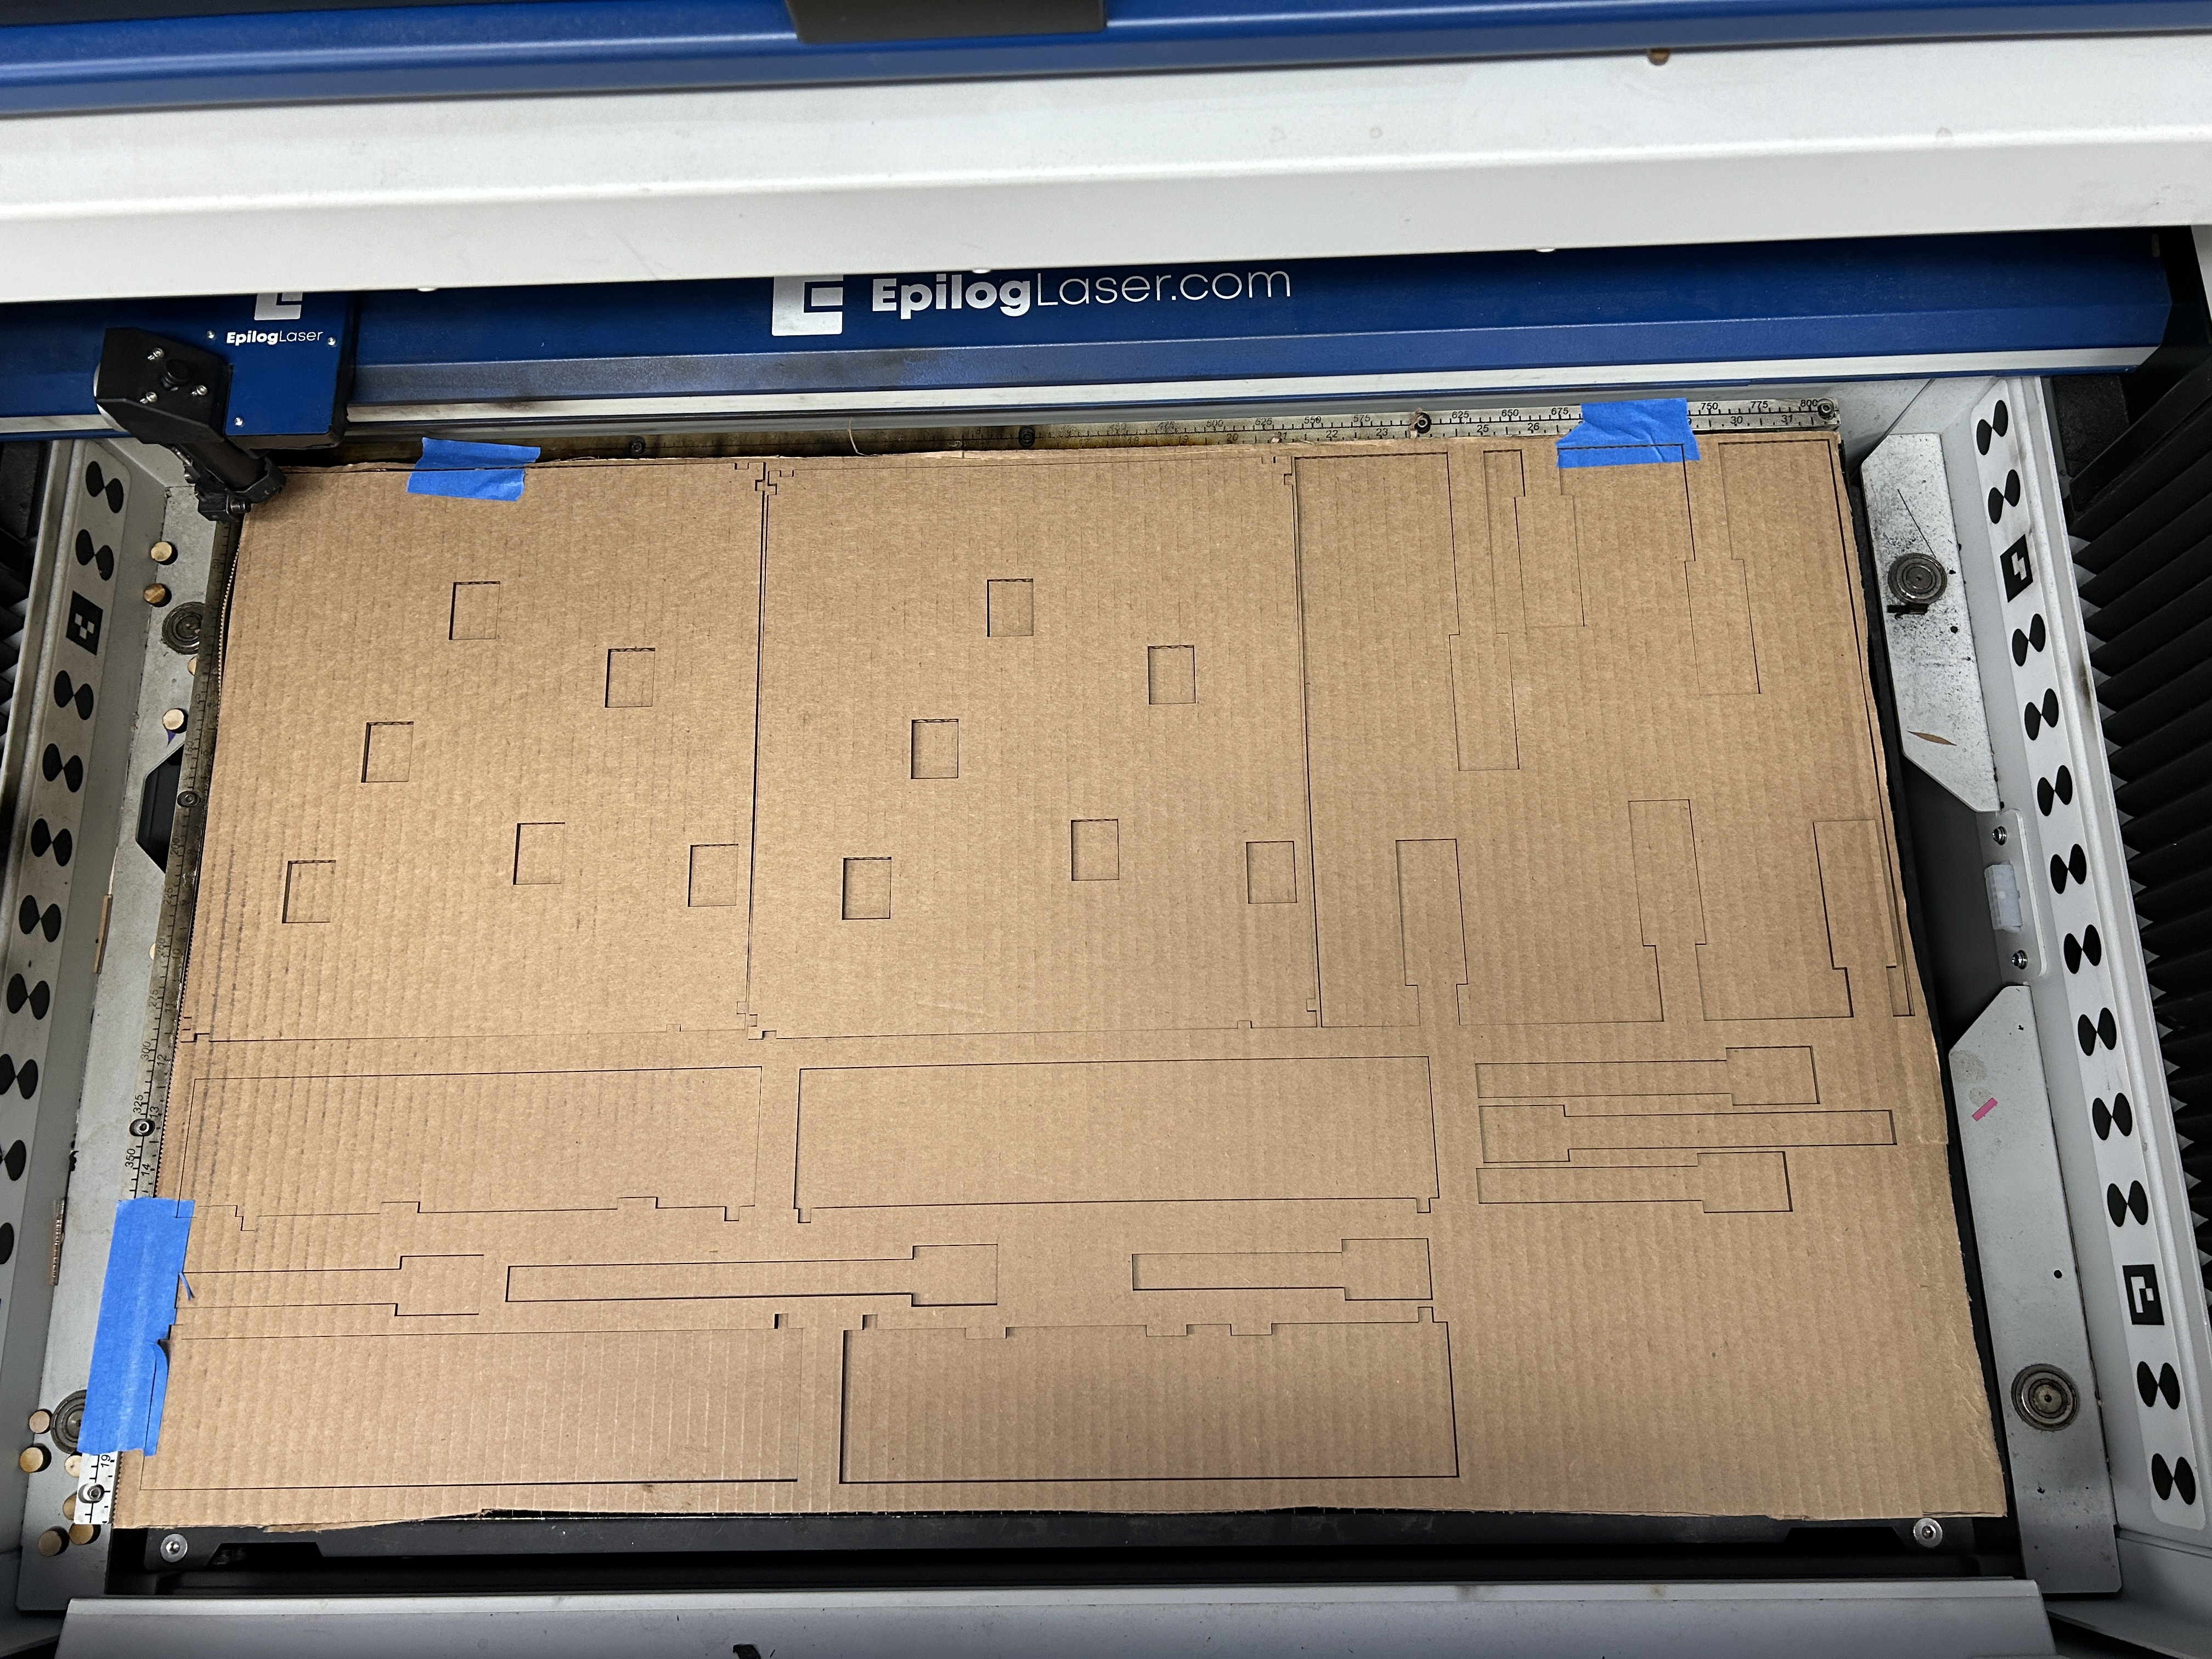
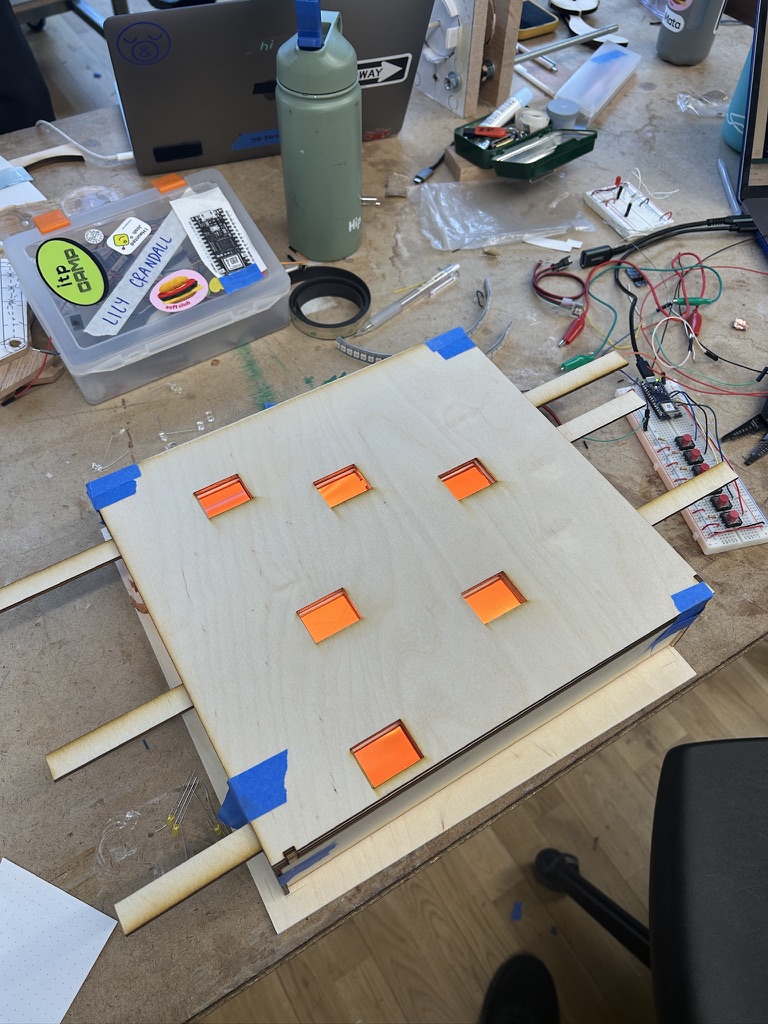
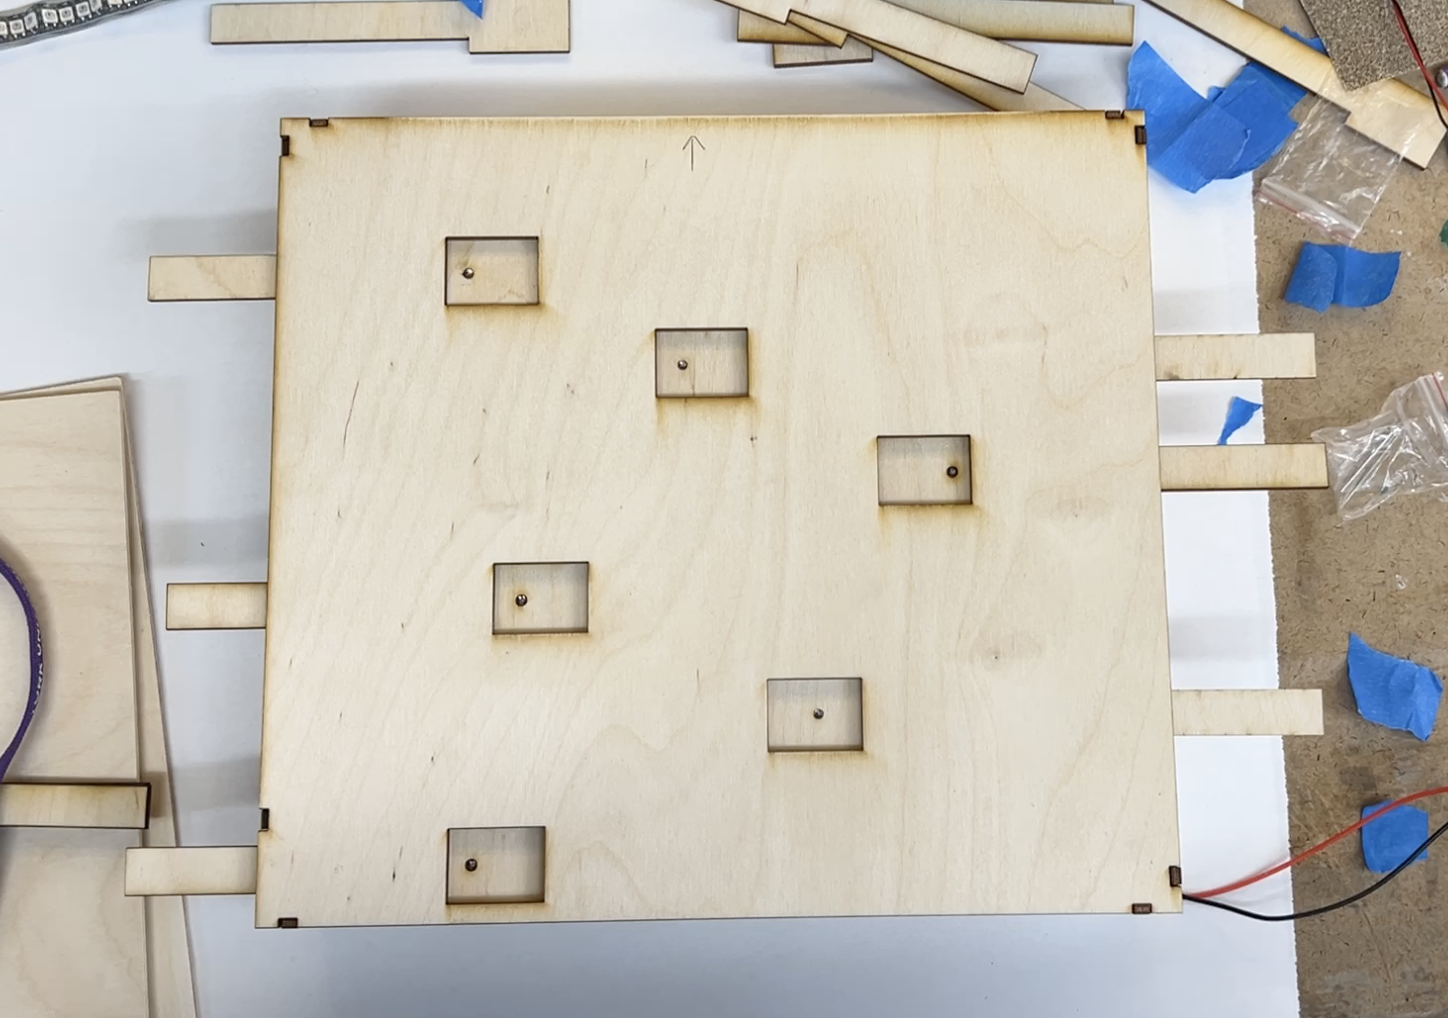
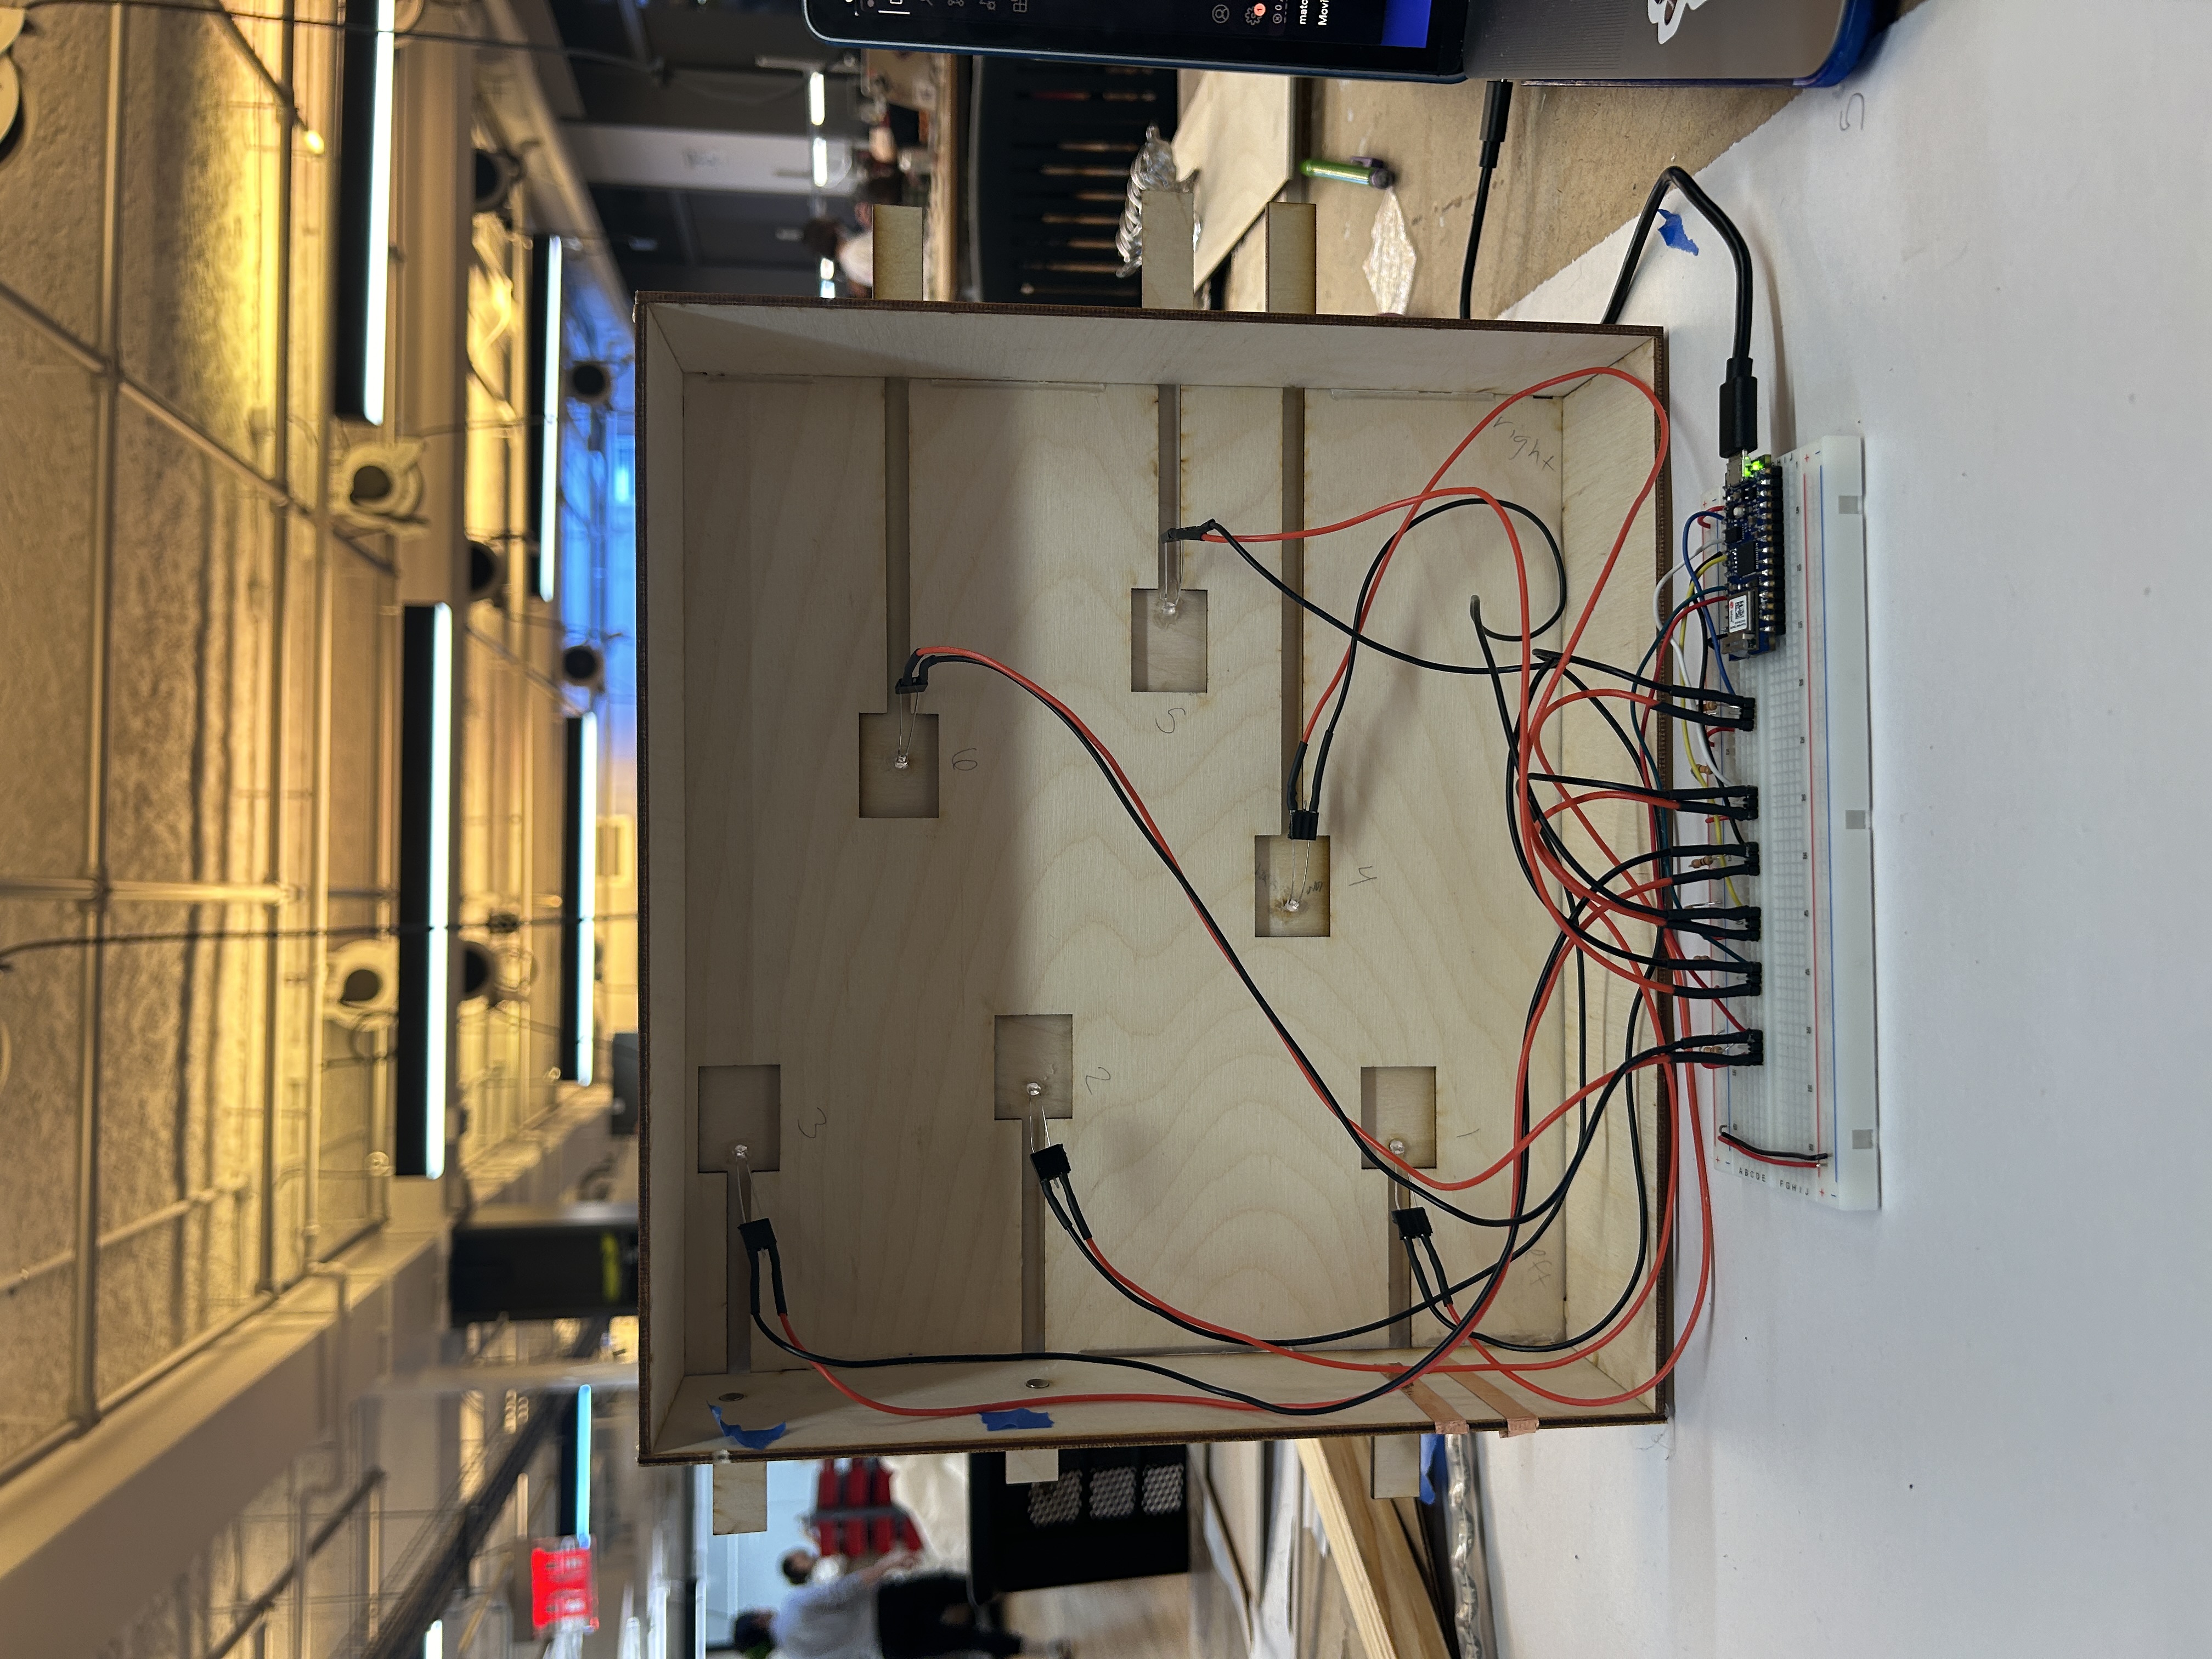
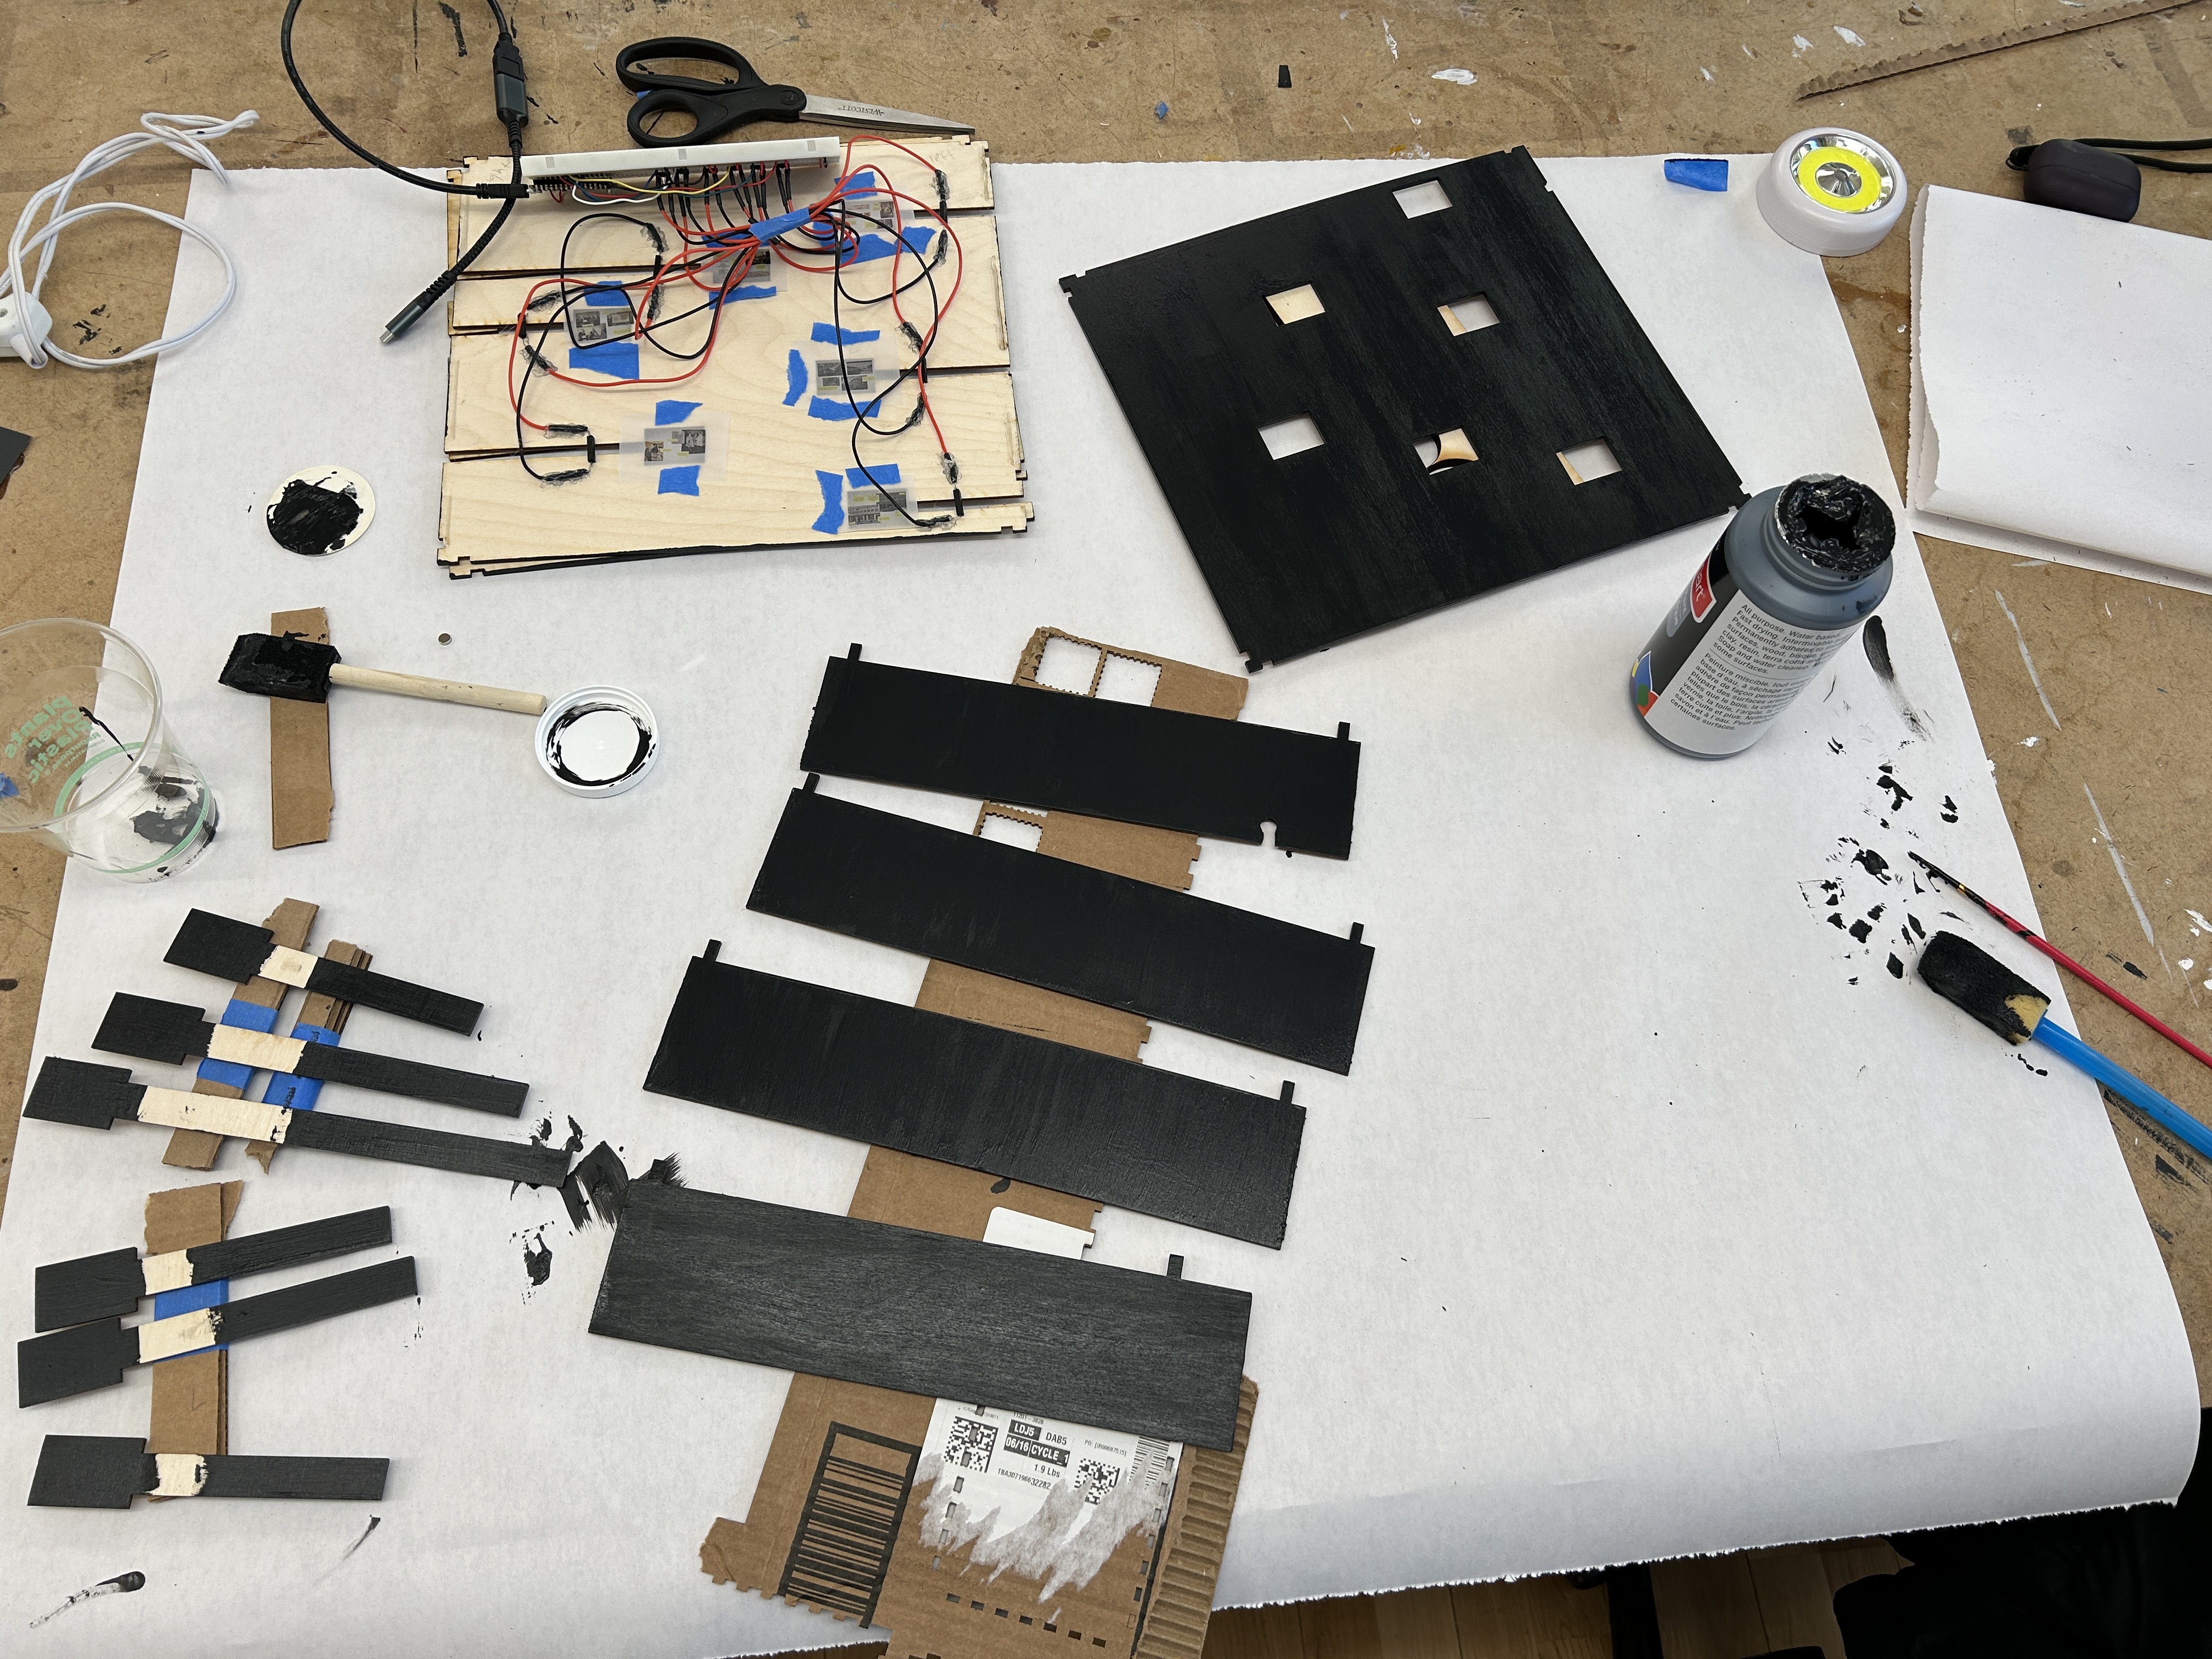
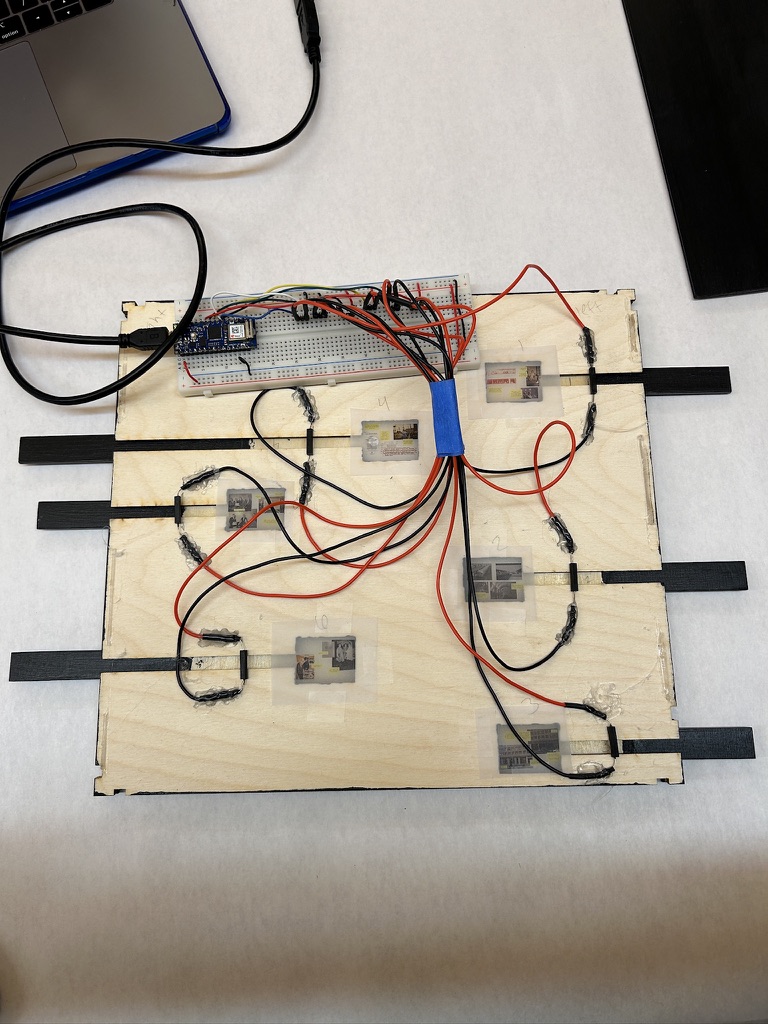
At this point I just had to start building the thing out of wood, and hoped I’d figure out the circuit later. That was risky. Planning out the layers I’d need was a pain, especially when I had to figure out how to make it as small as possible while still being able to fit a breadboard in there. Also, I knew I’d have to make the box modular with notches in the corners so I could test things out.
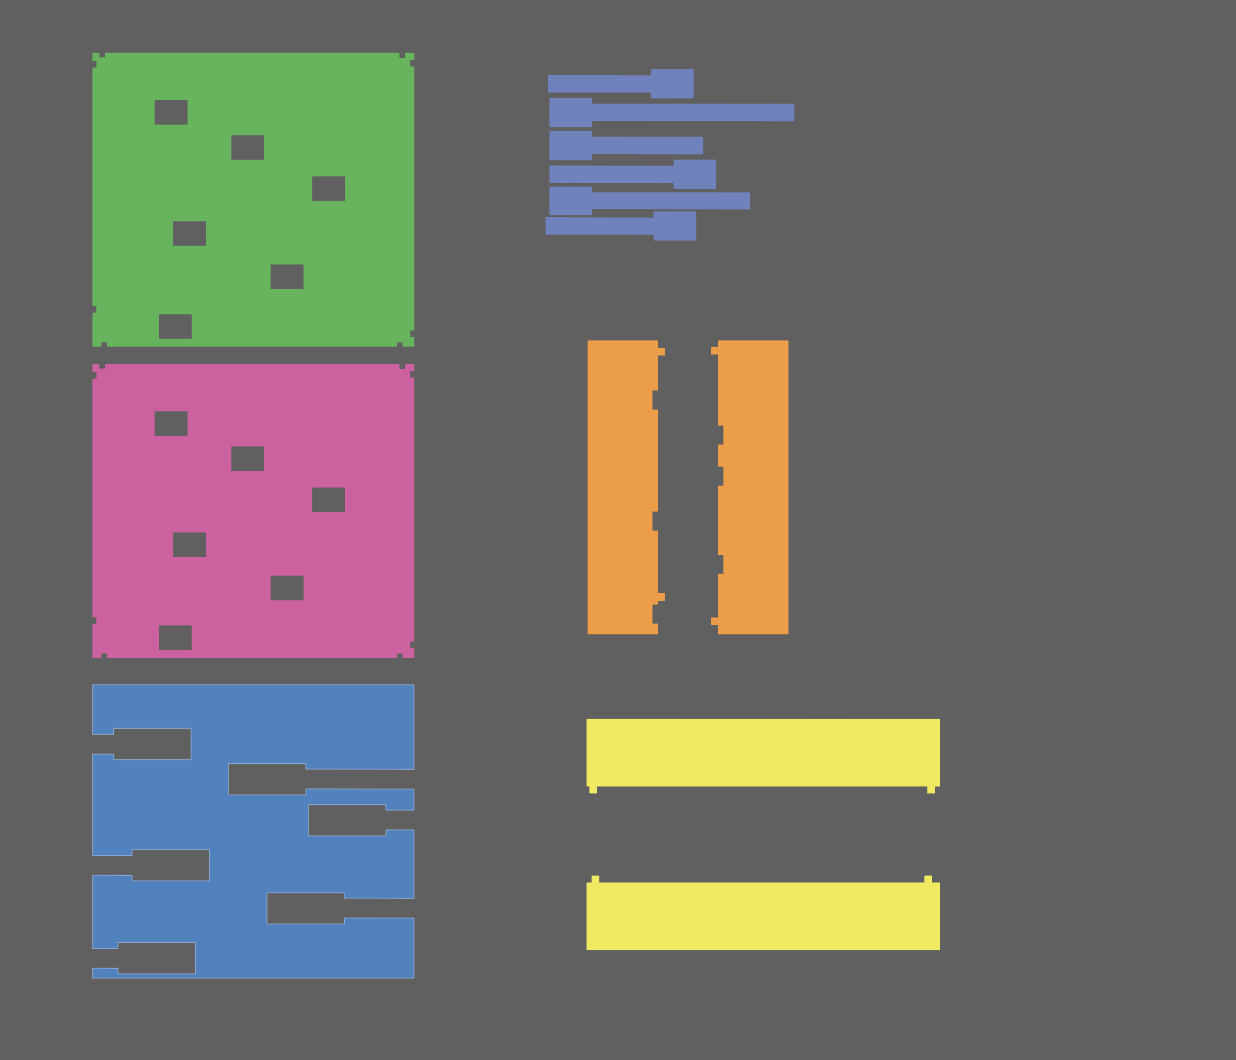
The box consists of a top layer, a layer to hold the tabs, a layer for the tabs to sit on, sides of the box, and the tabs themselves. I modified the files I created for Honey by the Numbers.


Circuit #4: Wood with inlaid magnets

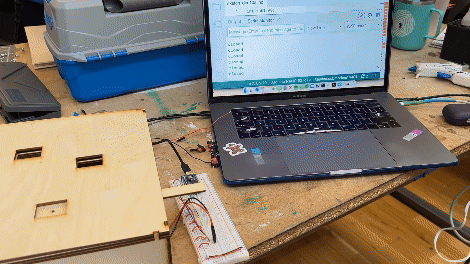
While this worked okay, I had to figure out what to do with the copper tape ends, and how to connect them to a breadboard in a stable way. I decided I had to move on to the other parts of the project (the collages), so I just wired a breadboard with 6 buttons instead of the tabs to use in the meantime. I wasn’t thrilled with this solution. I also lit up an LED strip to put inside the box to backlight the collages.
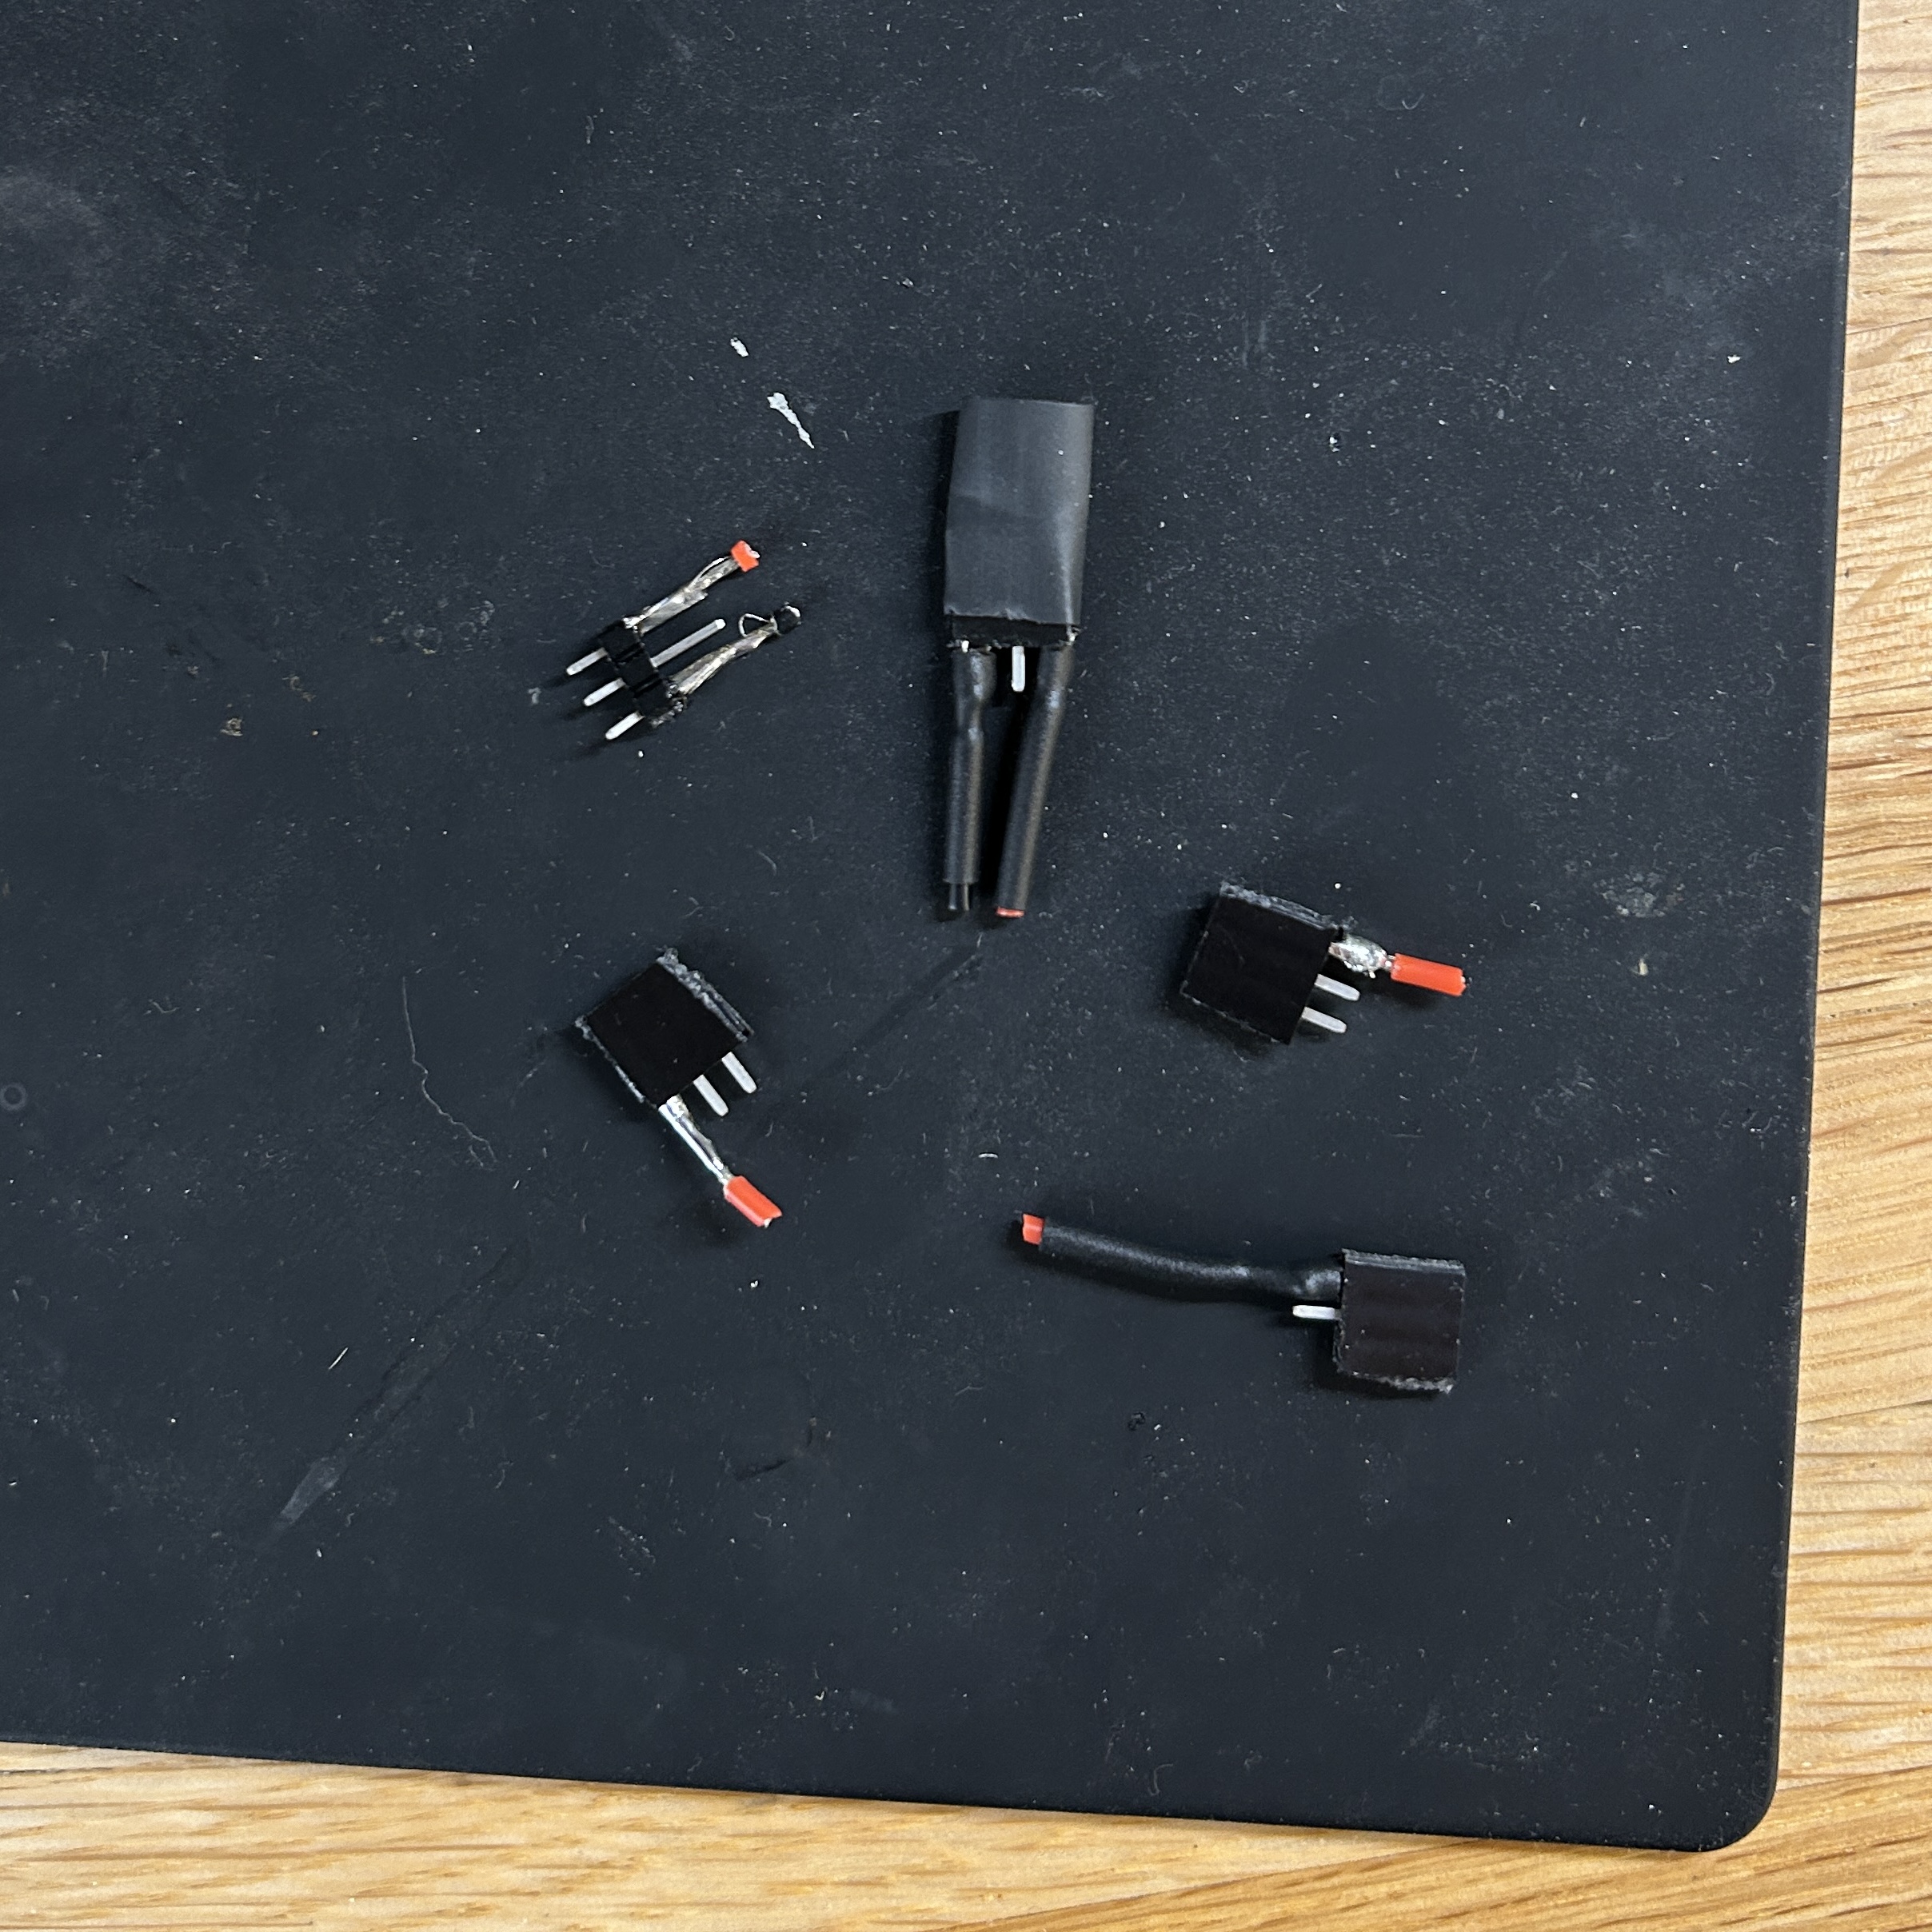
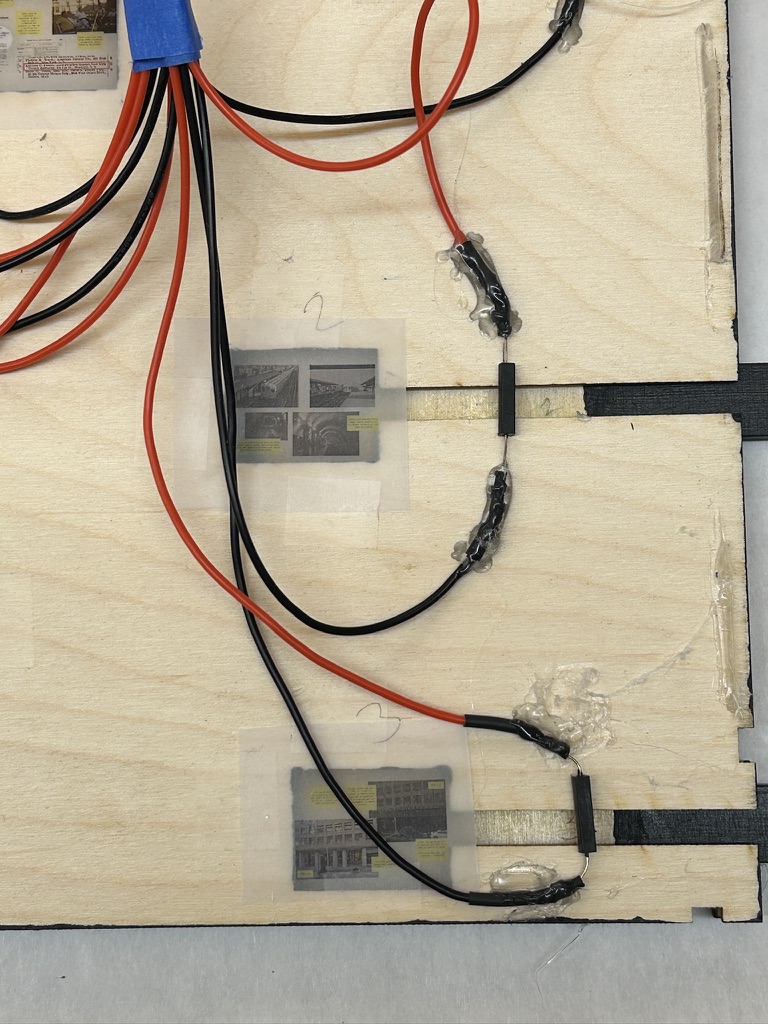
Circuit #5: Phototransistors
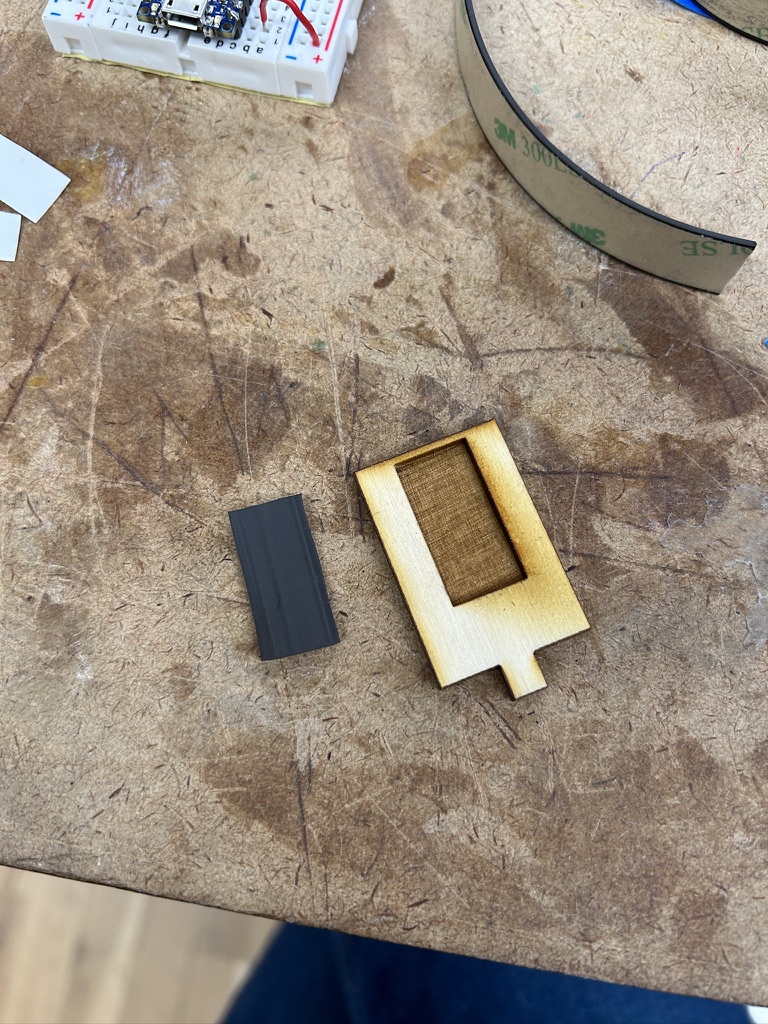
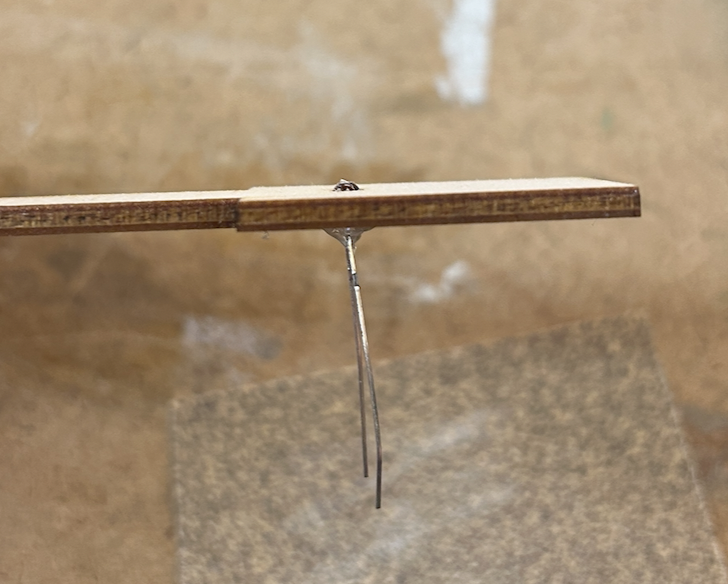
At this point I was running out of time, and really wanted to find a solution for my circuit problem. Jo suggested I try using phototransistors that triggered the switch when the tab was open. I hadn’t thought to use these before because I had thought to use them in the opening (like when the tab opens, they detect light and the collage is shown), but Jo suggested I mount them in the tab themselves, so they are detecting light until the tab is pulled, then the change is registered. This ended up working pretty well!
I sanded down the top of the sensor so it would not hit the top layer of the box, then hotglued it to a hole I cut in the tab.

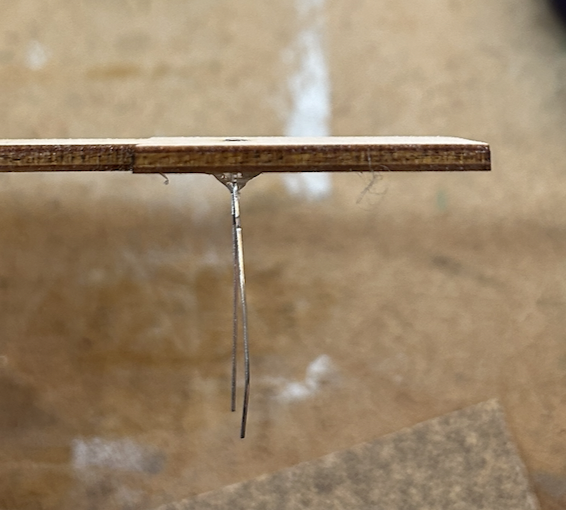
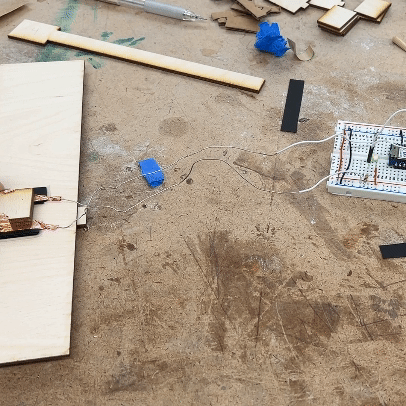
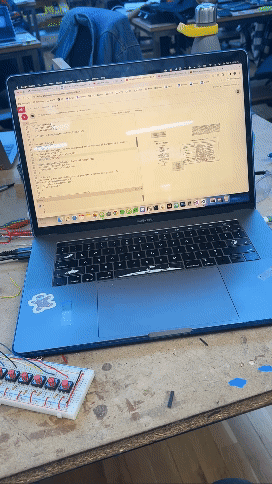
Lots of soldering later... (and failed soldering that I had to redo)...
(also shoutout to Priyanka for the flexible silicone wire!)

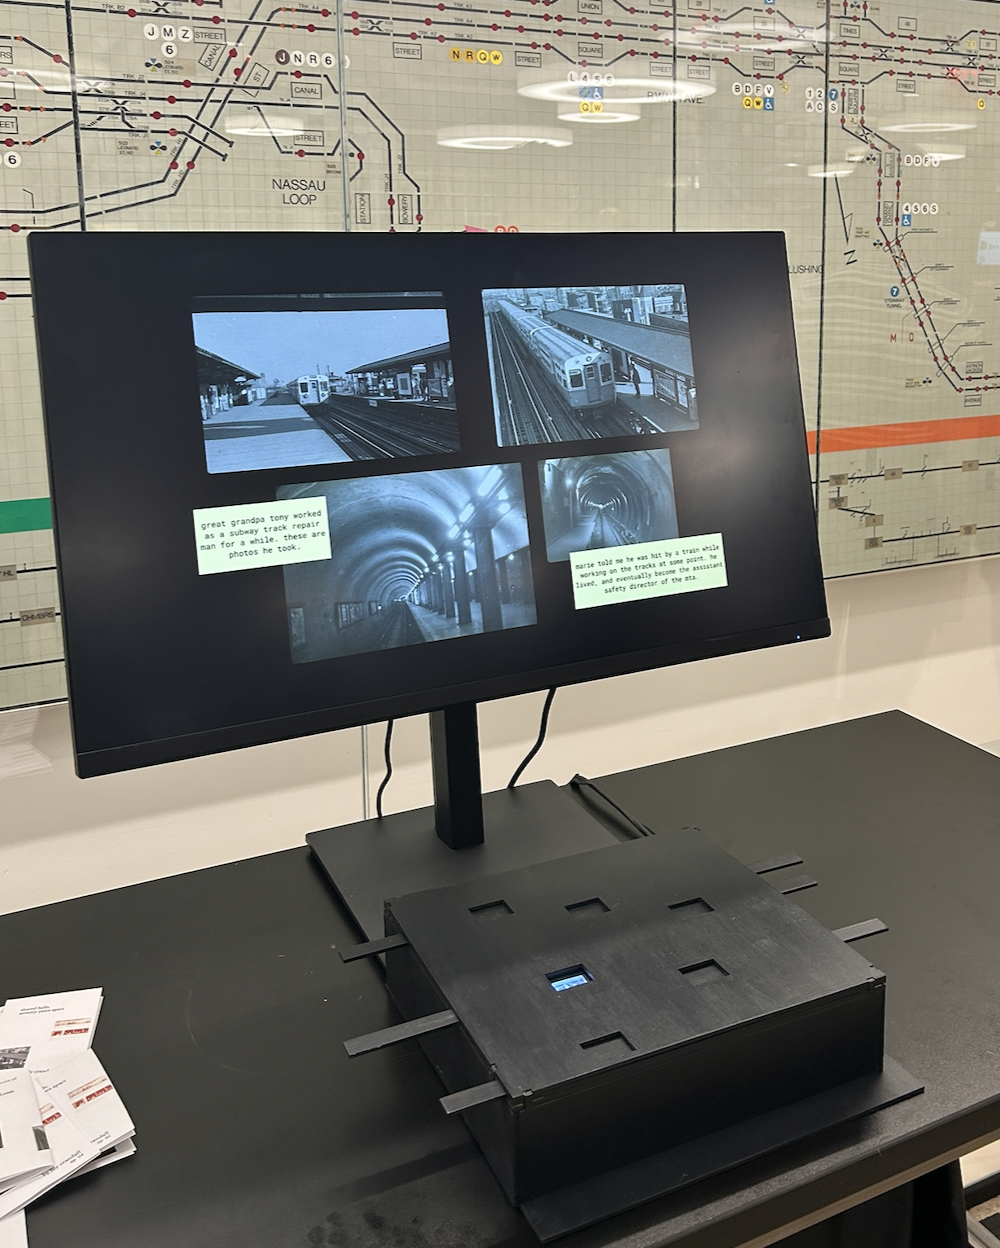
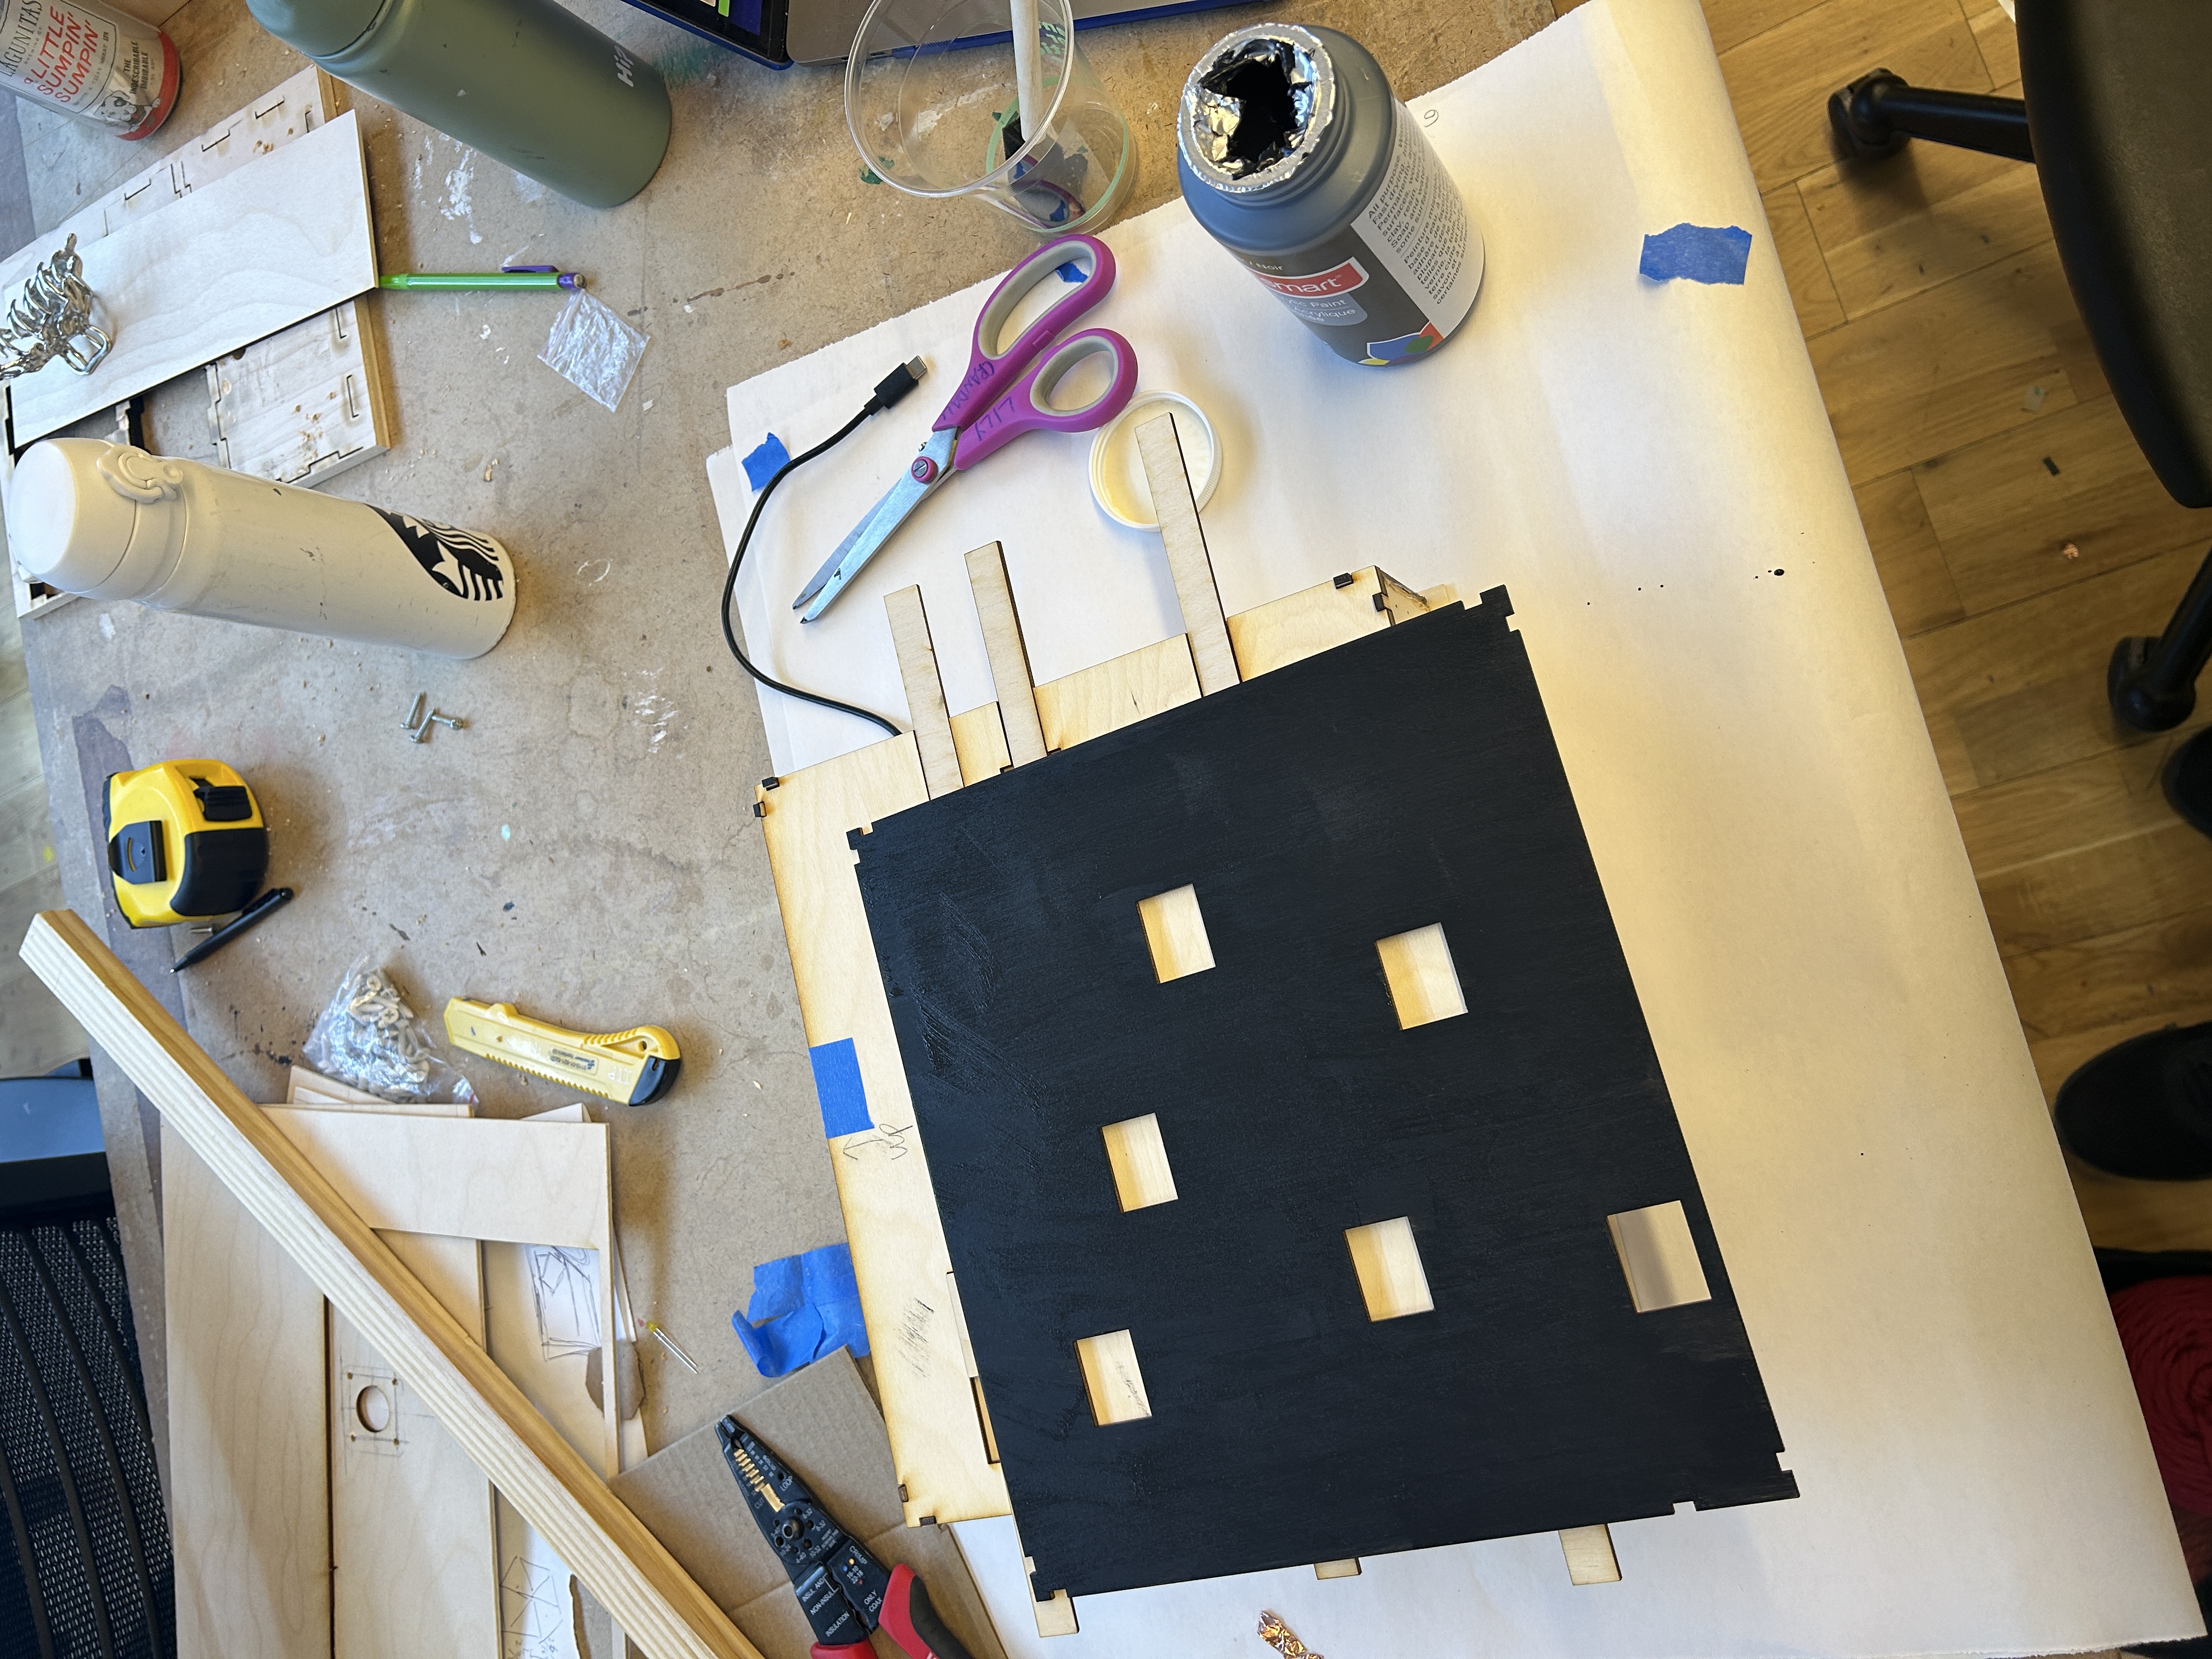
When it was done, I decided to paint it black.
PART 5: Collages
At some point during all of this I made 6 collages. I wish I had more time to spend on these collages themselves, but I ended up liking the kind of research notes/archival look they have. Originally I wanted to make them out of paper and scan them, but I ran out of time. I made them in Miro.


I presented this version as my final project for Time & The Medium of Memory:
PART 6: Actually not done yet
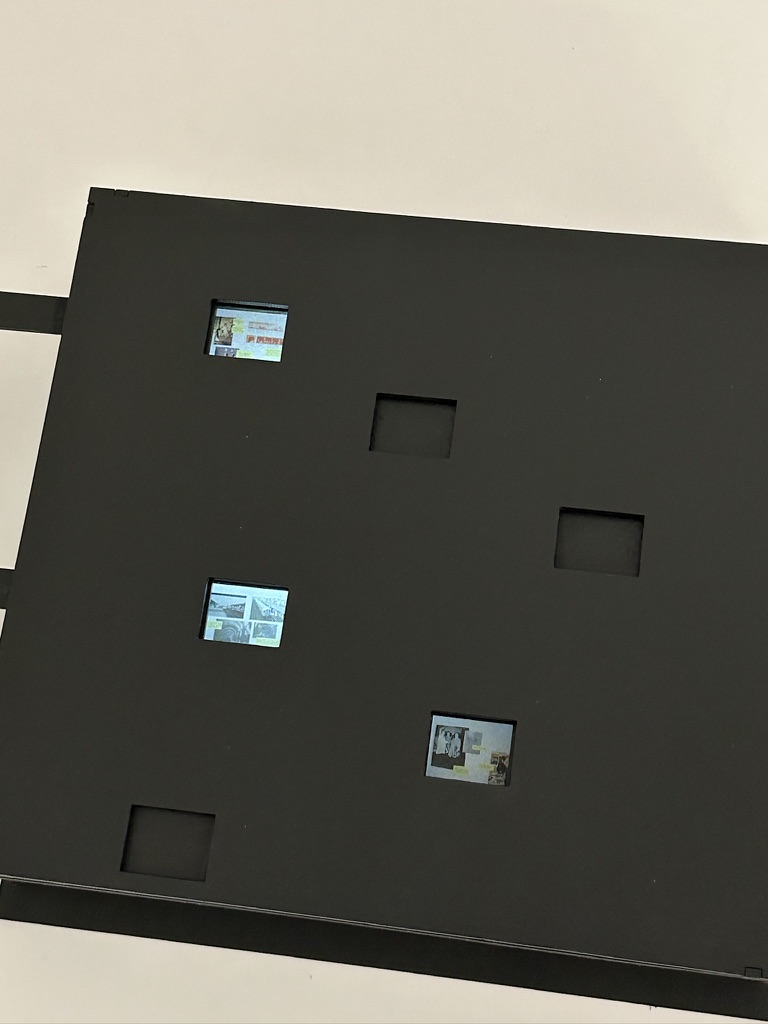
While I was glad that this version worked, I knew I’d have to make some changes for it to be in the winter show. The phototransistors were too sensitive, and could be triggered just by someone leaning over the box and casting a shadow. Also, I really wanted to get the collages in the actual openings with light behind them. Thus, my work was not done.
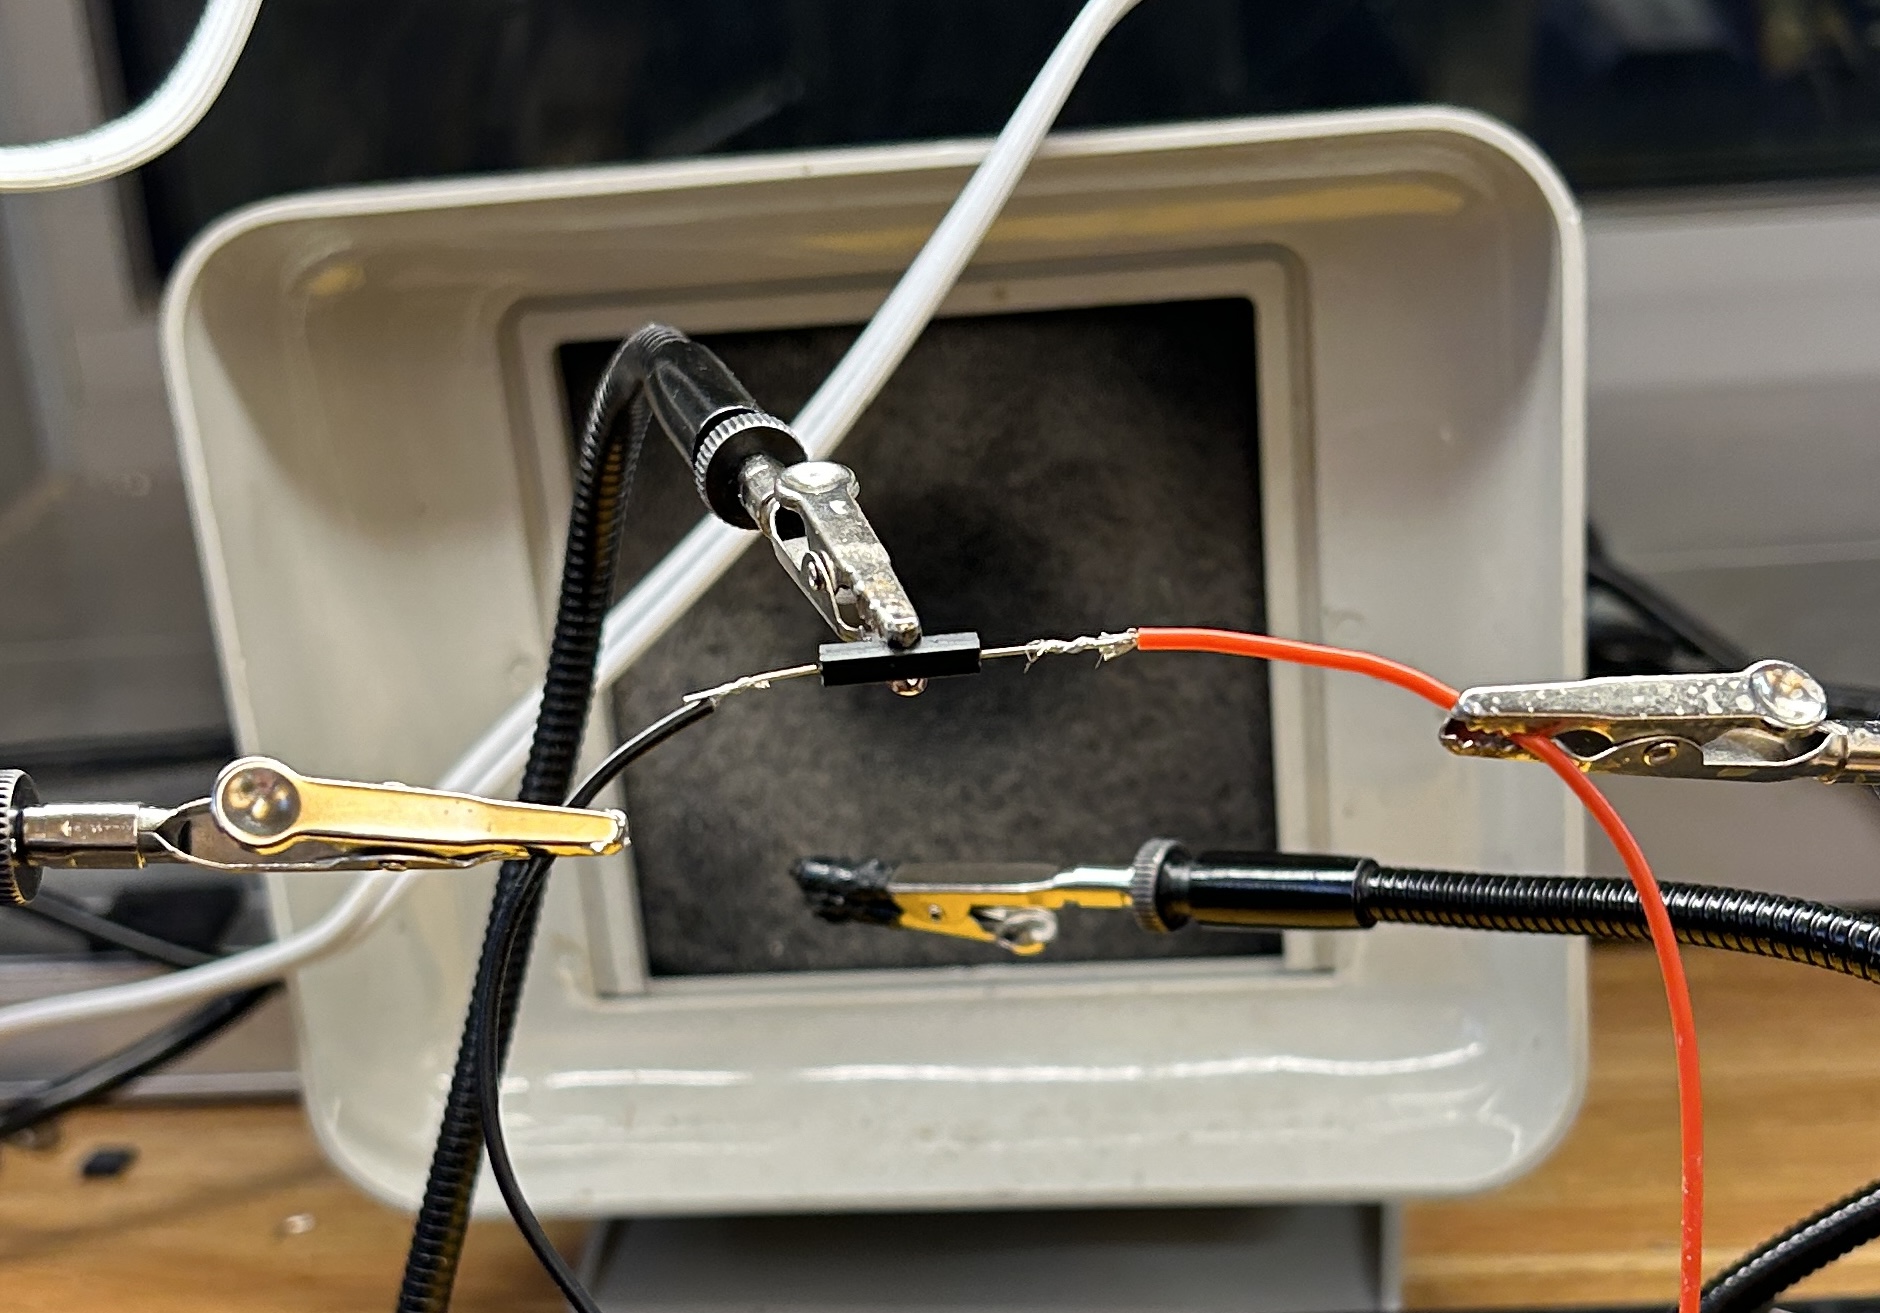
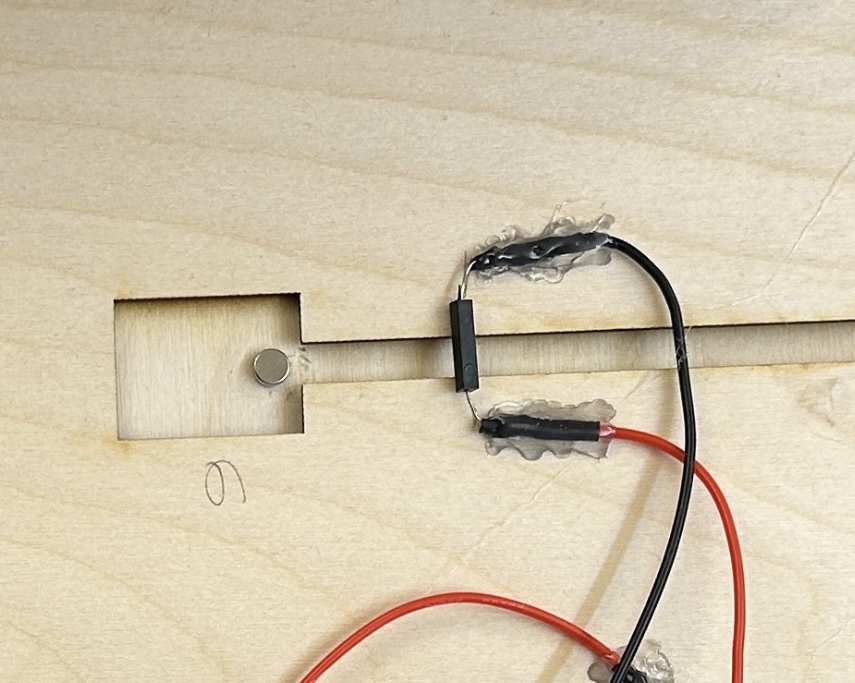
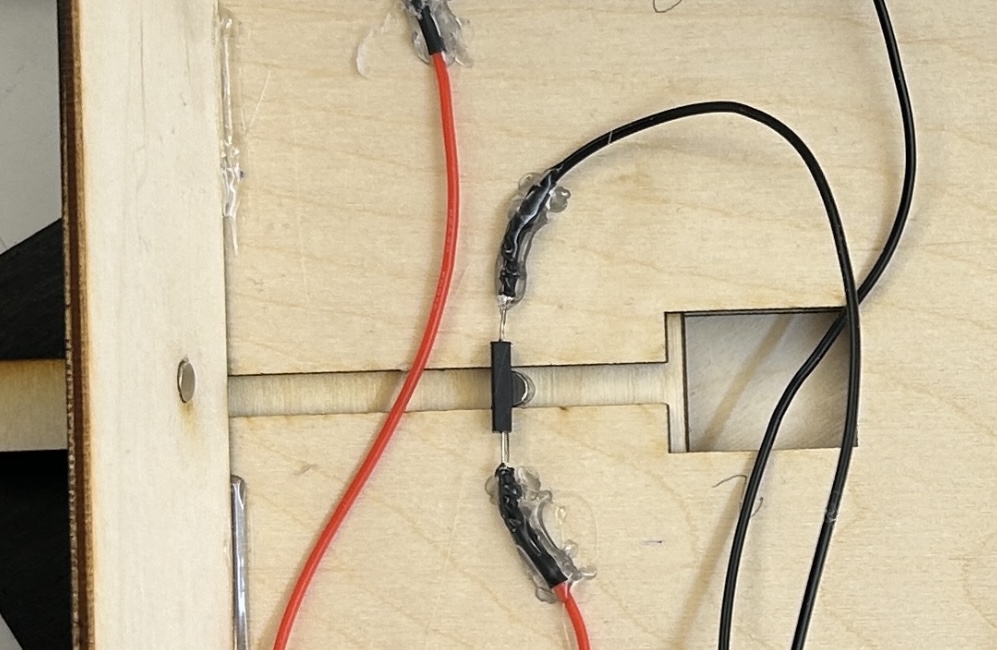
Many people had recommended reed switches to me and I decided to give them a go. They are amazing and I can’t believe I didn’t try to use them earlier.
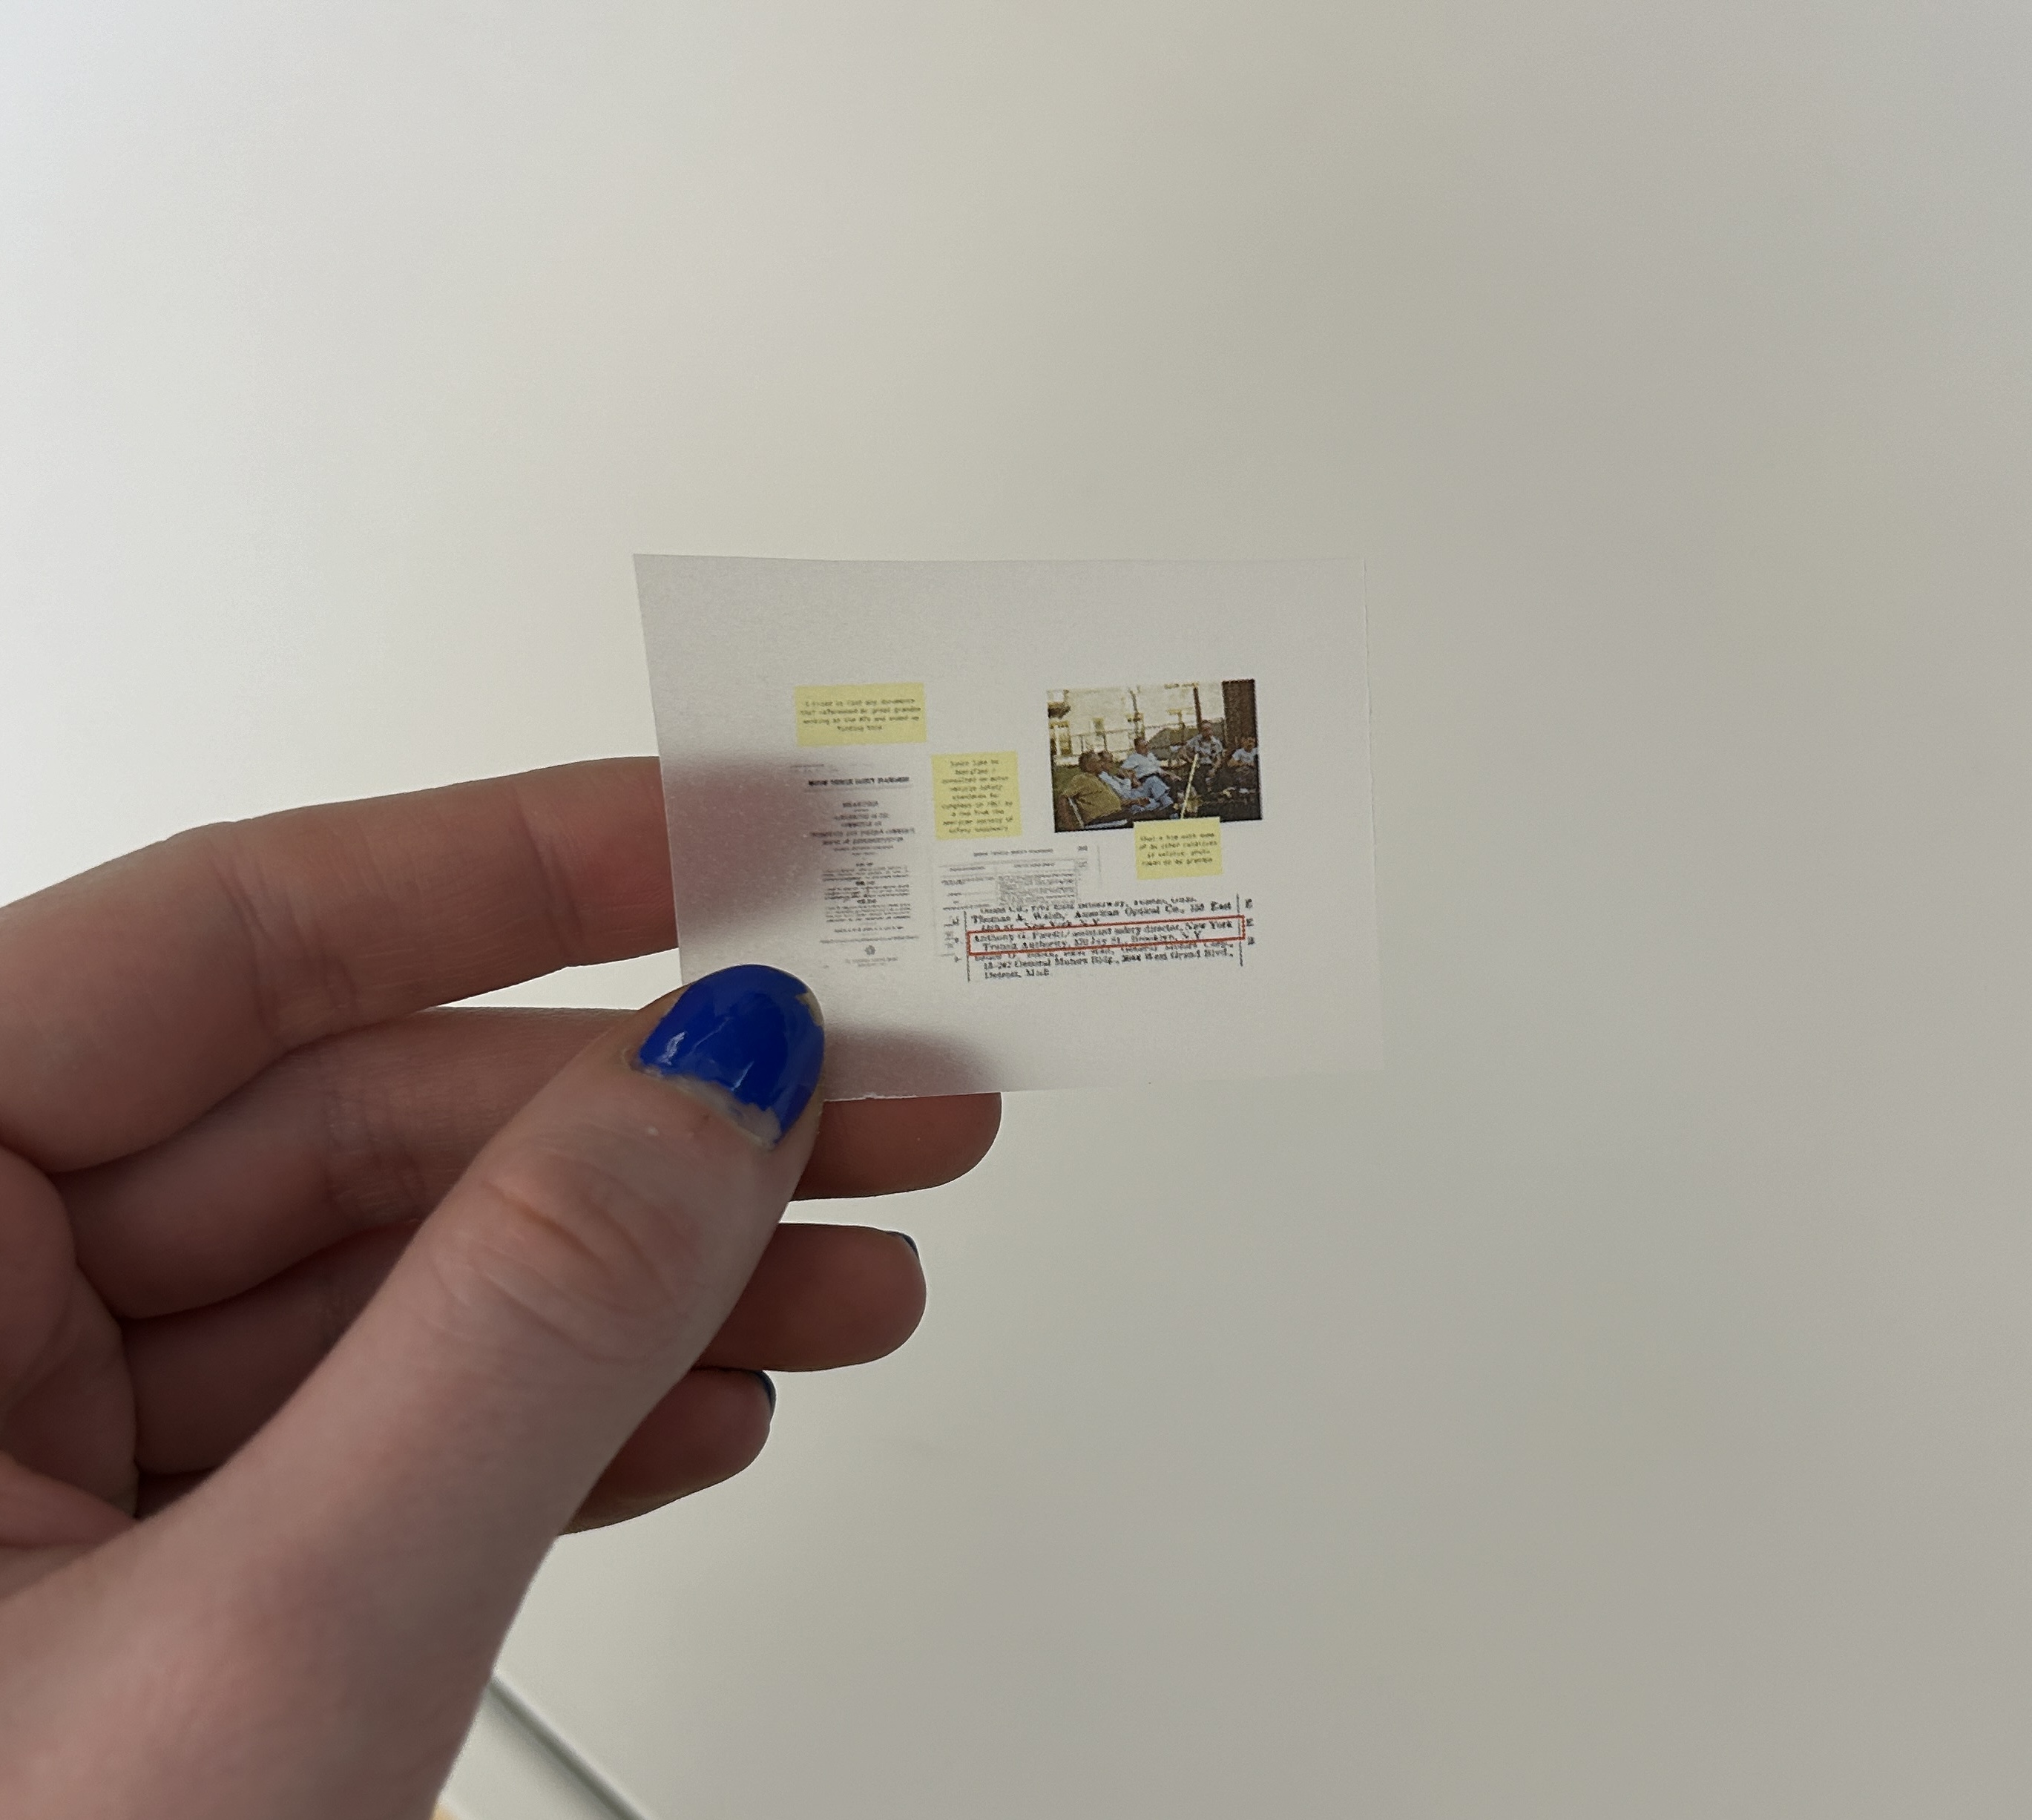
Thank you to Elif for letting me use a sheet of her transparent paper to print tiny versions of the collages on - they turned out exactly how I wanted them to!


PART 7: Actually done now
Messes I made over the course of making this: